|
Mercedes Injector Nozzle Replacement |
| Home |
| Bio diesel and WVO page |
All parts used in these pictorials are available at the diesel parts for sale page
See the video of the Bosio Nozzles that I installed on the car, with the car running at the end of this page.
Safety and security tips:
Please remember to recycle all your used fluids at an appropriate recycling center. Be mindful to not spill or splash fluids on yourself, others or the ground. Also as a safety tip please remember anytime you are working on, around or under your car, to wear safety glasses and secure the car with wheel stops and approved jack stands!
Mercedes Injector Nozzle Replacement
This is a pictorial that I have been waiting to do for quite some time. With all the information flying around about the quality of replacement nozzles for the Mercedes diesel, I was especially pleased to run across the Italian made Bosio nozzles. I have resisted for some time, the urge to buy replacement Bosch nozzles, knowing that it is a roll of the dice, whether they will spray properly. My friend with a Mercedes shop had a 240d engine on the stand and showed me the result of the reman Bosch fuel injectors. After about 1200 miles 2 of the injectors started spraying a stream of fuel, not a mist. Well it melted 2 of the pistons, and is currently getting a rebuild.
I have been turning wrenches on cars for over 24 years, and immediatley noticed the super high quality and precesion of the Bosio nozzles, when I opened the package. These little gems are a very important part of the fuel injector and responsible for proper attomization of the fuel.
So I decided to install the nozzles on a car I could do a long term test and the winner was a 1984 300 d with 217k on the clock. As best I can tell, the car has the original injectors and nozzles installed. The car ran pretty well, but was a little smokey at start up and I new that it needed some fresh nozzles.
So follow along as I show you how to properly install the Bosio nozzles.
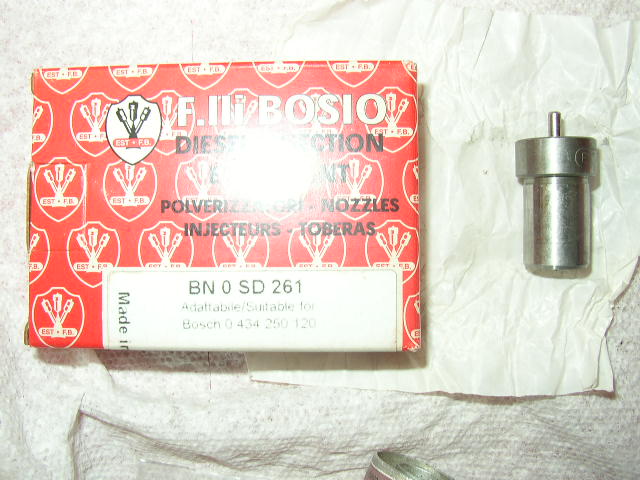
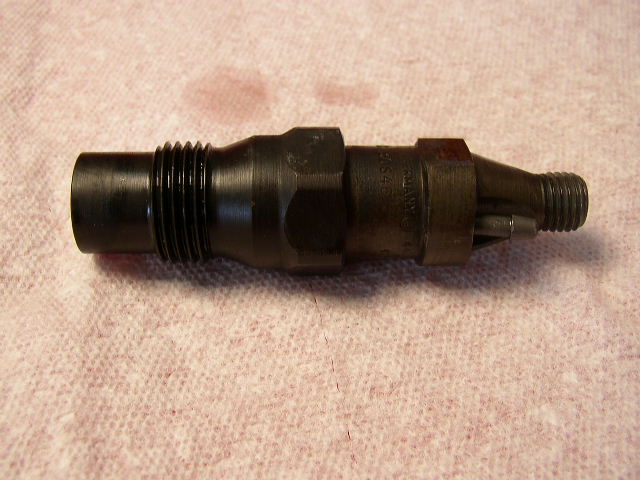
This is a pic of one of the nozzles. A super high quality piece that you can tell was really machined well.
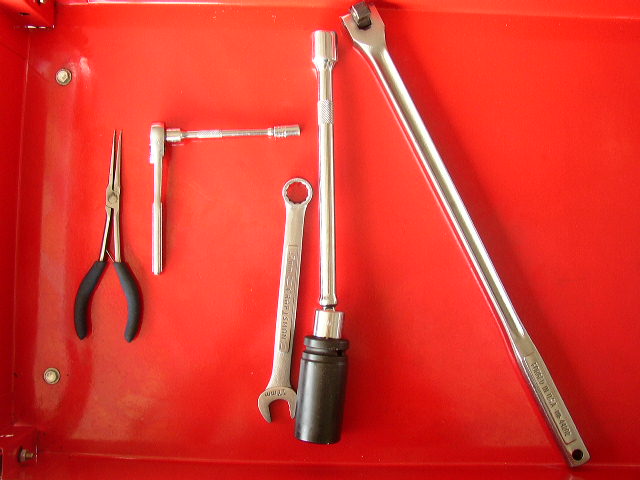
Tools needed for the job are: needle nose pliers, 8mm 1/4 drive socket, 17mm combo wrench, 1 1/16 socket and breaker bar. Not shown is the 5 heat shields that go between the injector and the head and a 22mm combo wrench. The heat shields must be changed when the injector are removed.
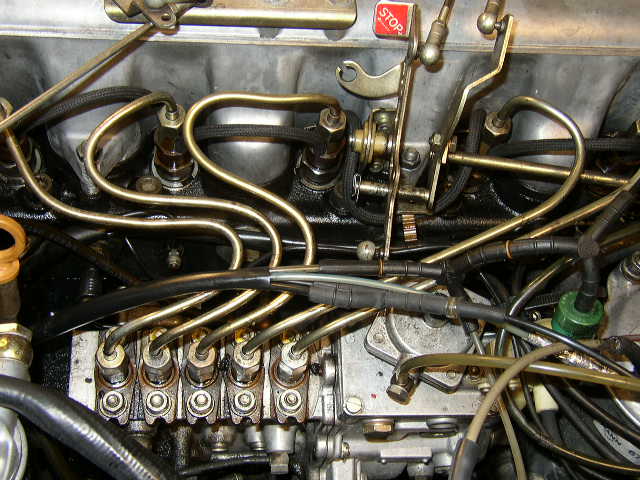
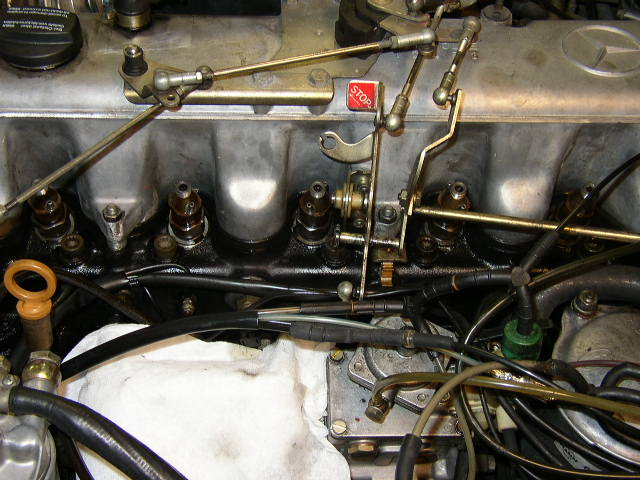
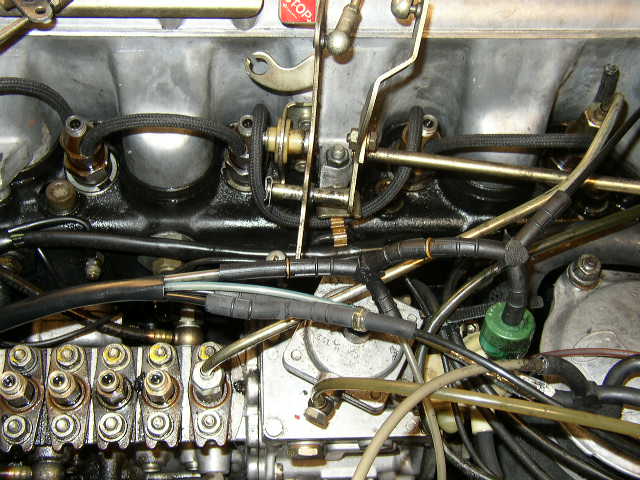
First we are going to be removing the injector lines. I recommend that you do this on a cold engine and clean it at the car wash before you do this job. Pay particular attention to cleaning around the injectors, so that no debris will enter the engine after the injector is removed.
Injector lines have been removed. The nuts on the lines are 17mm. Be careful, go slow and make a diagram or label each line. Each line is unique to each injector and its real easy to get them mixed up and you will spend a long time trying to figure which line goes where.
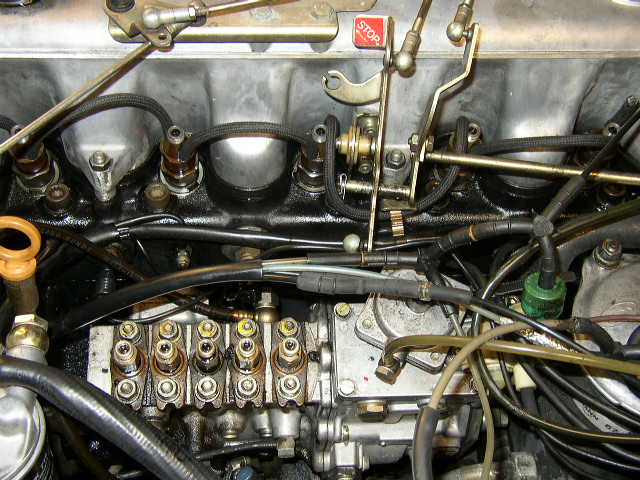
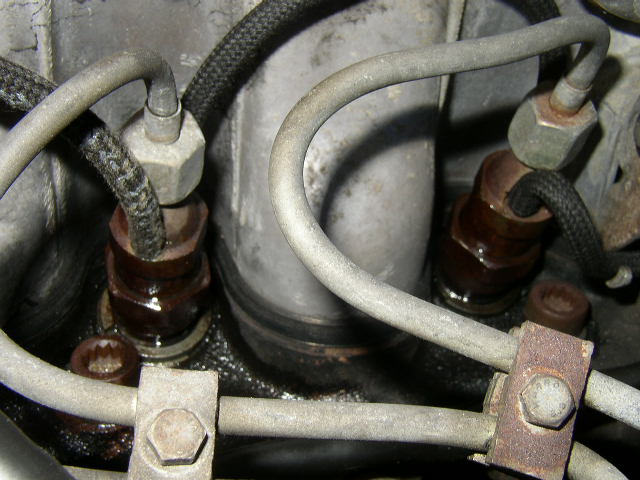
The return lines have also been removed. The return lines on this car "looked" fine, but they were leaking through the pores of the rubber and were hard as plastic. I installed a new set of injector return lines when I put everything back together.
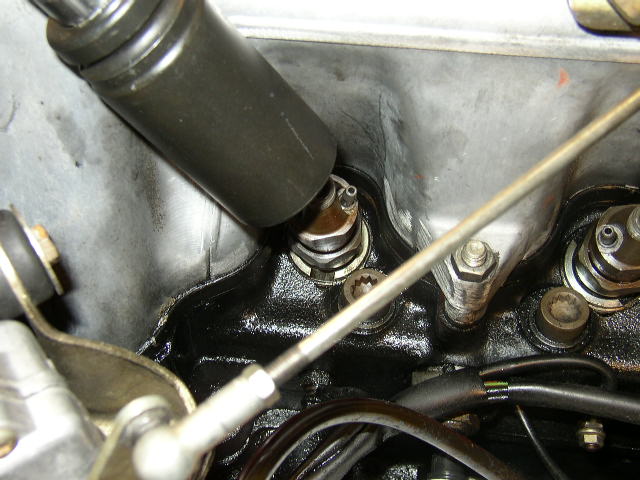
Remove the injector with your socket. Only work on one cylinder at a time.
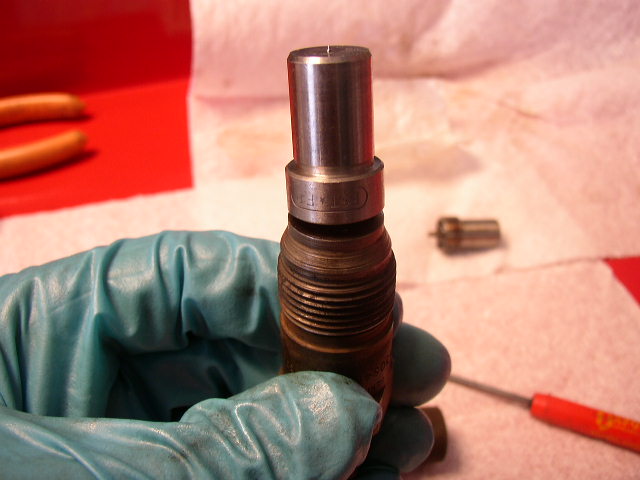
Injector removed and ready to be disasimbled.
To seperate the lower half of the injector from the upper half, I recommend that you clamp the lower half in a vise. Make sure to clamp only on the hex portion, not the smooth part. I used paper towels to catch any diesel fuel that may drip out.
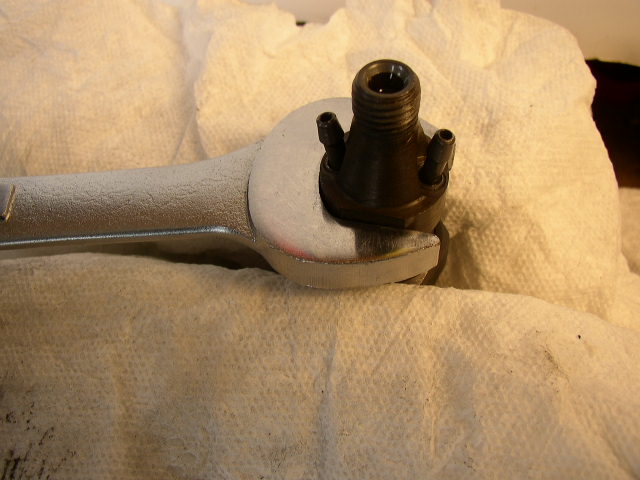
Use a 22mm wrench and loosen the top portion of the injector. Only loosen it at this stage, but do not remove. You may have to tap the wrench with a rubber mallet, it will be really tight if its the original.
When the top is loose, turn the injector upside down and over a clean paper towel. There are some small pieces that you MUST not lose. I do this in my tool cart so nothing drops on the floor and bounces or rolls away.
As you unscrew the injector do it very slowly and remove the lower body portion very carefully. If you remove the body too fast the nozzle will probably fall out.
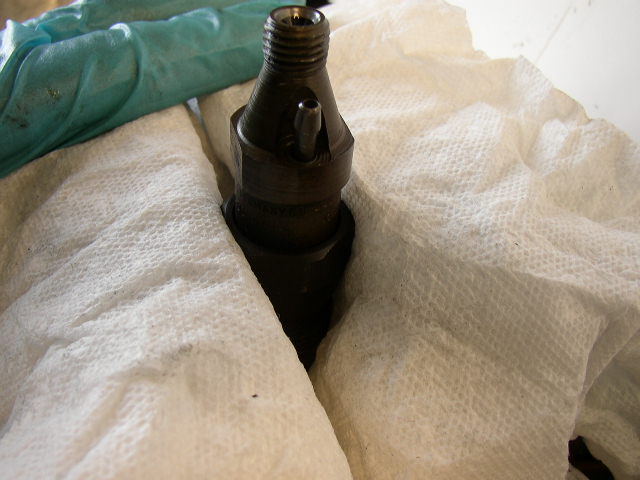
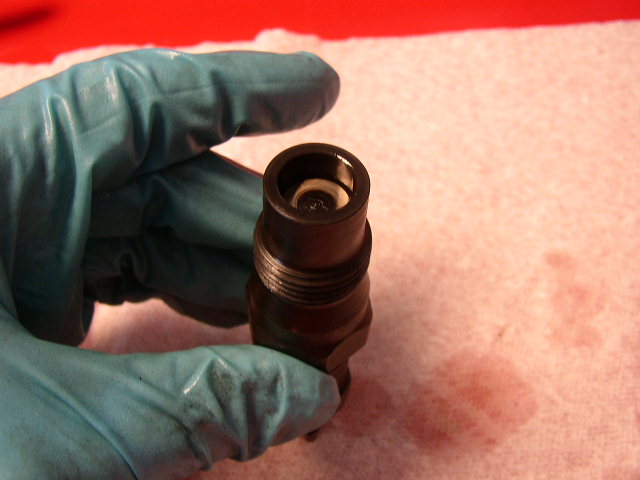
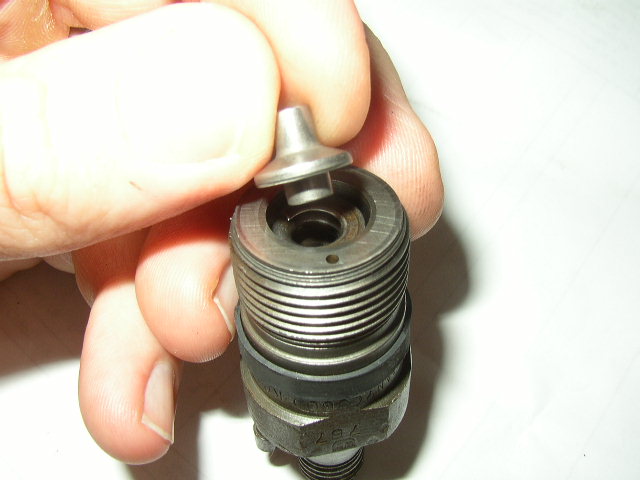
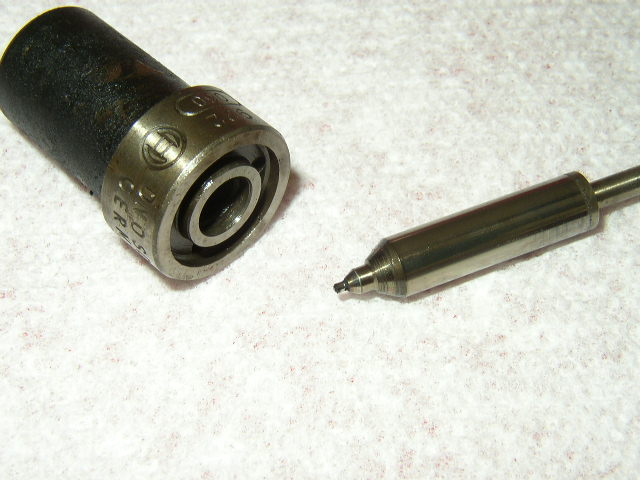
When removed upside down, you keep the nozzle from falling out of the injector. Notice that when the pressure of the lower body has been removed from the internal spring, the nozzle assembly does not sit flat. It will when the lower body is reattached.
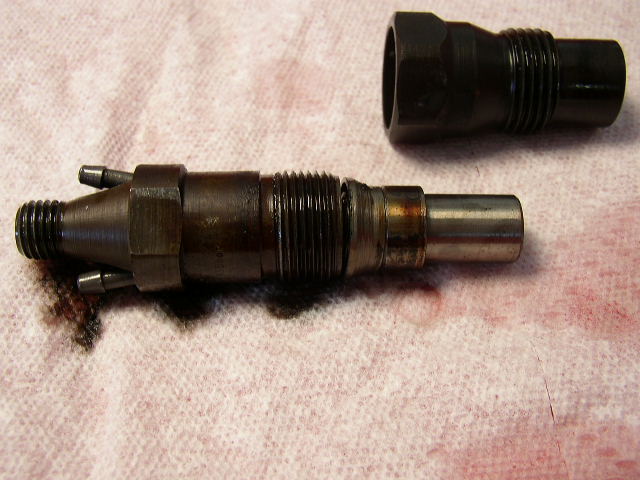
This is the injector with the body removed. You can see the nozzle on the end.
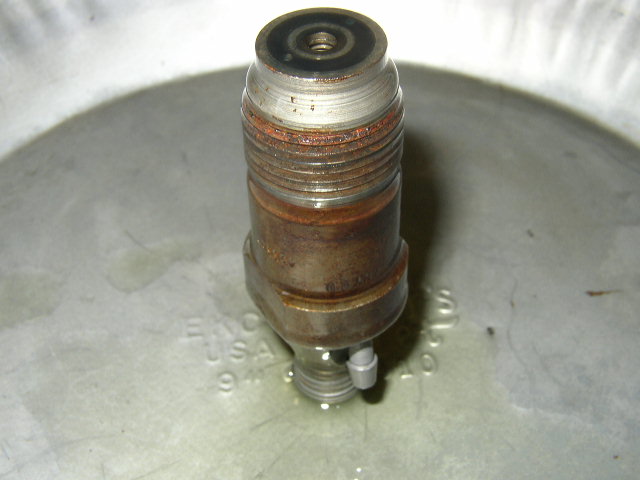
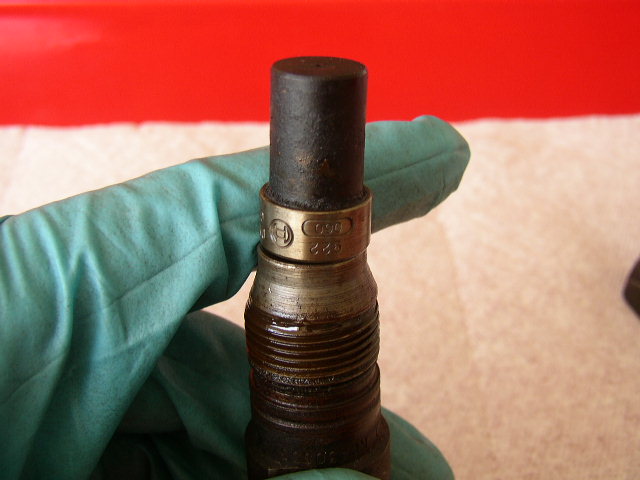
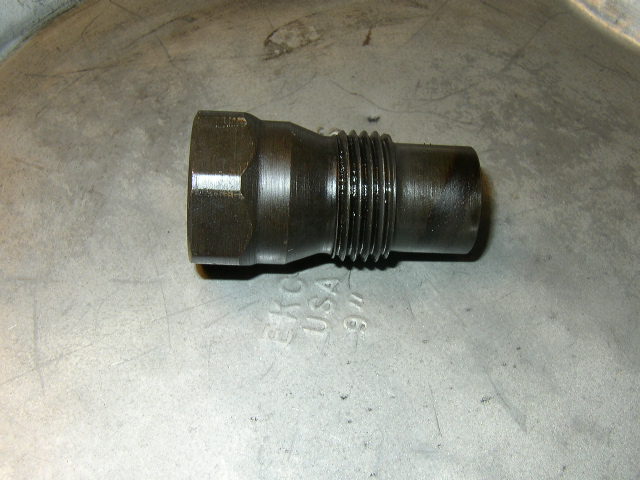
Nozzle holder insert and body need a good cleaning.
The nozzle holder insert only fits in the injector one way.
Nozzle holder insert removed for cleaning.
This is the underside of the nozzle holder insert.
Underneath the nozzle holder insert is the thrust pin, and it sits inside the compression spring.

This is the compression spring that is inside the upper portion of the injector. I like to turn the injector upside down flat on a clean paper towel and then lift the injector up. You can see the spring and shim on the top. Sometimes the shim will stick in the injector. Just tap it with your hand and it will come out. There are many different thickness of shims, so that is why I tell you to do one injector at a time. Don't mix and match parts!
Cleaned lower portion of the injector. I cleaned all the parts with brake cleaner to ensure that no foreign material was in the injector.
I just cleaned the inside with spray brake cleaner. It really did not need it in my case, but I figured I would do it since it was apart.
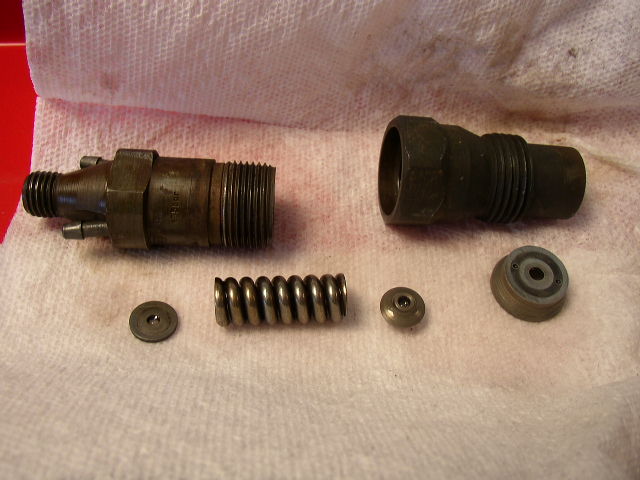
These are the parts inside the injector in the order they fit. If you get any of these parts back in the wrong order or upside down, then it WILL NOT WORK properly. The only piece that you do not see here is the nozzle.
Just so you could see what the old nozzle looks like with the needle valve out. DO NOT take your new nozzles apart!!!! Just leave them alone and install then right out of the box. If you want to mess around with your old ones after you get the car running, be my guest. But leave the new ones be. You have been warned.
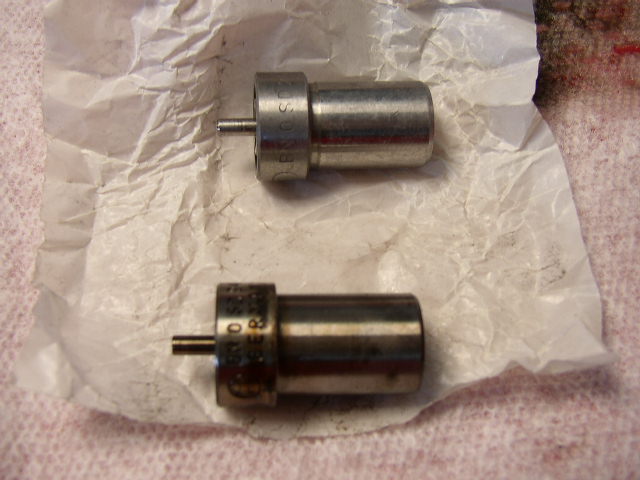
Old nozzle and new Bosio nozzle.
After cleaning all the parts and letting them air dry, I installed them back in the exact order I found them in. I then took some clean diesel fuel and lubricated the inside of the injector. Don't put them back together dry, they are lubricated in a diesel fuel environment, so that is what I used. Then I set the new nozzle on top of the nozzle holder insert. Note that is does not sit flush, it will when you reassemble the injector. Remember the compression spring is not yet under compression, so the nozzle sits high at this point.

I lubricated the inside of the lower body before I install it to the upper body. Then just screw the injector down and you should see just what this pic shows. Now take the injector back to the vise and tighten it down to between 70-80 Newton Meters.
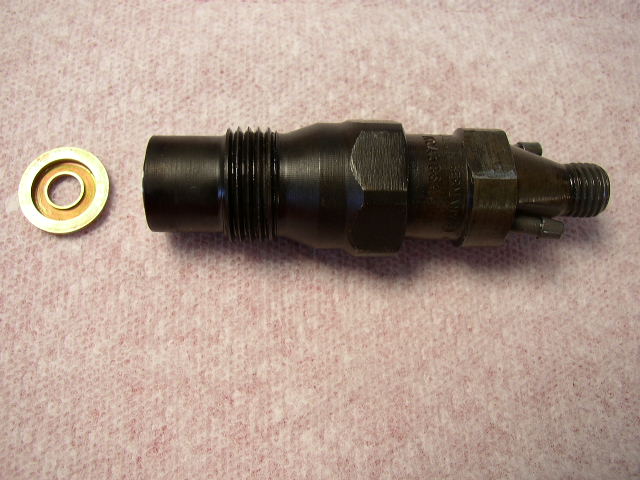
Injector ready to be installed with a new heat shield. Do not reuse the old heat shield.
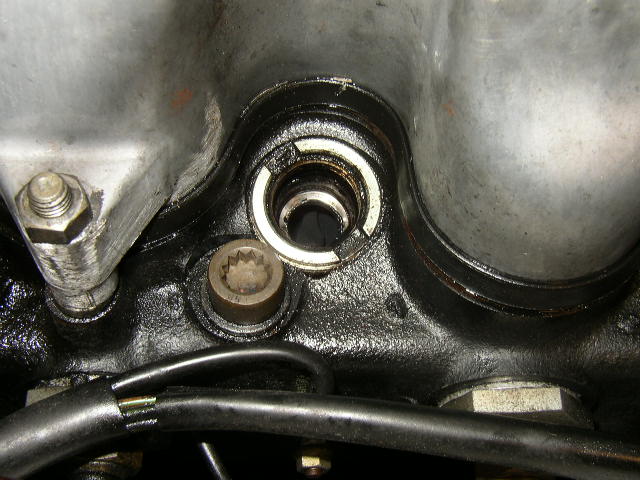
Clean the injector hole with a paper towel and long screwdriver. Just be very careful and be gentile. You are just trying to clean any oil or debris that is on the surface where the heat shield will sit.
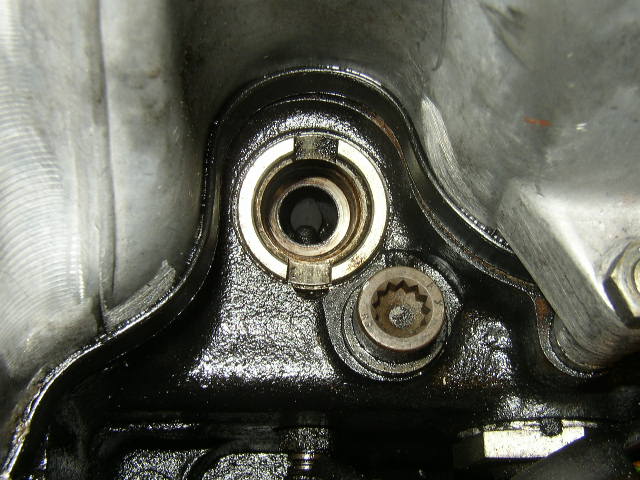
Cleaned seat area. The heat shield goes into the hole with the concave side facing up. Just like in the previous pic. Do not install it upside down, it won't seal properly.
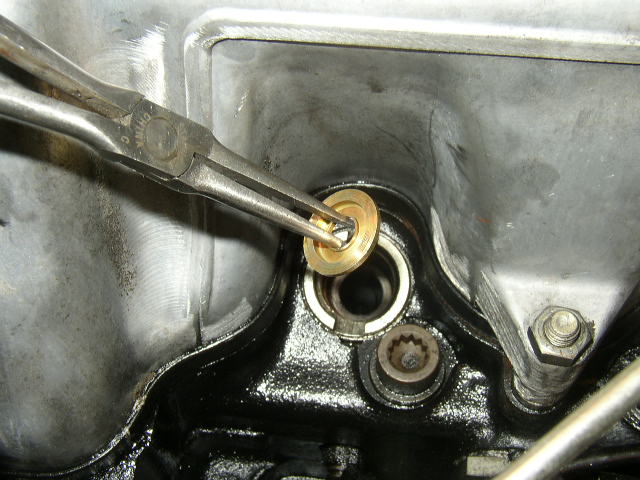
I use the small needle nose pliers to help with the installation of the heat shield. Notice the concave side is facing up.
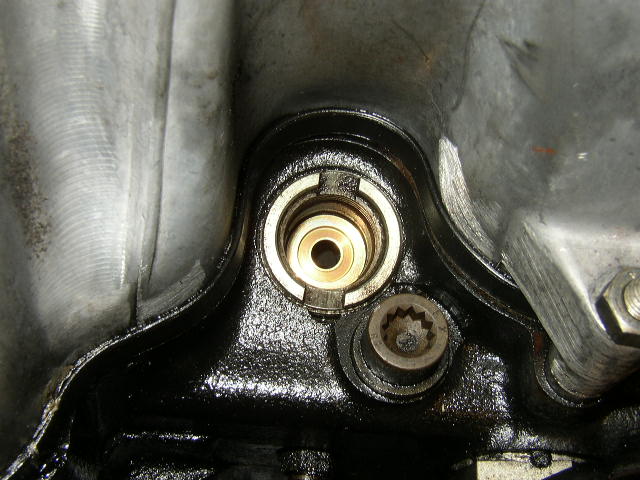
A proper install of the heat shield. Next is to install the injector and torque it to 70-80 Newton Meters.
Now do that 4 more times, for each injector. Remember to only work on one injector at a time. After you finish all 5 injectors, then reattach the fuel lines and tighten everything up.
I cranked the car for maybe 20 seconds and she started right up. My first impressions were WOW! Hardly any smoke at start-up! A nice idle that was SUPER SMOOTH! Great throttle response and VERY little smoke at high revs. I think I am more than a little impressed with the Bosio nozzles!
Since this is a long term test, I will update this pictorial with more driving impressions and reports with how the nozzles are doing.
My initial recommendation.....you gotta get some of these for your Mercedes! They WILL breath new life into it. Any Mercedes diesel will benefit from a super high quality nozzle assembly.
**************New Info added*************
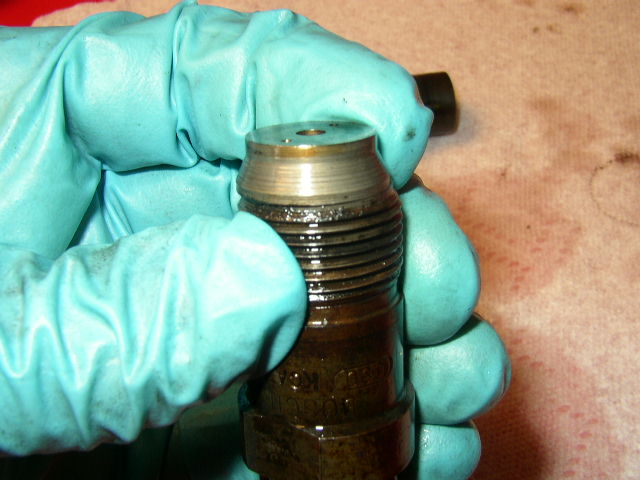
So what happens if you have a leak in the body of the injector after you have it running? See below.

You will sometimes get leaking at the middle of the injector because there is still carbon and debris in the bottom of the injector where it seal against the nozzle. I just installed this set on my 1981 300d and it ran like a new car. Got rid of 100% of the "knocking" and "hammering" but 2 of the injectors started to leak after a few miles. Hmmm... Well I took them out of the engine one at a time and took them apart again.....
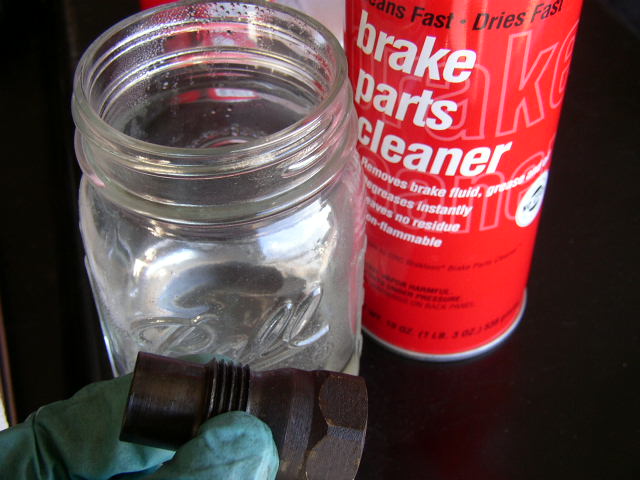
I took a mason jar and filled it 1/3 of the way up with Brake Parts Cleaner. This is just about the strongest solvent you can find in the auto parts store. I them took the bottom of the injector off...
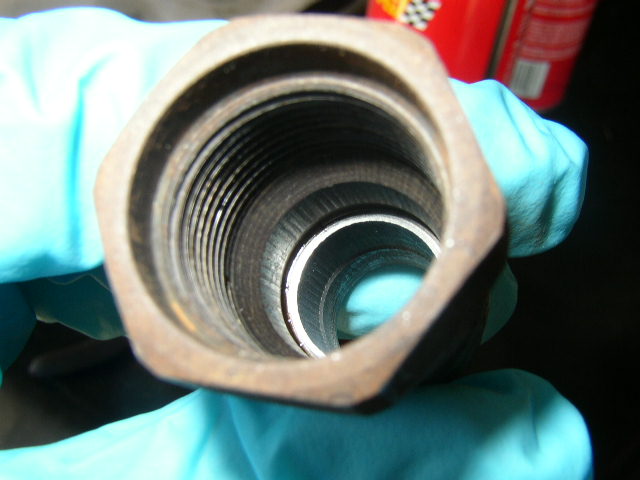
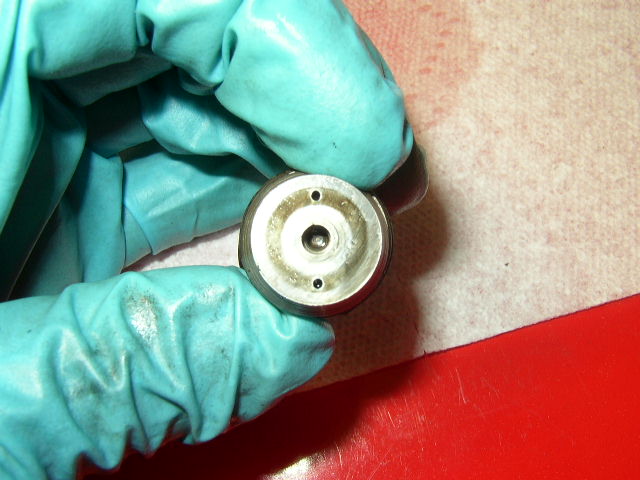
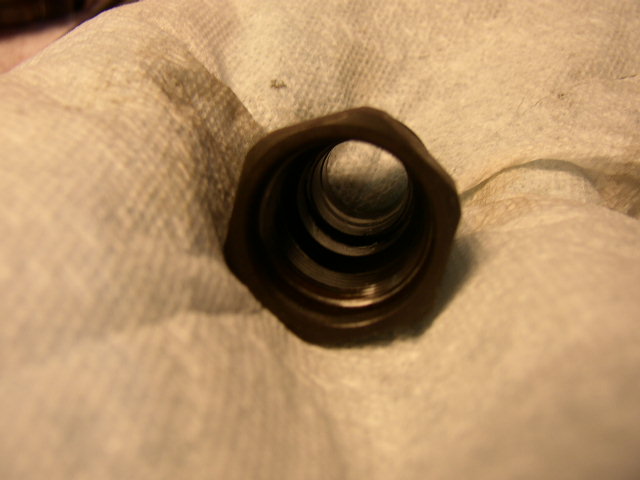
See the flakes of carbon on the silver ring about the 8 o'clock position.....
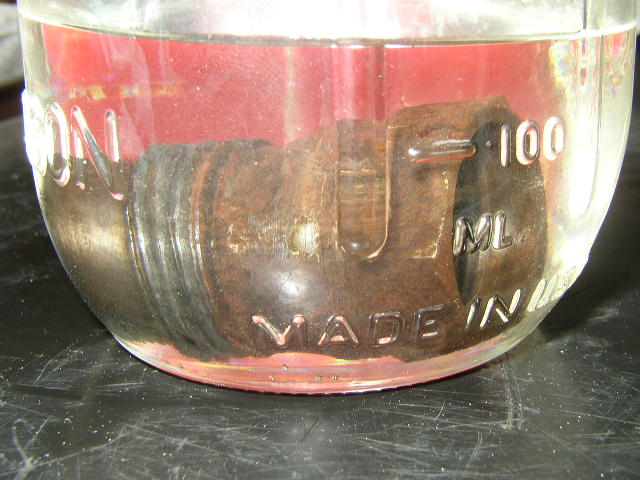
Soak the bottom in the cleaner for about 30 minutes...
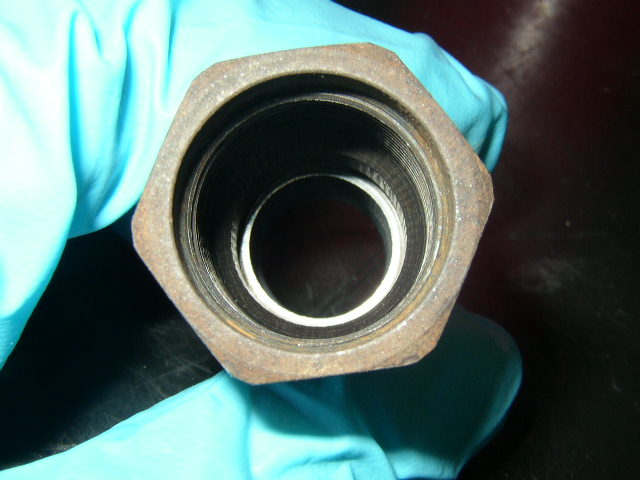
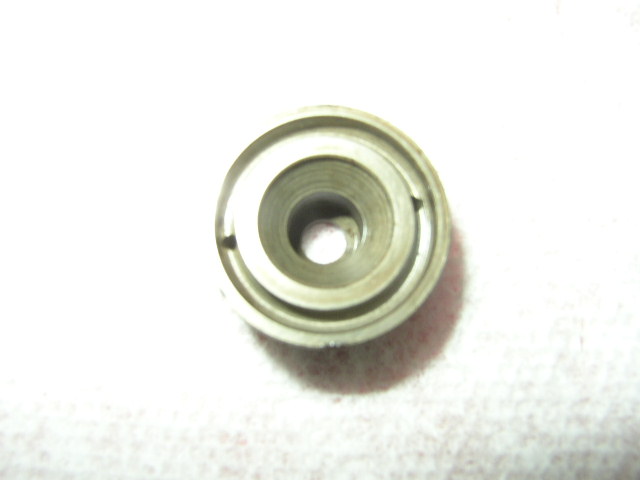
Now its nice and clean with no carbon. Now put the injector back together and reinstall it in the car and test run it.
Now that was not so hard, was it?
I just uploaded the video of these nozzles running on this car. Look at the LACK of smoke and how smooth the engine runs!