|
Dodge diesel maintenance tips, parts and DIY DVD's |
| Home |
| Bio diesel and WVO page |
Parts and DIY DVD's
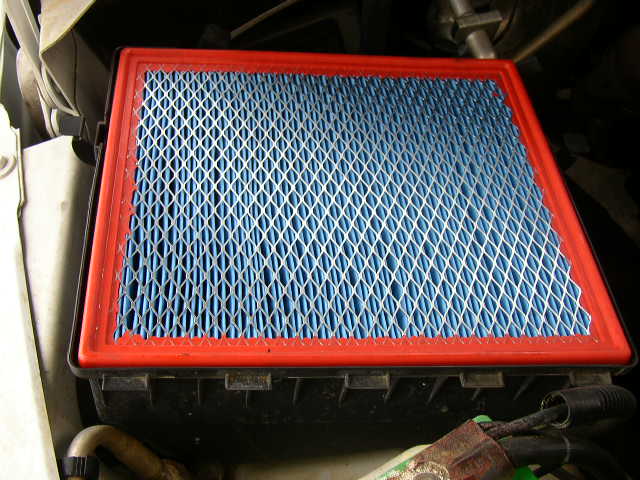
Dodge Air Filter and Turbo Silencer Ring Removal
Dodge Diesel Transmission tips
On of the most frequent questions I get on the Cummins powered Dodge trucks is transmission related. The Dodge automatic tranny is very robust and does what it was intended to do very well. But given the reputation for massive torque that the Cummins engine provides, many times the transmission is asked to do far more that the engineers at Dodge designed it to do. The best thing you can do to make the transmission last a LONG time is 1) Don't exceed what is recommended in towing, 2) Change, change, change that tranny fluid and filter, 3) keep the bands adjusted. What? you did not know that the Chrysler rear wheel drive units required periodic band adjustments?
Both Ford and GM use a different system that does not require band adjustment. Just think about it like the comparison between hydraulic and sold cam lifters. One needs adjustment and one does not. But when a solid lifter engine is adjusted properly, just you watch out!
I recommend a fluid change at 10k if you tow heavy. Fluid is cheap compared to rebuilding a tranny. I had a friend some time ago that rebuilt trannys for a living and asked him this. What is the one thing that would put you out of business? He said people changing their fluid often. Automatics get a bad rap, but most people I query on their change intervals brings up one glaring fact. THEY DON'T CHANGE THEIR FLUID OFTEN ENOUGH!
So lets talk band adjustment. The front and rear bands need adjusting at every 24k miles with your fluid change. If heavy towing I would cut that in half. It is an easy procedure once you see how it is done. So follow along with the pics and let me show you how its done....
Keep in mind that these adjustments were done on a '98 24v truck. Depending on the year
Band adjustments for each model year: These were borrowed from the TDR page.
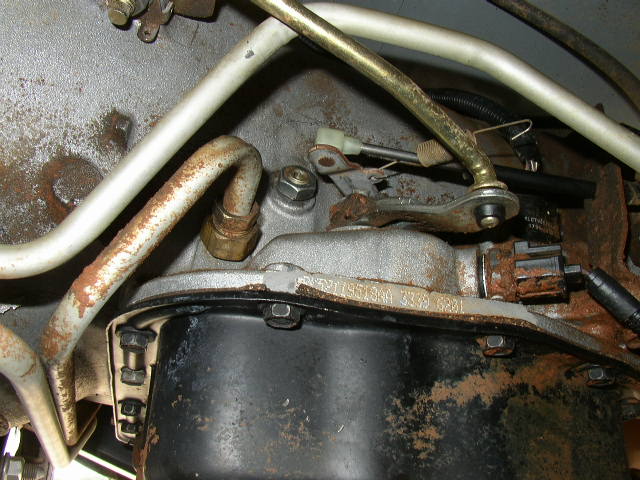
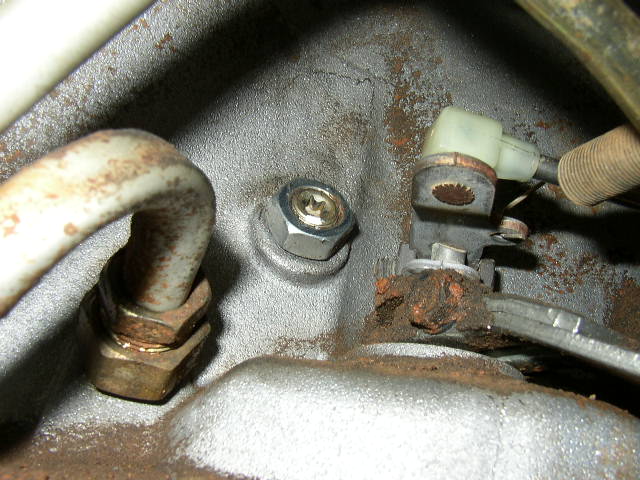
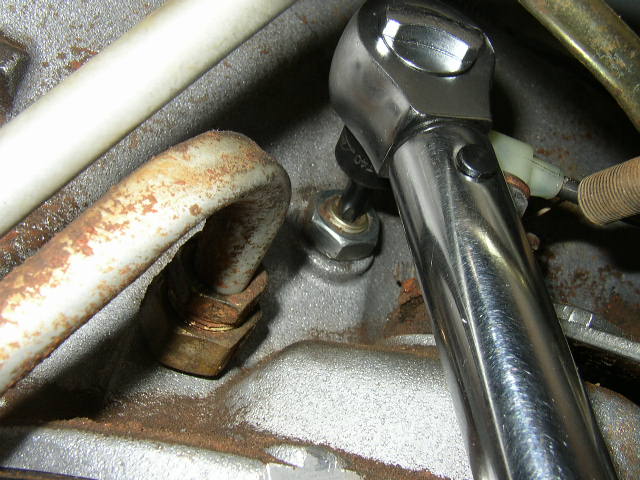
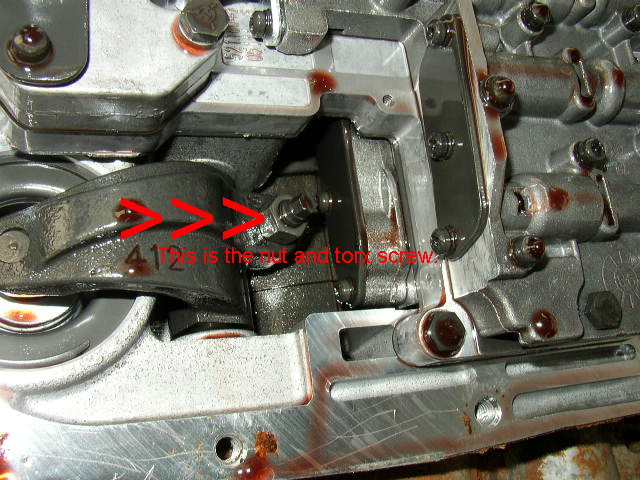
These 2 pics show the lock nut and the adjusting torx T-40 screw.
This is the front band adjustment on the drivers side of the transmission.
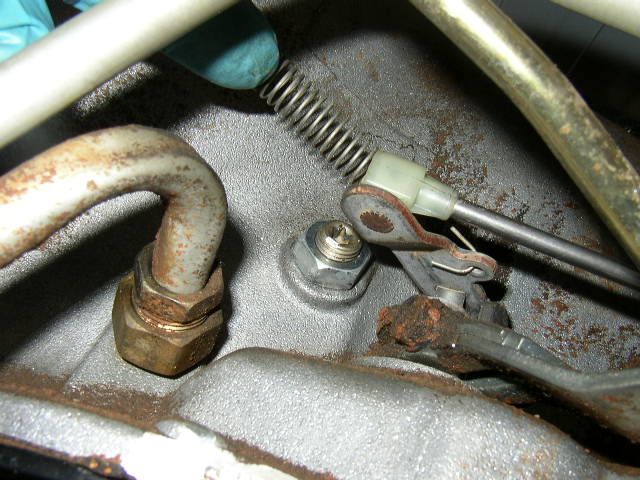
Disengage the spring from the lever so your wrench will have some working room.
Back off the nut about 5 turns and then torque the torx screw to 72 inch lbs. Then
I backed off the torx screw (1 7/8 turns). You must do this! Failure to back off the
torx will result in transmission damage! Then re torque the nut 30ft lbs. Don't forget
to re attach the spring to the lever.
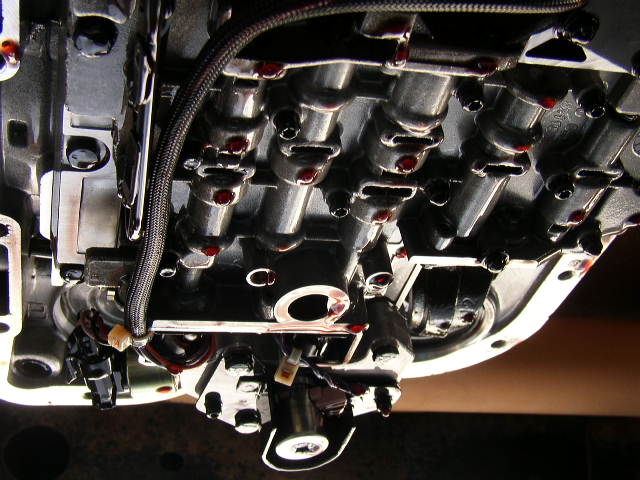
Remove the tranny pan and filter to access the rear band adjustment.
Back off the nut about 5 turns and torque the torx screw to 72 inch lbs. Then
I backed off the torx screw (3 turns). You must do this! Failure to back off the
torx will result in transmission damage! Then re torque the nut 25ft lbs.
Install the new filter and pan, refill with ATF+4 and enjoy!
If this article was helpful please drop me an email letting me know other items you would like to see in the future.
Throttle position sensor adjustment and cleaning
for the 1994-1998 12 valve engines
Well if you have been around Dodge diesels very long, you know that there can be a very annoying problem. On trucks equipped with the Cummins engine and an automatic transmission, you can get a condition of no overdrive and or/no torque converter lock-up. While there can be several causes, the most frequent cause can be a faulty TPS. Most of the time when you experience the truck not engaging overdrive or shifting out of overdrive/lock-up for no apparent reason, you must look at the TPS as the first cause. So follow me along on how to diagnosis and repair this condition.
Our test truck is a 1994 Dodge 3500 with the Cummins diesel and 179k miles. The symptoms were no or intermittent overdrive and intermittent torque converter lock-up. After a quick check to verify that all the actual wires were plugged in to their respective connectors, I proceeded to clean the battery terminals and cables. I also removed and cleaned all the ground wires running to the body. While this may seem elementary, a corroded ground or cable can cause havoc on a computer controlled vehicle. Indecently the non-working fuel gauge started working fine after the cable clean-up.
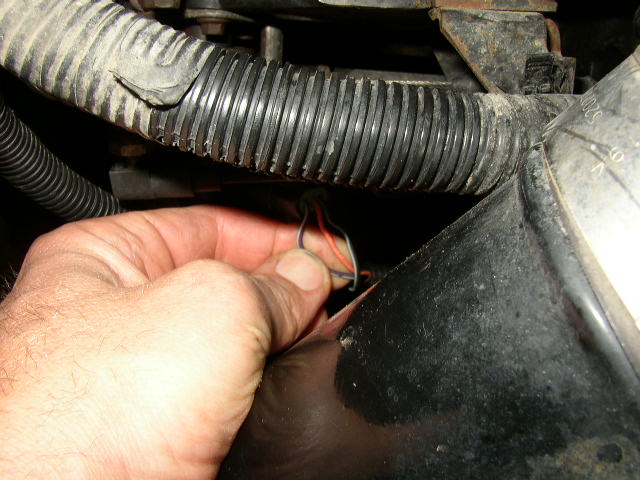
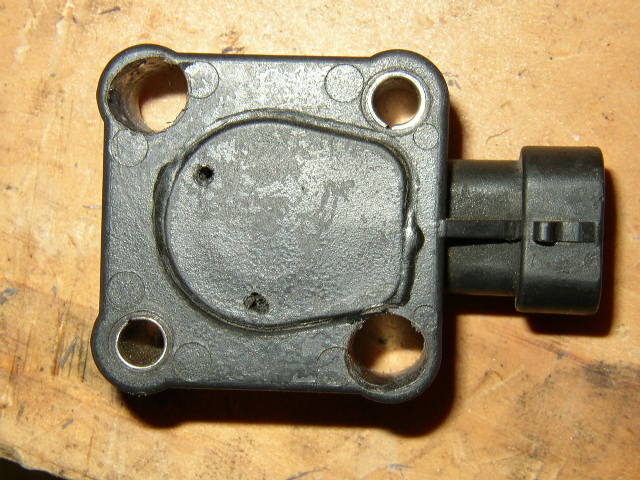
Next I wanted to check the TPS for proper operation. The TPS is a small plastic black box attached to the throttle linkage with 2 screws. It has a 3 wire connector that plugs into the end.

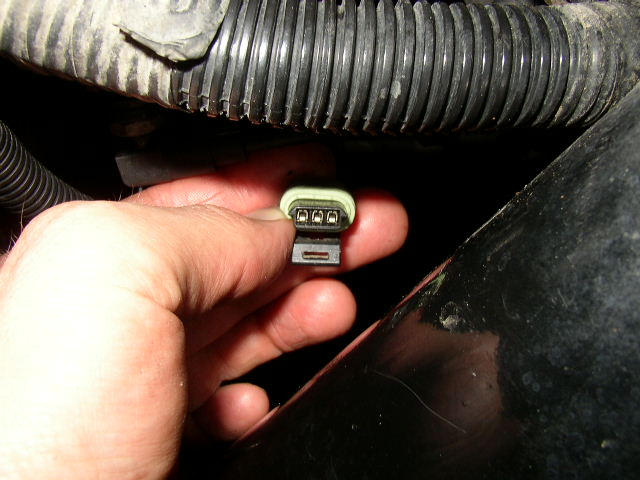
Most of the advise you will read on the forums is to clean the TPS with electrical contact cleaner. The problem is how to get the cleaner into the sealed unit. Pulling off the unit from the truck reveals a slotted metal plate that mates to the throttle linkage. Congenial advise is to spray cleaner around this plate, with the hope that the cleaner will leak into the unit and remove the "corrosion". Well go ahead and give it a try, but it did not work for me. The plate is sealed to keep moisture and dirt out, so it is very difficult to get the cleaner into the unit in any appreciable amount.
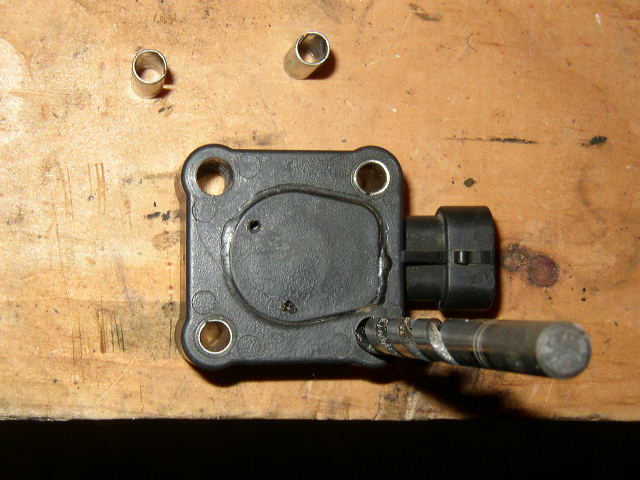
The next way to get the cleaner in the unit, is to drill 2 small holes about the diameter of the wand on the spray can or cleaner.
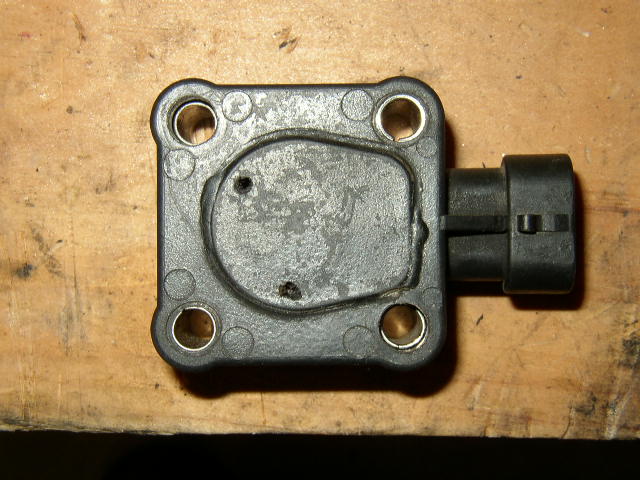
You can see where I drilled the 2 holes using a 5/64 drill bit. They are almost the same diameter as the red spray wand found with almost all aerosols. Spray the electrical cleaner in the top hole. Rotate the metal plate on the back of the unit many times to work the cleaner around. After you have done that, blow out the holes with some compressed air to dry the internals. I recommend putting a dab of silicone sealant on the holes to keep out moisture once you are done. NOTE: DO NOT USE WD-40 Use only electrical contact cleaner for electrical circuits.
On this truck, this little "trick" did nothing to help the erratic overdrive shifting. So on to the next fix.......
I then took my digital volt meter and ran a few basic electrical tests. I wanted to make sure that we have the proper voltage in the harness that plugs into the TPS. The TPS harness has 3 wires: black (ground), purple (power), orange (signal). So I disconnected the plug from the TPS, turned the ignition key on (don't start the engine) and probed the connector with my volt meter. Black and purple you should get 5 volts or very close. So far so good.
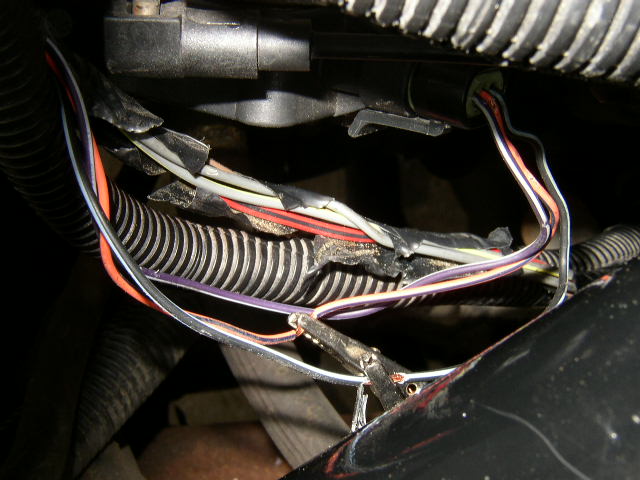
The next electrical test will tell us if the TPS is faulty. Turn the key back off, and start to slowly remove the TPS harness from the wiring loom. You will have to remove some black tape, then pull the bundle slightly out of the loom and unravel the black tape like substance. What we are doing, is trying to get easy access to work on the harness for our next test. I tried many times to probe the connector and or the wire with items like a sharp needle etc, in an effort to get a stable electrical signal. I never could. So take my advise and keep your sanity, and expose the wire from out of the loom. Remove it maybe 4-6 inches. This will give you plenty of working space. Now very carefully strip about 1/4 inch of insulation off the orange and black wires only. Your objective is the expose the copper strands of the wire. DON'T CUT THE WIRE!!!! I took a razor blade and very carefully pealed the insulation off the wire.
Next you want to take your volt meter wires with small alligator clips and attach one to the orange wire and one to the black wire. Plug the connector back into the TPS. We are now set-up to "see" what kind of voltage values the TPS is sending to the computer. Turn the key back to the on position (but don't start the truck). If the TPS is working properly then the reading should be around 1.0 volt plus or minus .2 volts. The test value on this truck was .60 volts. Waaay to low! So we need to see if we can adjust the voltage to spec. If we can rotate the TPS slightly counter clockwise, this will increase the idle voltage. So loosen the 2 small bolts holding the TPS to the bracket, and rotate it counter clock wise. It will only move a little. I did this but the voltage did not change. A faulty TPS. At this point you have 2 choices. Buy a new TPS at $159 or "modify" yours to work. Being the tinker, I chose to try the free choice first.
We need to somehow make the TPS rotate more, and this is done by elongating the mounting holes in the TPS. This will give us more adjusting room and hopefully, get the required voltage. So turn off the key, remove the plug and take the TPS off the truck.......
There are several ways to make the holes bigger in the TPS. I chose the drill method over a small rat file, only because I don't own a small file. I first used a 9/32 drill bit and slowly started to drill. This helped to remove the metal sleeves from the mounting holes. I drilled and remounted the TPS and tested the voltage values. I did this about 10 different times making the holes bigger every time. A lot of trial and error on this procedure. Each time I was making voltage progress. Since my TPS was way off its voltage value, and I not wanting to take too much material out of the hole, I just did a little at a time. You can see how much material I ended up grinding out of the 2 mounting holes. I had to stop because I was about to break through the holes. So on my final voltage test........
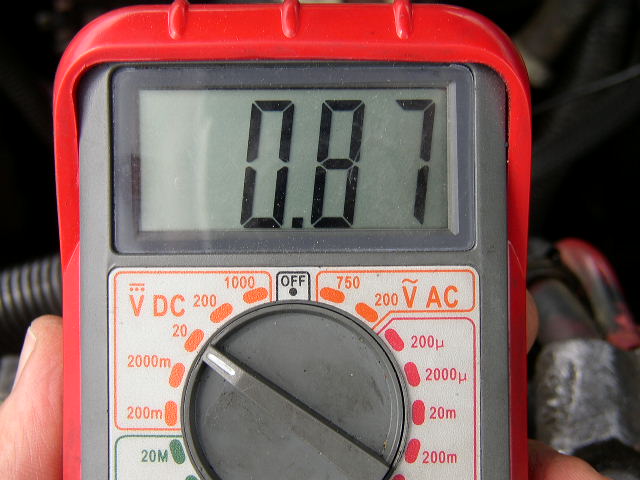
I was able to get .87 volts at idle position. The spec is 1.0 volts plus or minus .2 volts, so I am just above the minimum accepted value of .80. Next I tightened up the TPS and operated the throttle to see what the voltage was at wide open throttle. I got a 3.9 which is fine but slightly on the low end of the scale. I also operated the throttle very slowly while watching the volt meter values. You are looking for a smooth increase in the volts, with no erratic "bouncing" of voltage. Mine was just as smooth as a new penny. Ok so I just saved myself $159 for a new TPS, but how did it drive you may ask.
Well the truck shifts perfectly now with overdrive and torque converter lock-up working just like the Dodge engineers designed them to.
Keep in mind there are other causes to the above problems such as a bad tranny temp sensor, etc., but I was fortunate to nail this problem down as the TPS. I hope this article will encourage you to give this fix a try, at the least it is free to do and may keep your hard earned dollars in your own pocket.
If this article was helpful to you, I would love to hear about it, just drop me an email.
Pitman arm removal and replacement
For those of us who suffer with sloppy steering with our Dodge trucks, there can be many causes. One of the most common cause of the sloppy steering anomaly, is a worn pitman arm. I get the sense from talking with other Dodge owners, that pitman arm wear is not really consistent. Some wear out quickly, while others get huge miles out of theirs. As with any moving part, those that maintain repair less. Keeping the entire steering linkage well greased is the main key. Every 5k miles is the maximum I would go between greasing. Grease is easy and cheap, don't be penny wise and pound foolish. The following pictorial was done on a 1999 Ram that was in the shop for a pitman arm replacement. So follow along as we tackle this relatively simple job.........
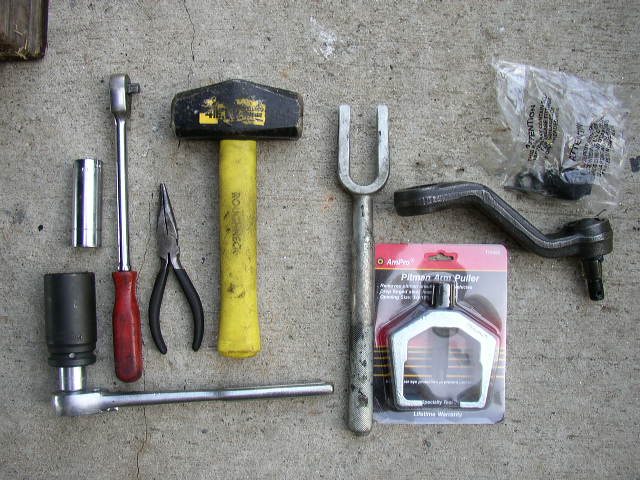
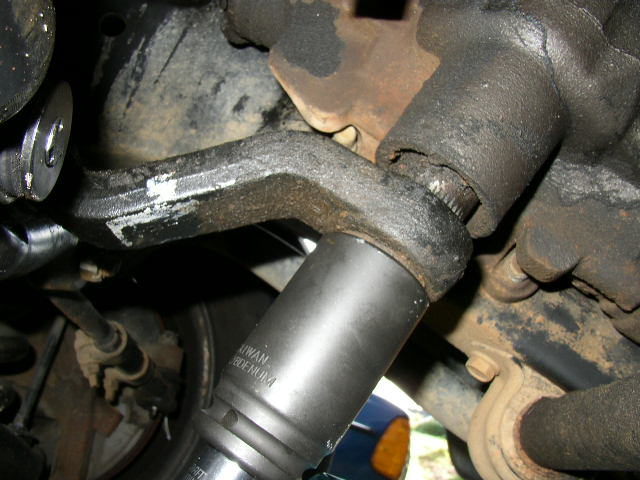
These are the tools you will need for this job. I rate this job a 3 on a 1-10 scale. You may need some tools you don't have like a pickle fork, pitman arm puller, and a 1-5/16 socket.

Here is a shot of the worn out pitman arm. The symptom was too much play in the steering wheel. An easy test is to have someone very slowly turn the steering wheel back and forth just a little, while you watch the steering box and pitman arm. A bad pitman arm will move with the steering box, but wont move the center link. Just a few degrees of rotation on the steering wheel is all that is needed. The pitman arm is what wears NOT the center link.
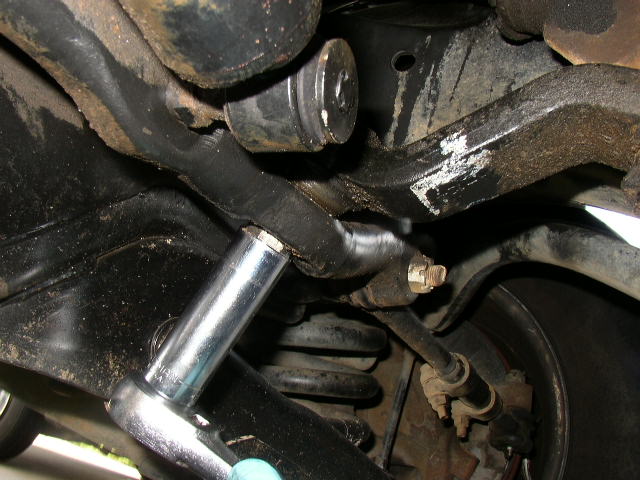
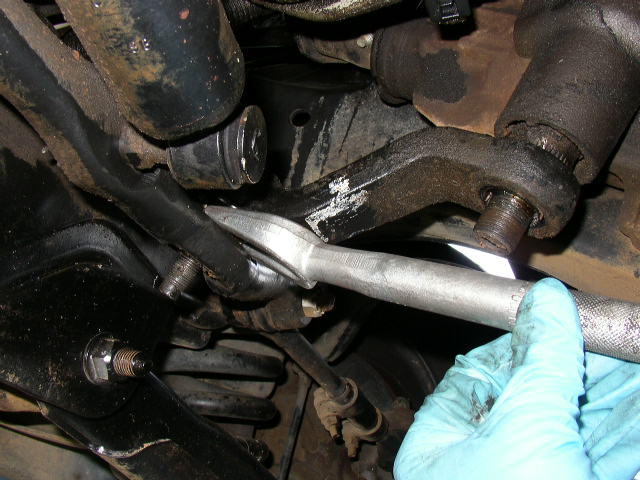
We start by removing the cotter pin and securing bolt on the junction of the pitman arm and center link.
Next we remove the bolt on the steering gear box that is below the pitman arm.
Now we take our pickle fork and 3 pound hammer and insert is between the pitman arm and center link.
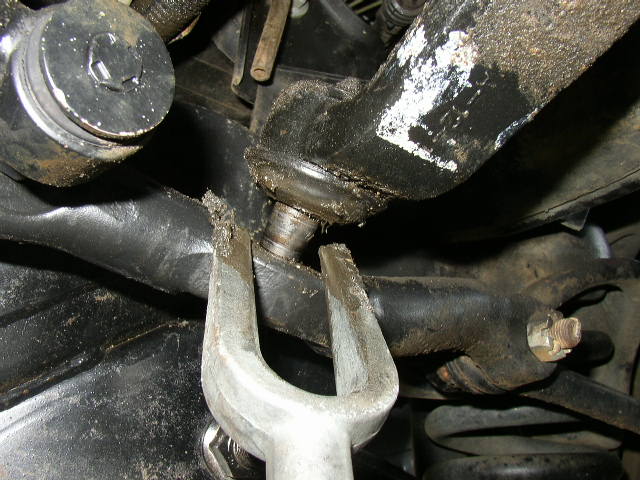
After a few well placed and motivating whacks with the hammer, the joint will pop free.
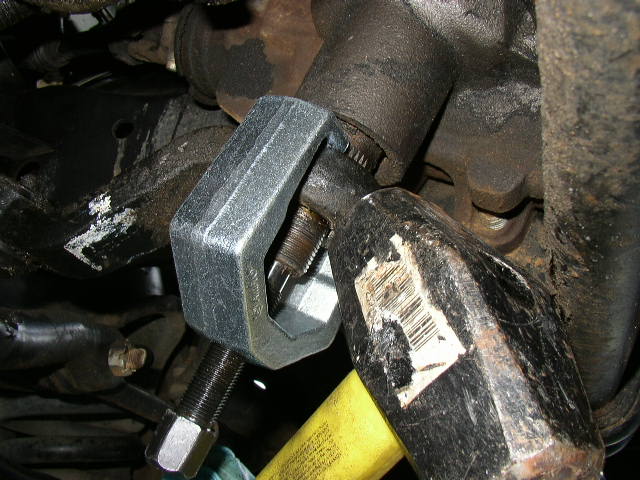
Next we will set our pitman arm puller on the arm and steering box shaft. I tightened up the puller very tight and gave some very firm but NOT hard blows to the end of the pitman arm. ** You must be very careful hitting against the gear box so as not to damage the shaft seal or worse, bend the output shaft. Just taping on the pitman arm does 2 things. It help to break the rust bond that has formed and relives the stress on the pitman arm. You will have to do this several times. Tighten further a little bit, then tap with hammer. This one took 4 cycles before it came off. If you try to hammer on it with an air impact gun, you may end up breaking the puller. Be patient it will come off.
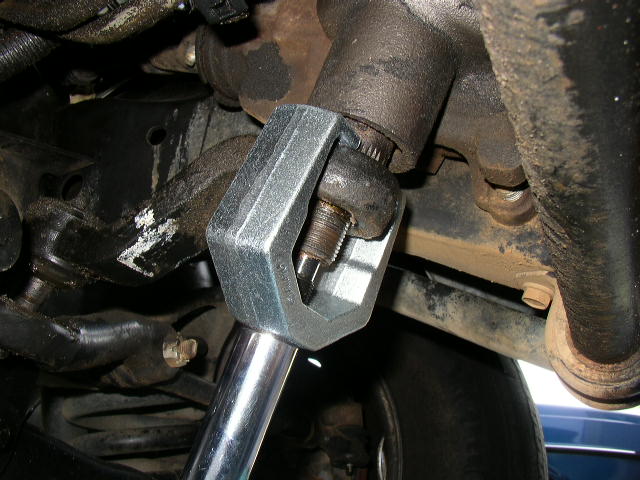
The pitman arm is now starting to come off the output shaft.
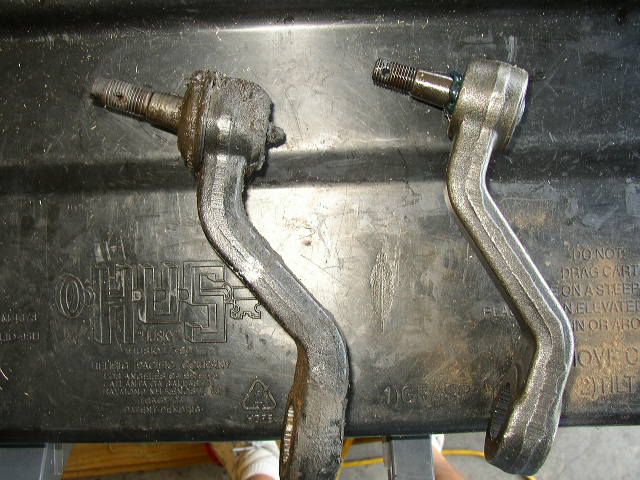
Pitman arm removed and compared to the new one. Looks just the same as the new one except dirty but........
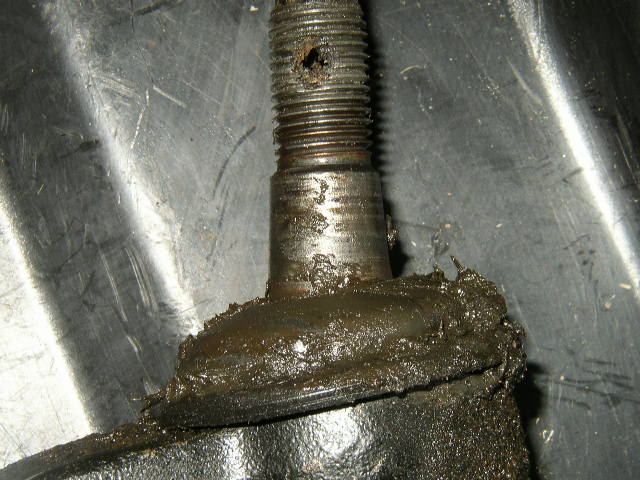
A close-up of the old shaft reveals the cause of the wear. See below the threaded portion of the joint. There is some circular wear marks there. Cause of this.......improper lubrication!
Now just transfer the old zerk fitting to the new shaft if it does not come with one. Assembly is the reverse of what we just did. Just remember the center link will have to be pulled toward the pitman arm with your hand, when you install the new one. They have a tendency to flop around after the arm is removed.
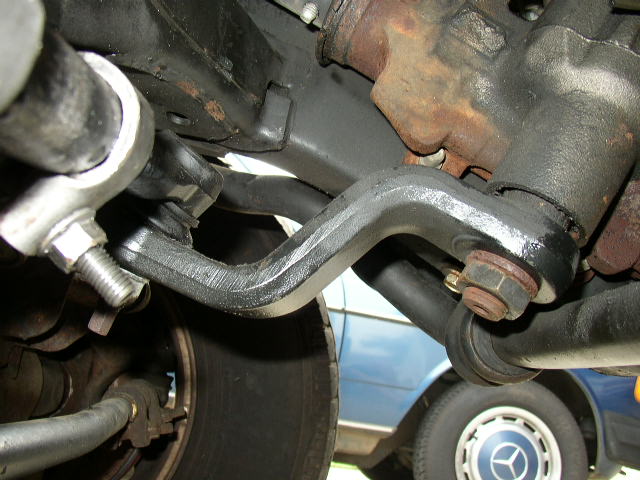
A new arm and no more steering slop. Remember to tighten everything well and install the cotter pin back.
Russell
DIY DVD Dodge Air Filter Replacement and Turbo Silencer Ring Removal
Price:$19.45 S&H: Free See the promo of the video!
|
Product Description:
We are proud to announce the DVD is finally ready! Shot in my shop, professionally. Broadcast quality ready to view on your T.V.
Russell's Review of the DVD on Air filter Replacement: This DVD will teach you how to properly replace your air filter from start to finish. I will show you the most effective air filter to use and you will get 100k miles of use out of it. I also show you how to remove the turbo silencer ring for more turbo whistle. Get the confidence you need with me at your side.
The DVD includes:
|