|
Mercedes Upper Control Arm Replacement |
project 240d series
| Home |
| Bio diesel and WVO page |
All parts used in these pictorials are available at the diesel parts for sale page
Safety and security tips:
Please remember to recycle all your used fluids at an appropriate recycling center. Be mindful to not spill or splash fluids on yourself, others or the ground. Also as a safety tip please remember anytime you are working on, around or under your car, to wear safety glasses and secure the car with wheel stops and approved jack stands!
Mercedes Upper Control Arm Replacement
This is another project in our series on Project 240d.
Doing the upper control arms on your 123 MB seems to be shrouded in mystery. Often times we as owners are running around with 20 plus year old control arms, hear this...."they don't last that long"! The ball joint and grease seal boots definitely will not hold up the fight for 2 decades and can be dangerous if the joint breaks while driving.
Doing the job takes some patience, elbow grease and a few tools, but is definitely a DIY job. So follow along as I show you how to get this job done right.
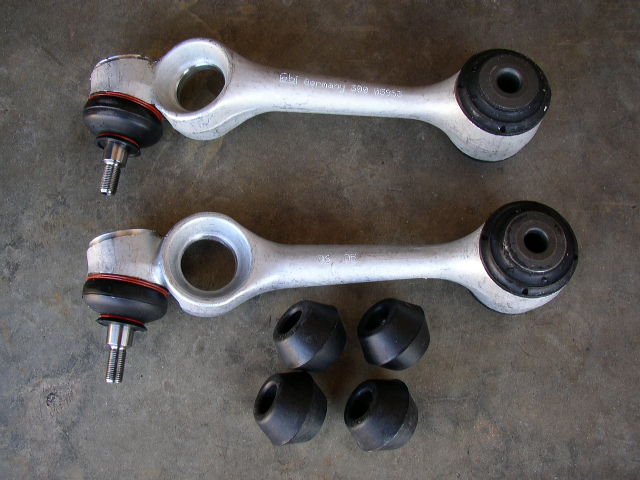
Here are the parts you will need. Both right and left upper control arms, and four outer bushings.
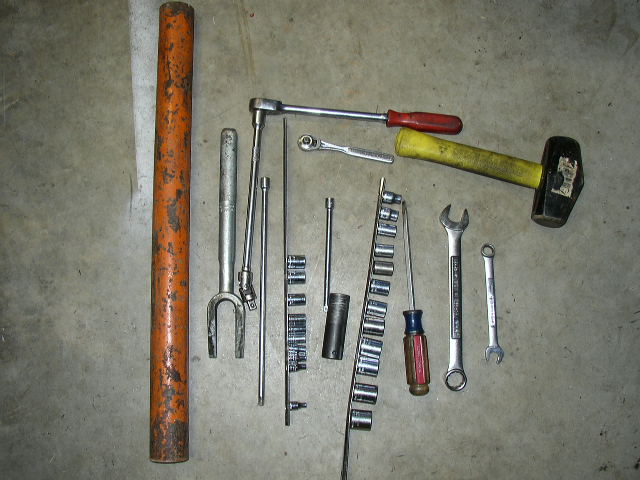
Tools needed will be a variety of metric sockets, screwdrivers, wrenches large pipe and hammer.

If your ball joint boot is torn or is loose them the arm must go.
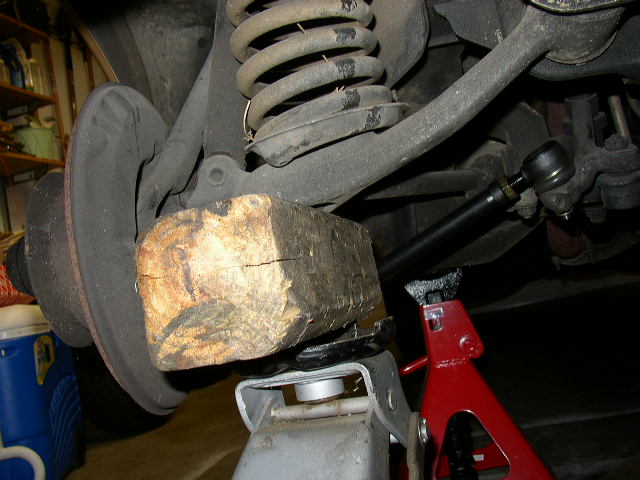
Secure the car on heavy jack stands, remove the tire and put your floor jack under the lower arm.

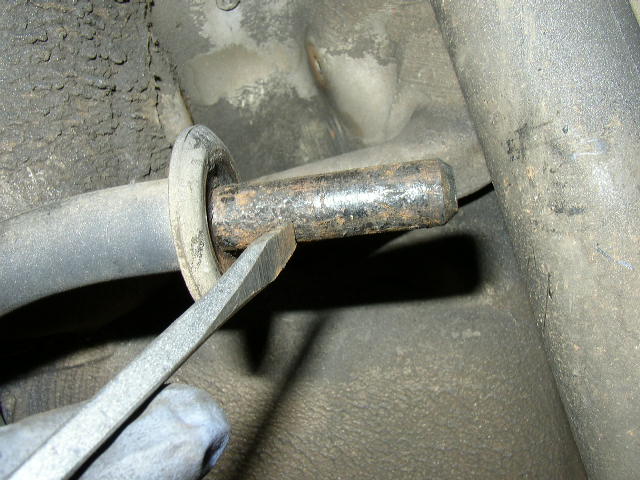
Start by loosening the bolt on the ball joint almost all the way off.....
Take your pickle fork and hammer and smack the joint to break it free of the spindle. The pickle fork
destroys the grease boot, but the boot is bad anyway.
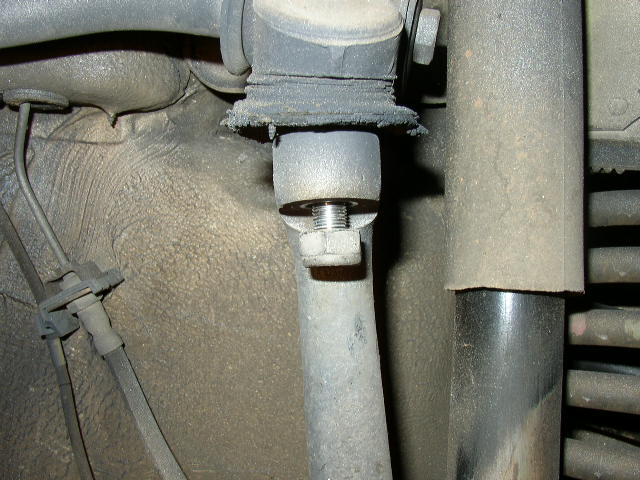
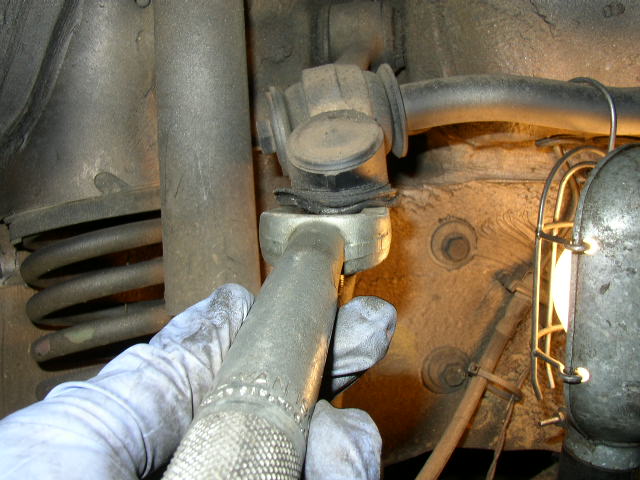
After the joint is free, remove the bolt from the sway bar end...

Remove the washers and bolt....

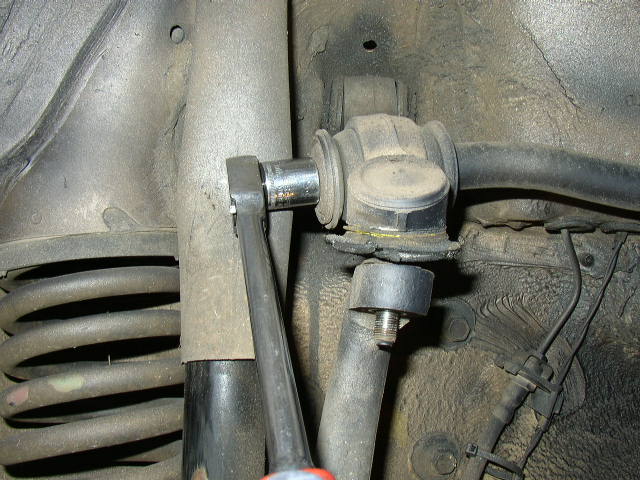
Now go and remove the bolt holding the arm to the body of the car.
Once the bolt is free wiggle the arm out and its free.

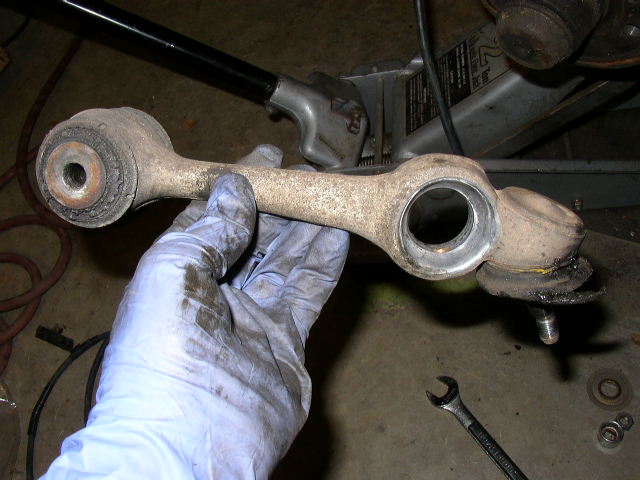
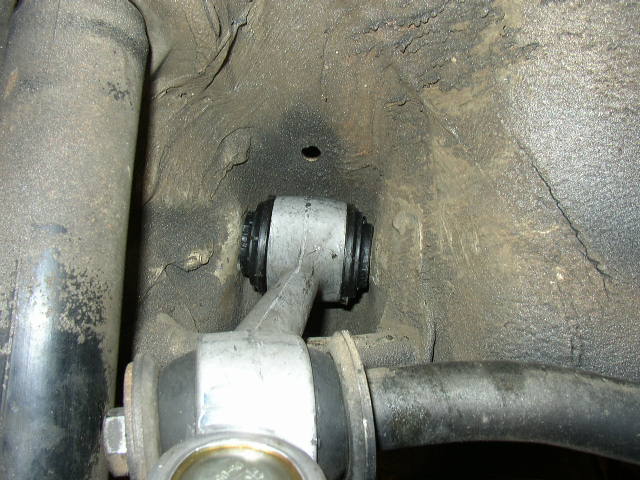
The inner bushings were dry rotted and this alone would have justified doing the arm. It is much easier
to replace the whole arm than trying to press in the inner bushings. Plus you get a new ball joint on the arm to boot.
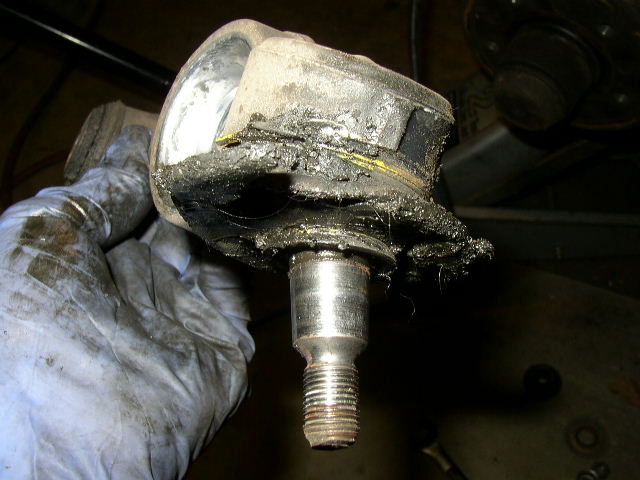
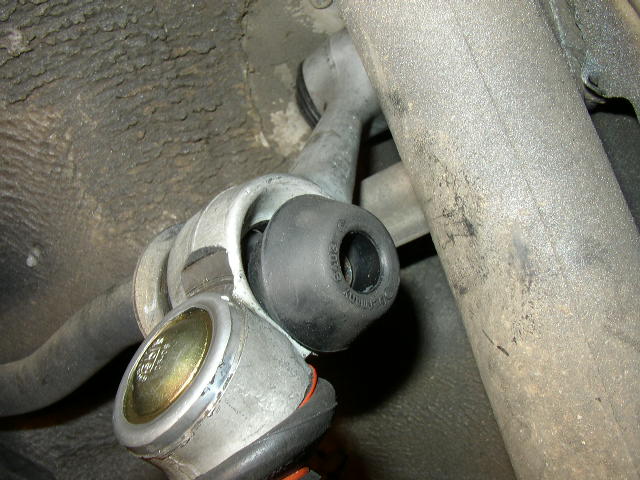
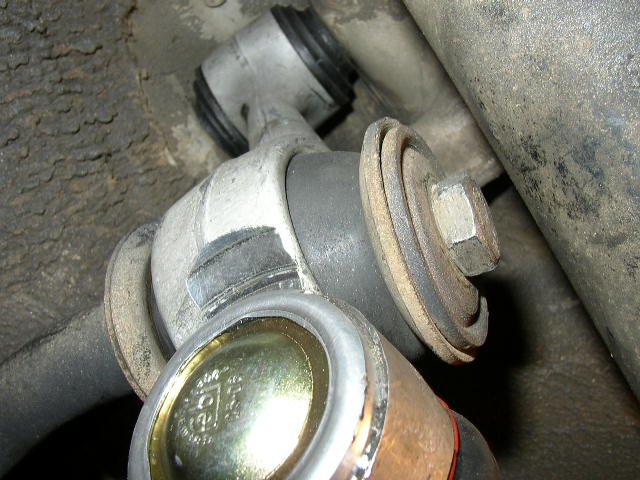
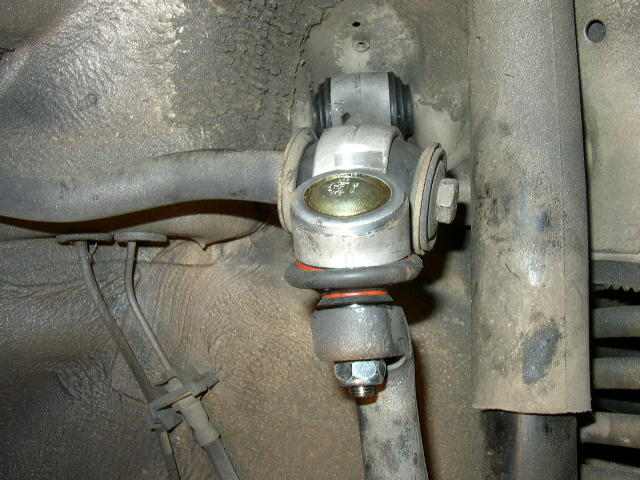
Look at that nasty ball joint boot. The ball joint was very loose. On the Upper Control Arm DVD I show you
how to check the ball joint and you can watch me and listen to how a bad joint will sound.
Clean the old crude off the end of the sway bar before installing the new parts.
To reinstall the new arm slide it back in the body and I like to use a screwdriver to center the holes in
preparation for the bolt insertion.
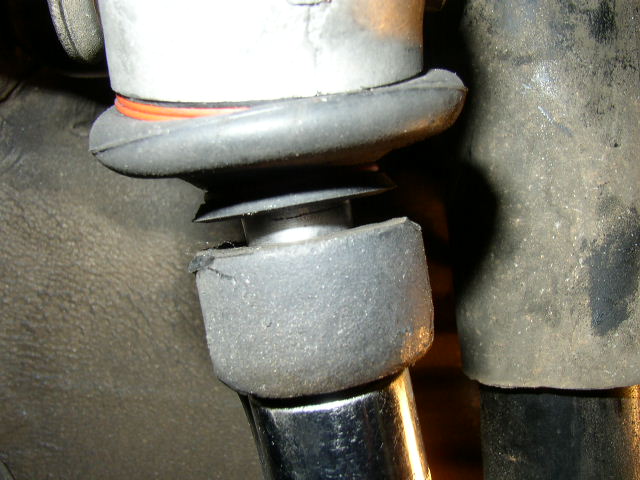
As you can see the bushing won't line up with the sway bar by itself.
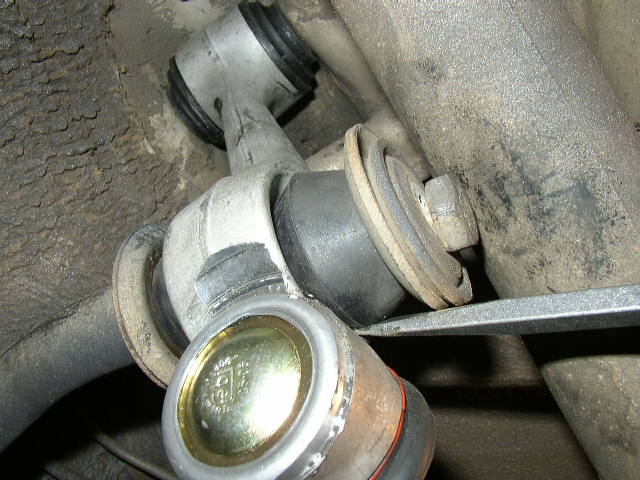
At first I tried using a screwdriver to line up the bushing in the sway bar hold, but it really does not work right.
Getting the rubber bushings into the sway bar and the control arm takes the pipe and pickle fork and the floor jack. I use
this as a lever to push the sway bar up and then install the bushings. I could not take a pic since I only have 2
hands. I show this in great detail on the control arm DVD. It is very hard to do without using the above items as
a lever force. You do not want to get the bushings in cocked or off center with the sway bar.
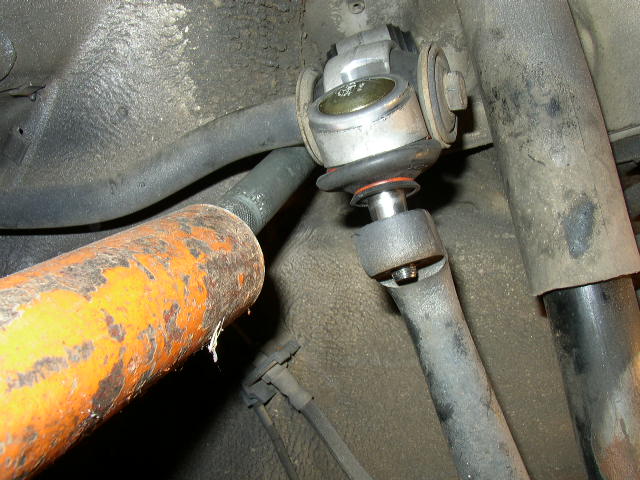
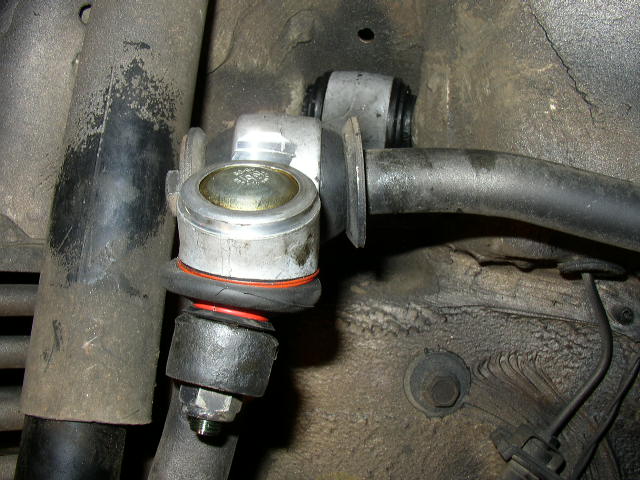
After learning the correct way to install the bushings it will look close to this.
Arm is a tight fit in the body.
Now install the ball joint into the spindle.....
The ball joint will start to be drawn into the spindle as you tighten the nut....
The arms comes with special nylock nuts instead of the old cotter key design.
Once the arm is in the body then reattach it to the sway bar, spindle and insert the bushings and washers. Getting the
rubber bushings into the sway bar and the control arm takes the pipe and pickle fork and the floor jack. I use
this as a lever to push the sway bar up and then install the bushings. I could not take a pic since I only have 2
hands. I show this in great detail on the control arm DVD. It is very hard to do without using the above items as
a lever force. You do not want to get the bushings in cocked or off center with the sway bar.
Now make sure all the bolts are tight and reinstall the tire. Remove all the jack stands and go for a ride!