|
Jetta Tdi diesel maintenance tips |
| Home |
| Bio diesel and WVO page |
If you have worn or leaking injector return lines then order my kit at the bottom of the page!
Jetta Tdi injector purge
On any diesel with high miles, it is often a good idea to perform an injector purge. I have used with great success the Lubro Molly diesel purge product. I do lots of repair and maintenance on older Mercedes Benz diesels and find this stuff to work miracles. The Mercedes will often have a very distinctive "nailing" sound that comes from a dirty injectors. This product cleans the injectors in a hurry, and gives the car greater throttle response and power.
The car I am about to do is a 1998 VW Jetta Tdi with over 207k miles. I have owned the car since new and wanted to do an injector purge. The process is very simple and takes about 30 minutes total. I can say the results are very worth while and will be part of my yearly maintenance procedure.
So follow me along as I do the purge.........
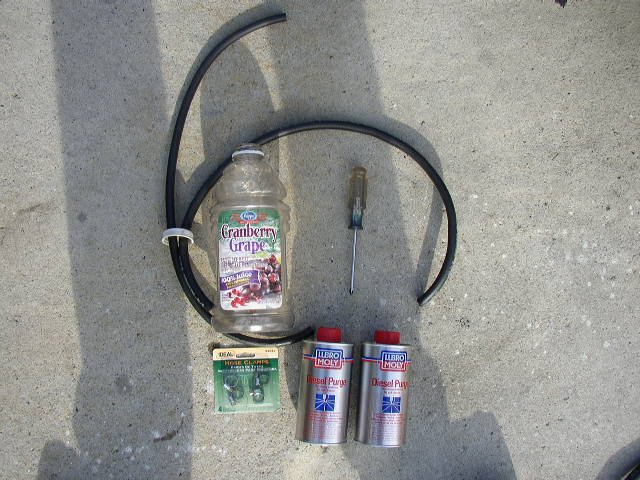
The supplies that I used consists of 2 feet of 1/4 inch fuel line, 2 feet of 5/16 fuel line, 2 can of diesel purge, small hose clamps, 1/2 gallon juice bottle, Phillips screwdriver.
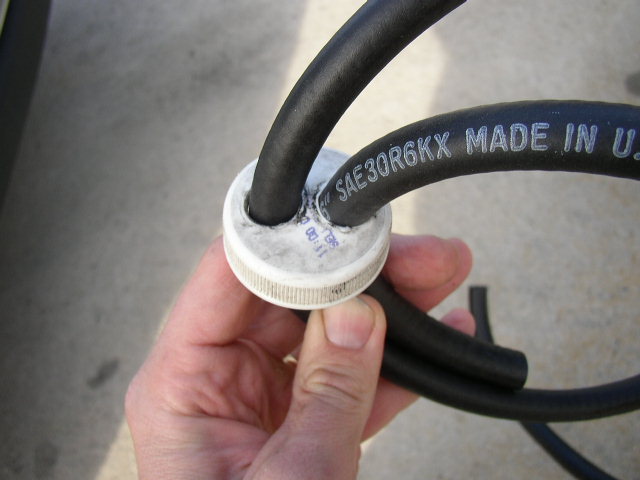
This is a close up shot of the cap. I drilled 2 holes in the top that fit the hoses very tight. This will be your temporary supply and return hose.
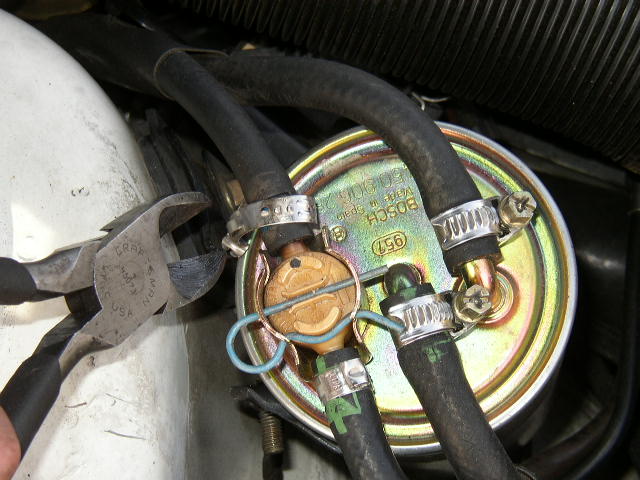
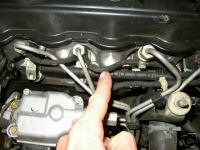
Remove the return line hose crimp clamp. I used some side cutters and cut the factory clamp off. Be very careful not to bend the hose too much as the nipple inside the hose is fragile plastic. You will replace the factory clamp with a screw type clamp when we are done.
This shows the hose removed and the plastic nipple I told you NOT to break.
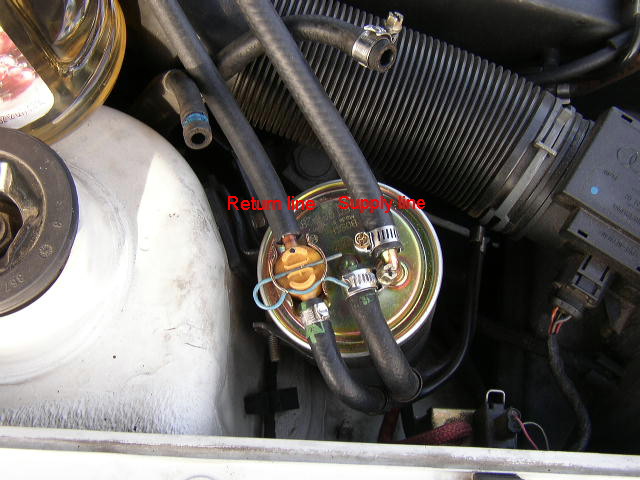
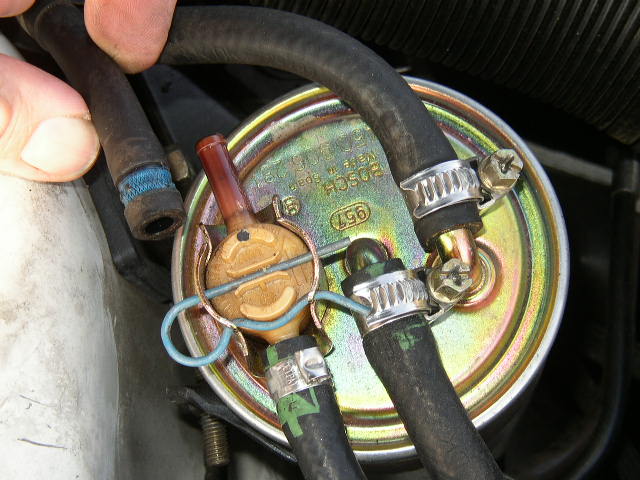
This pic shows the hoses from our bottle connected to the fuel filter. The return line on the left and the supply line on the right. The supply line must go to the bottom of the bottle, the return line just needs to get about half way into the bottle. Just above the return and supply line is the lines we took off to do the purge. We will connect them back, after the purge is complete.
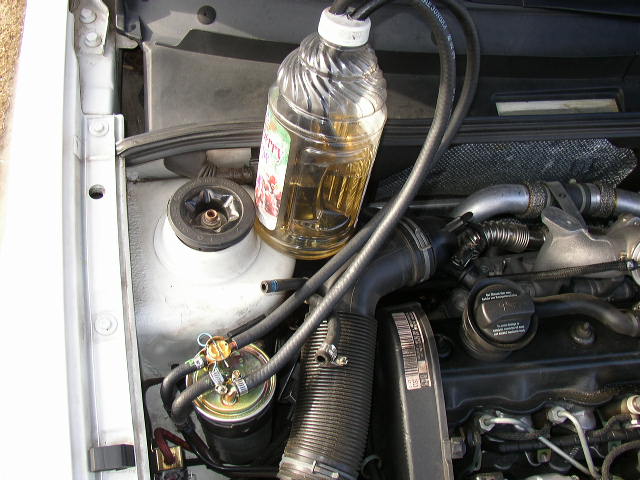
Here is a wider shot showing the temporary hook up to the bottle. What we have effectively done is disconnected the fuel tank and made the juice bottle our temporary fuel tank. Be sure to hook up the line exactly the way they are here. It won't work any other way. Do not try to bypass the fuel filter. The injection pump wont last very long if some dirt of impurities get into it.
Go ahead and start the car with the 2 can of purge in the bottle. It will take about 20 minutes to use up the bottle. I turned the A/C on to help put the engine under a small load to use more fuel. I also sat in the car and varied the RPM's from idle to 3000. This helps to burn the cleaner faster, and makes the overall cleaning work better.
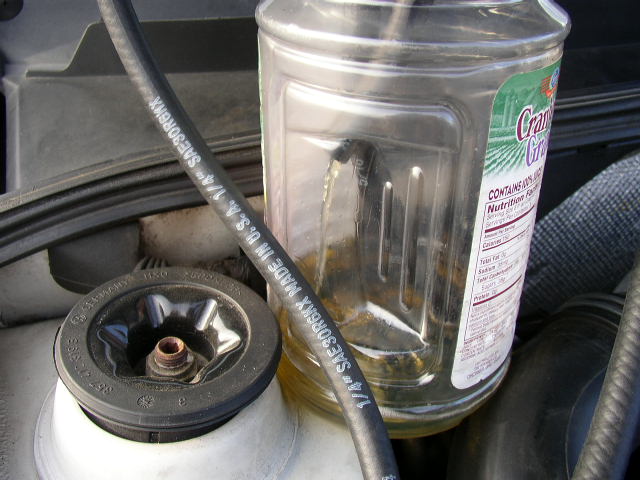
Here is a shot with the engine running. You can see the return line inside the bottle flowing the fuel back. If you have some injector nailing, you will usually notice a great reduction in noise the first 5 minutes of the cleaning. Make sure to let the engine run and use up all the cleaner in the bottle. Also make sure the supply hose is not sucking air when the fluid level gets to nearly empty.
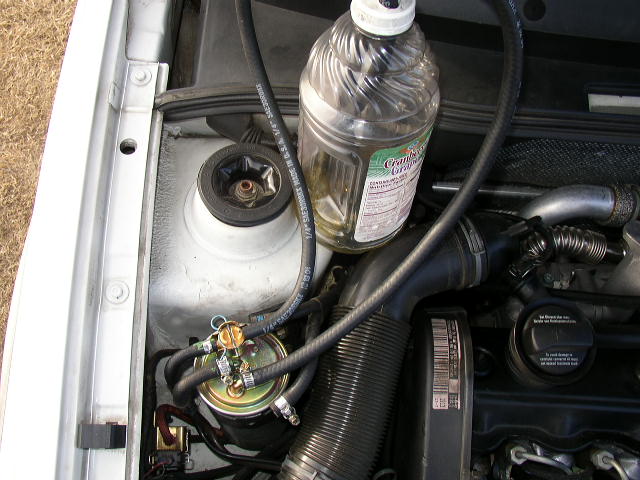
Here is another shot with the engine running. After the cleaner is used up, shut off the engine and disconnect the temporary hoses. Reconnect your permanent hoses and road test the car. You should notice a good difference in power and reduced smoke.
I hope this was helpful, if you have any question just drop me an email.
Trasko By-pass filter installation
Being one to always want to make my cars last longer than I would ever want to keep them, I decided I wanted to install a by-pass filter system on my 1998 Jetta Tdi. Since I am an Amsoil dealer and love the products, I wanted to go with the Amsoil bypass system. However after searching for space to mount the unit and not wanted to cut, grind or mutilate my completely stock car, I decided to go another route.
I have looked for months at different bypass systems, but they all required me to make some modification to the car due to the lack of available space. I then found the Trasko by-pass filter. This filter is both a full flow and by-pass filter in a very compact unit that mounts to where your oil filter normally goes. All this and without any modifications to the car. Wahoo!
So follow along with me on how I installed the filter........

Here is the Trasko by-pass filter system and the Amsoil 14w-40 that I used. This element in the Trasko is removable and comes with a handy wrench to take the canister apart. The unit is well made aluminum with heat dissipating fins. I have noticed a reduction in engine temp of about 5- 9 degrees since the installation.
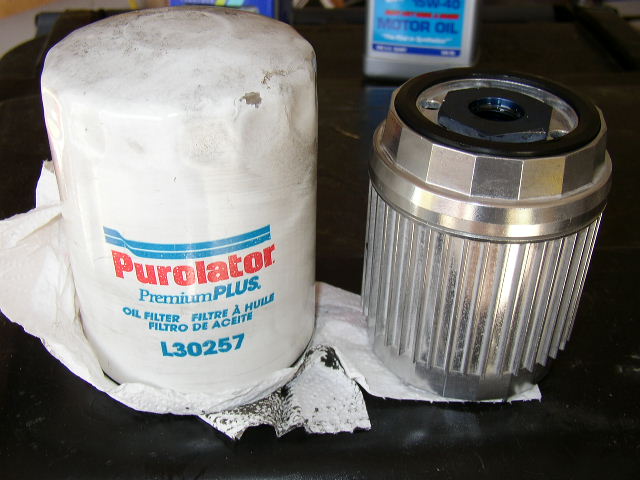
Here is the Trasko next to the Purolator that I had on the car. The Purolator was almost next to impossible to get on and off at filter changes. It is a little bigger than the stock VW factory filters and is really too big.
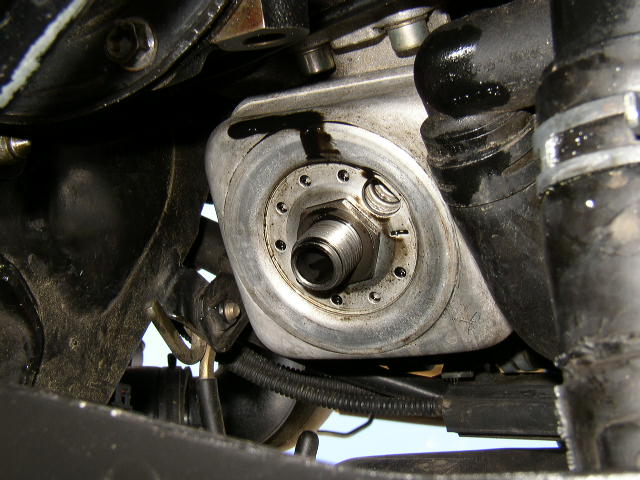
Here is a shot of the filter mounting base with the oil filter removed. Make sure the large nut you see is tight, as they have a tendency to loosen up with multiple filter changes over time.
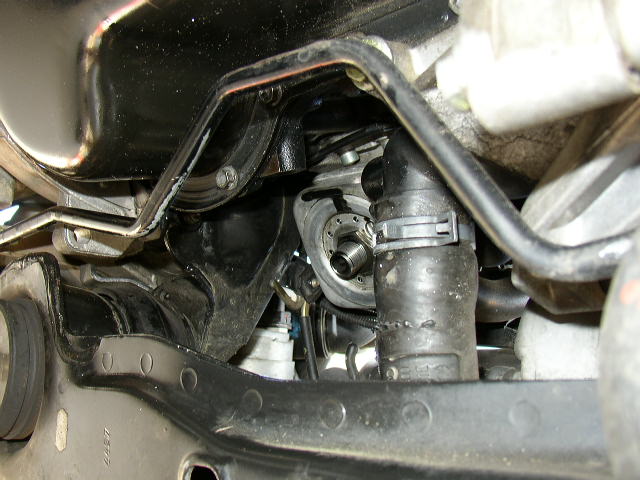
Another shot of the filter base and how little room there is in there.
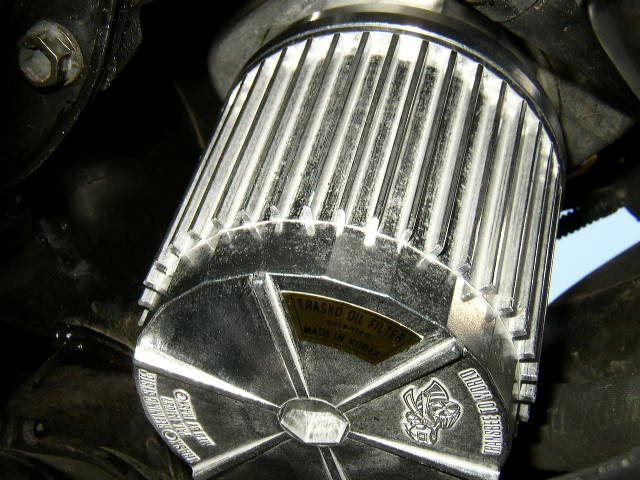
Here is the Trasko unit installed on the filter base.
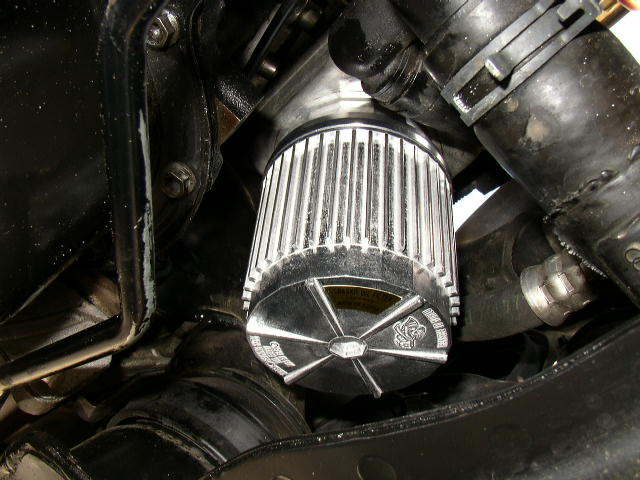
Here is another shot of the installed filter.
I will do an oil analysis at 25k miles of oil use, to gauge how well the Trasko is filtering the oil. They company recommends to change the element at the first 5k miles and then at 10k intervals.
VW Tdi and all VW Diesels Injector Return Line Kit
Replace those old leaking, brittle and cracked diesel injection return lines with my exact fit kit. If you smell diesel fuel or notice that your lines appear wet or brittle, you need to replace them now!
This is a very simple do-it-yourself project. The kit includes a pre-cut set of lines along with the proper end cap/plug.
This hose is the proper braided metric German hose used from the factory. No China made or cheap vacuum hose from your local auto parts store!
This is the correct diesel injection return hose for your four cylinder VW diesel engine.
Only $14.95 plus $2.50 S&H
This kit will specifically fit the following VW vehicles:
All
VW diesel engines