|
Diesel Purge Injector and Injection Pump Cleaning OM617 and OM603 |
| Home |
| Bio diesel and WVO page |
All parts used in these pictorials are available at the diesel parts for sale page
Injector and Injection pump cleaning
This will apply specifically to the OM617 and OM603 Engines
If you are like most normal drivers and have more than a few miles on your diesel car then it is probably time to clean the injectors and injection pump with a Diesel Purge. Over time the injector nozzles, piston and pump will get deposit build-up of carbon and varnish. This is a normal occurrence on engines that DO NOT use a diesel fuel additive in every fill up, or just an engine with lots of miles. Slow stop and go city driving creates deposits much faster than highway driving. Please note these buildups can occur on any internal combustion engine, whether it burns gasoline or diesel.
Often times on older higher mileage diesels, it helps to perform a diesel purge or CLEAN the injectors and injection pump. This process is relatively simple for the DIY person. I am not talking about just dumping some liquid into the fuel tank and driving away. While that is part of any good "prevention" program and should be done, we will learn today to clean the components directly. Let me show you how I performed the cleaning process or diesel purge, on a Mercedes 300 SD. The results can be very dramatic in terms of more power, less smoke, easier starting and better acceleration. Please also note that this process can be used on any diesel that is not common rail injection. Just keep in mind that after knowing the basics of your particular engine such as, where the fuel lines are located, which is the supply and return lines and why we do this, you can do it yourself on any diesel engine.
So lets get started:
Item needed:
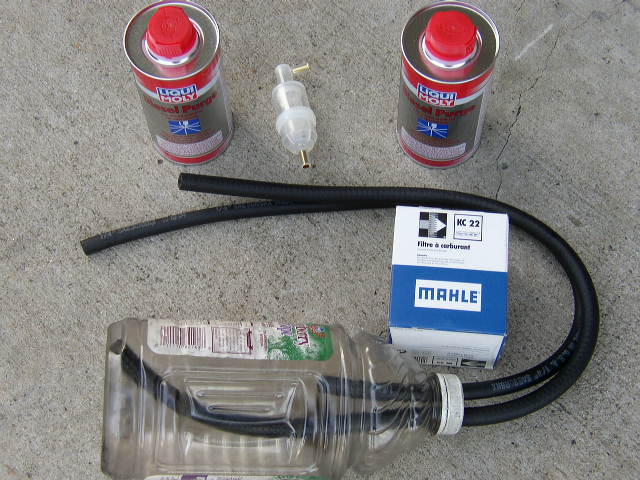
I am using the dieselgiant.com deluxe purge kit for this procedure. This kit has the required (2) bottles of diesel purge, holding bottle and fuel filters which must be changed after doing the purge.

2 cans of Diesel Purge injector cleaner
(1) new inline fuel filter
(1) new spin on filter (not shown in the above pics)
(2) old bolts (optional)
Philips screwdriver
Pliers
Using the purge holding bottle which will be be your temporary SUPPLY and RETURN hose for the engine. Please do not skip this part, it is very important to have the RETURN and SUPPLY terminate in the bottle. (I have tried this myself just clamping the return hose and not putting it in the bottle and had a great fuel leak at the number 4 & 5 injector lines).
The hose that goes all the way to the bottom is the SUPPLY hose the other hose is the RETURN.
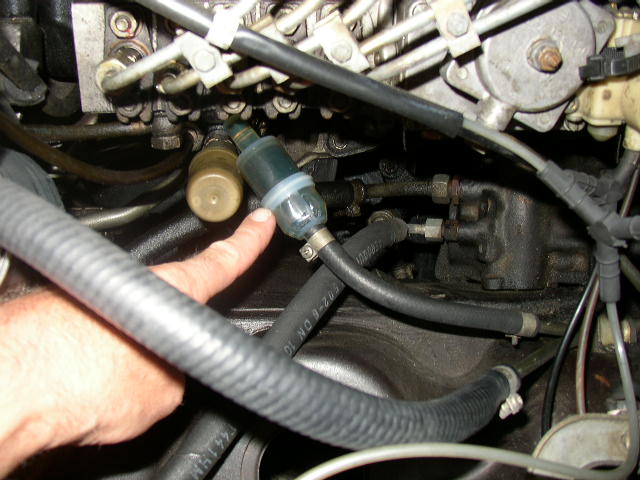
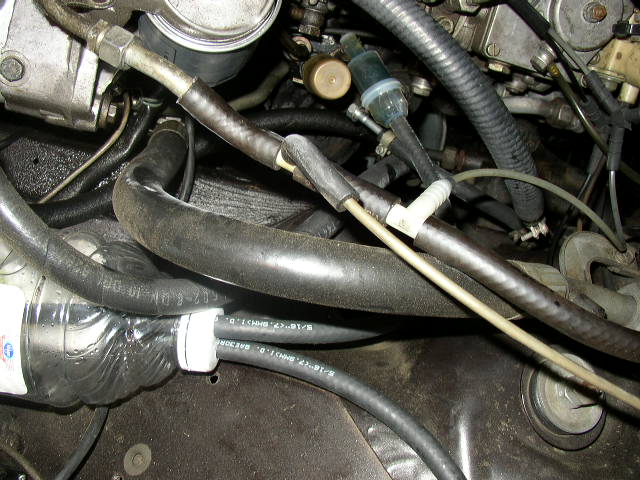
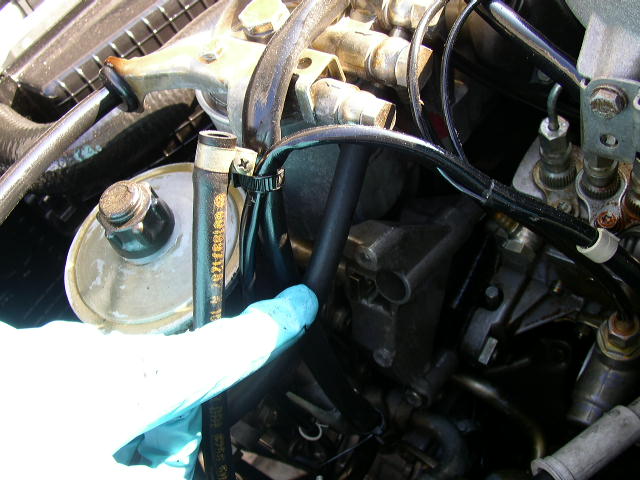
Now locate the supply and return hose on the car. The supply will be the hose that feeds the injection pump and also has a small inline fuel filter in it. Disconnect the hose where it enters the fuel filter.
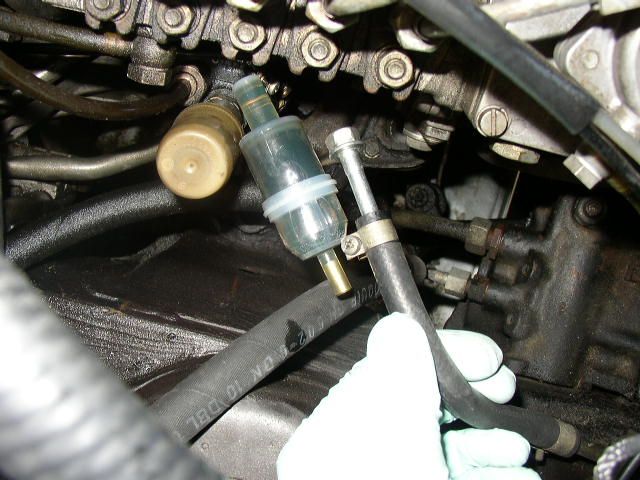
Take your bolt and push it into the hose to keep fuel from coming out. Now take the SUPPLY hose that is in your bottle and connect to the in-line fuel filter on the car. If you don't have or don't want to use the bolts then just clamp it shut with a pair of vise grips.
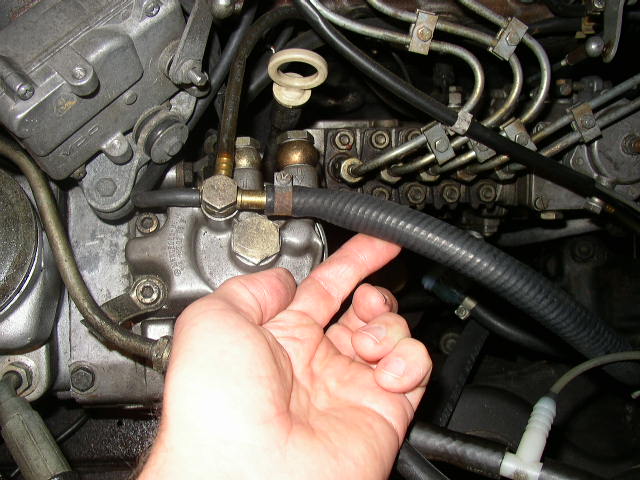
Now locate the return hose. This is a larger hose that is on top of the large spin-on fuel filter. Disconnect the hose at the filter and plug with your bolt.
Now take the RETURN hose that is in your bottle and connect to the top of the fuel filter.

You should now have your SUPPLY hose feeding the injection pump and the RETURN hose coming off the large fuel filter. You have made a "mini" fuel tank. Now pour the diesel purge into your bottle. Make sure the SUPPLY hose is all the way at the bottom of the bottle so it is submerged in the cleaner. The RETURN hose only needs to be in the bottle about halfway in and does not need to be any where near the liquid.
Now start the car and run, revving the engine at different speeds. You may see some smoke which is normal. After the bottle is almost empty, shut off the engine and reconnect your hoses to the engine and restart the engine. (I have even driven the car with this set up several miles and it really blows out some nasty carbon and smoke).
At this point it would be a good idea to change both the in-line and spin on fuel filters. Prime the system and restart and check for leaks.
Now drive and enjoy!
OM603 Pics
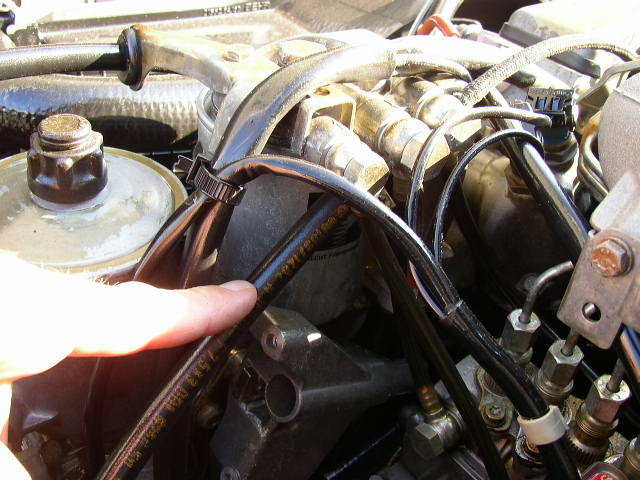
The layout of the OM603 engine as pertaining to the diesel purge is only slightly different from that of the OM617. The differences are noted in the pics.
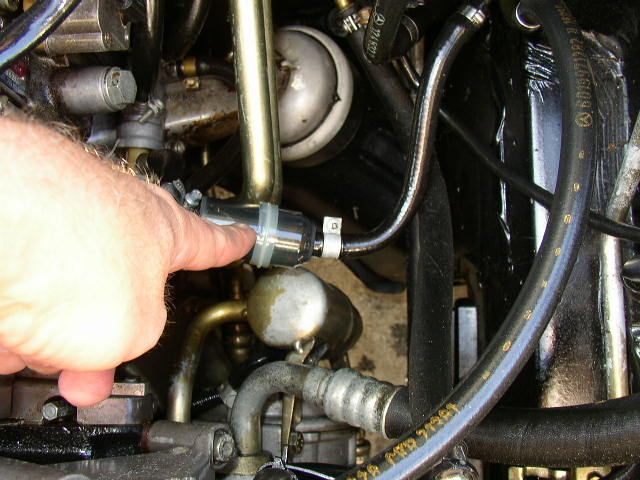
The supply line comes in at a different angle on the OM603 engine. Just look for the line going to the inline fuel filter. This line then goes into the fuel pump portion of the injector pump.
I like to use my own inline filter that I keep on my purge bottle. I just disconnect the inline filter on the car, and place my purge supply hose with filter in its place.
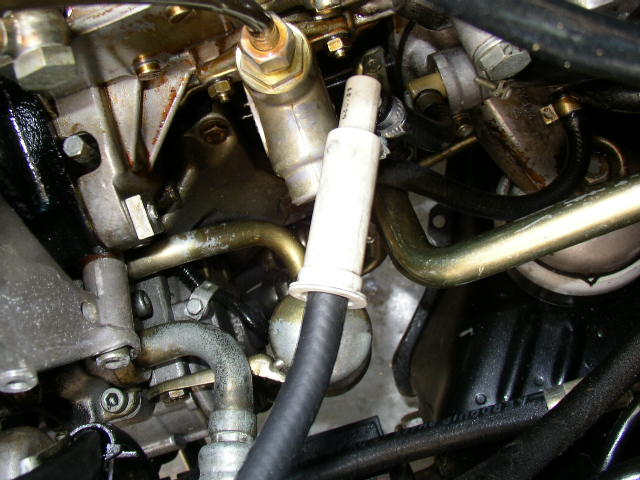
This is the return hose. It also is in a slightly different position and angle on the OM603 engine. Just disconnect it from the banjo fitting...........
.....and install the purge return line hose. Remember the purge return hose does not have to go more than a few inches into the bottle. Just keeps the liquid from splashing around too much.
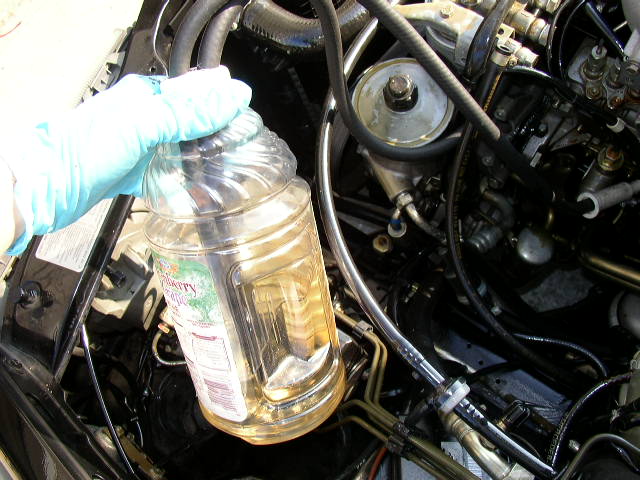
Bottle with both hoses connected and car is running on pure purge. The engine sound made a noticeable sound change after about 1 minute of running. Much quieter at idle and smoother vibration wise. After doing the purge the change in idle smoothness was about 50% better and power was MUCH better. Don't forget to change both the inline and spin-on filters right after finishing the purge.