|
How to Replace the B2 Piston Bore Seal |
|
All parts used in these pictorials are available at the diesel parts for sale page
Mercedes B2 piston bore seal replacement Safety and security tips: Please remember to recycle all your used fluids at an appropriate recycling center. Be mindful to not spill or splash fluids on yourself, others or the ground. Also as a safety tip please remember anytime you are working on, around or under your car, to wear safety glasses and secure the car with wheel stops and approved jack stands!
|
So your having transmission problems and you don't know what's causing it. You have searched high and low on the internet and are confused. Well your not alone. There are literally hundreds of things that can and do go wrong with the Mercedes automatics from time to time. One of the common ailments is the demise of the B-2 piston. This is the component that operates the B2 band brake. Some of the symptoms of a defective unit are: won't go into forward gear, slips out of 1st, bad flaring between 1-2 shift, leaking out of the bore. So if your car has any or several of these symptoms, then maybe you need to check yours out.
The good news is you do NOT need to remove the transmission to complete this job . Some sturdy ramps, heavy duty jack stands, floor jack, eye protection, drain pain and a good selection of 3/8 and 1/2 inch sockets and a transmission filter kit will get you started.
The car that we will be working on is a 1986 300 SDL and my complaint was a massive leak out of the B2 piston bore.
So follow along as I show you how to get the job done right....
Whether you are working on a 123, 126 body car, turbo or non-turbo, most of the steps will be the same. Some minor differences in the way the exhaust is handled can be expected.
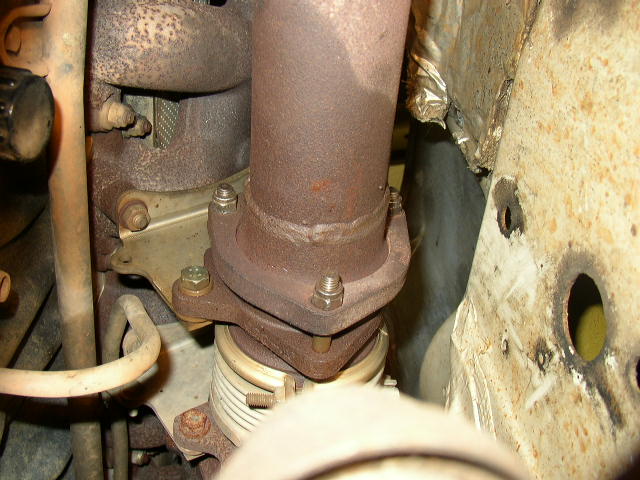
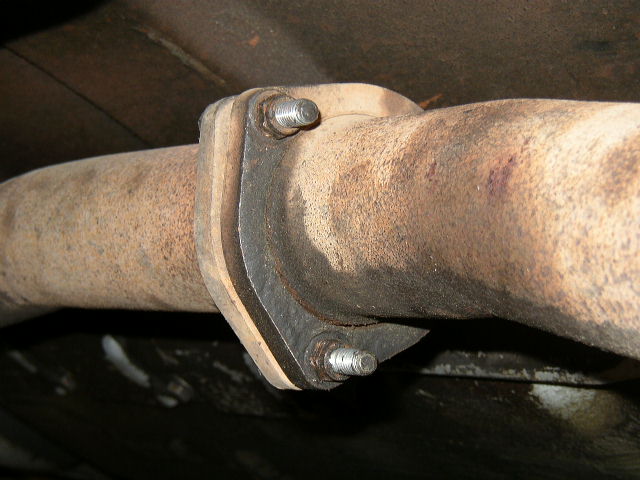
I like to remove the exhaust first to gain additional under carriage room. Remove the pipe from the engine. Using a lot of PB blaster will help those nuts to free themselves.
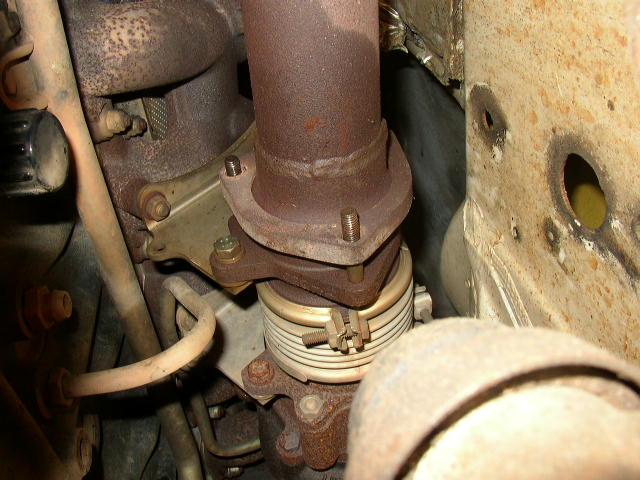
With the nuts removed slide the collar off the studs and down the pipe out of your way.
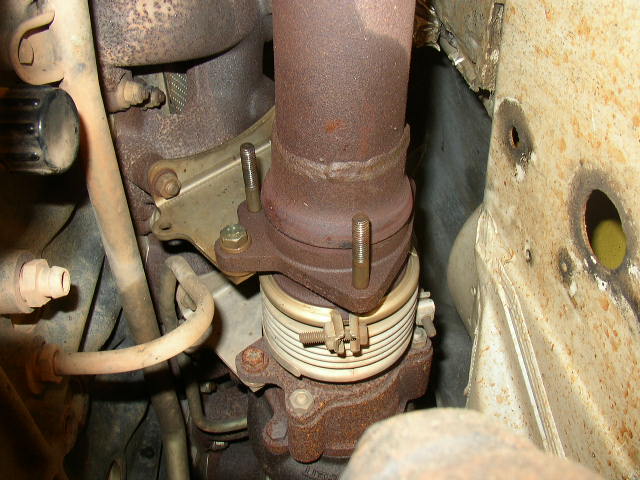
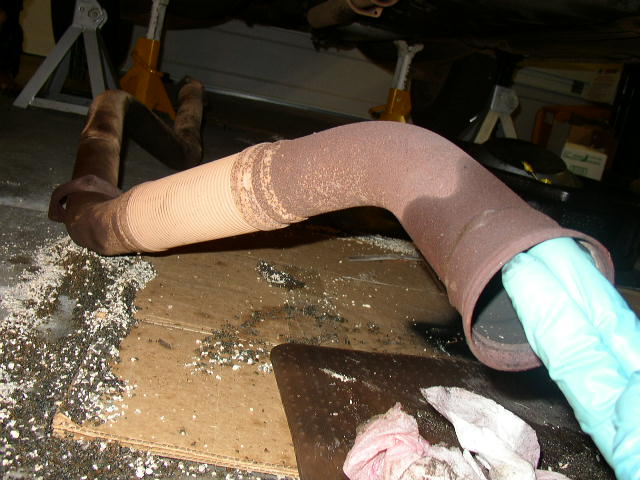
With the nuts and flange removed you will probably have to use a crow bar and rubber hammer to get the rust bond to break the pipe from the flange.
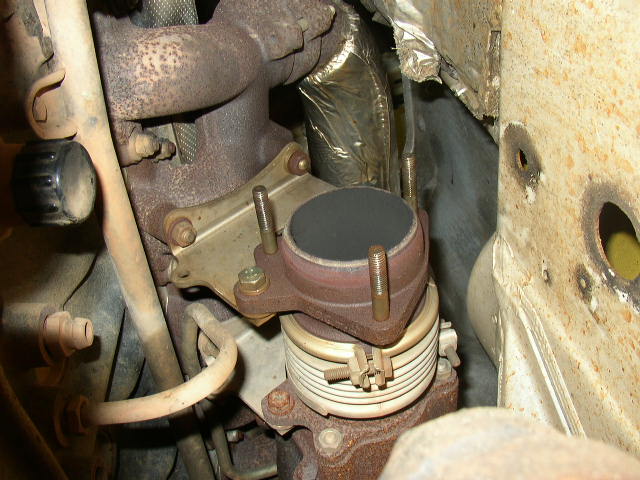
Once the exhaust pipe is removed, your done in the engine area.
On a 126 car the exhaust is bolted together in the middle. Remove the bolts......

...Separate the 2 pipe halves.....
Remove the pipe from the car and move it out of your way. This is actually the hardest part of the job. If you have a 123 body car, then you will have to remove the rubber hangers and take the whole exhaust down. Don't worry it actually easier and faster than doing the 126 car.
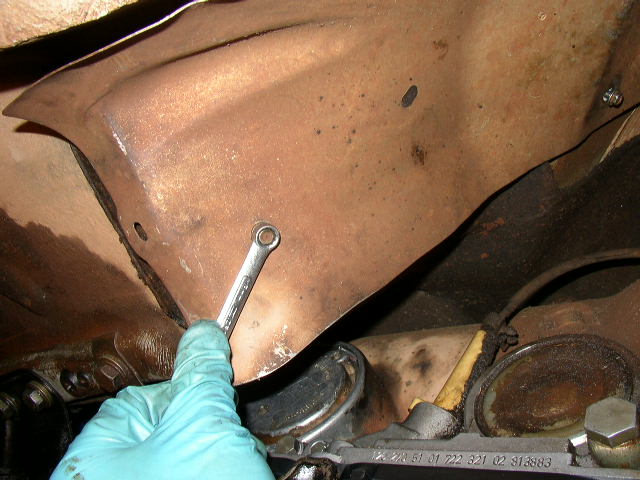
Remove the heat shield that was above the exhaust pipe.
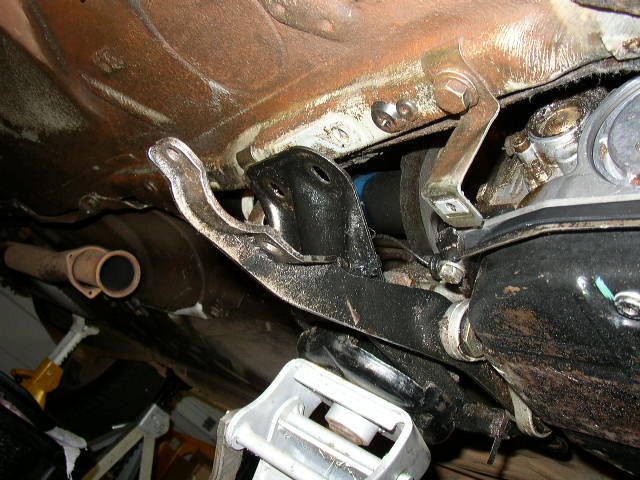
Locate your floor jack under the transmission mount and remove the four bolts holding the transmission cross member to the body of the car. Then slowly lower the rear of the transmission down.

Now drain your transmission pan into a suitable container. If you want you can also drain the torque converter while you are doing the job. You can let the transmission dip into the pan as long as you wish. At this point you can remove the pan or wait untill later, your choice. I must confess I had to do this job TWO times. Why? Because I was too lazy to remove the pan to insure the push rod was secured into the B2 piston properly. I got the car stuck in the street in because it would not go forward. Getting 3 of my neighbors to push my car back into the driveway and up the ramps was a little embarrassing. Please learn from my errors.
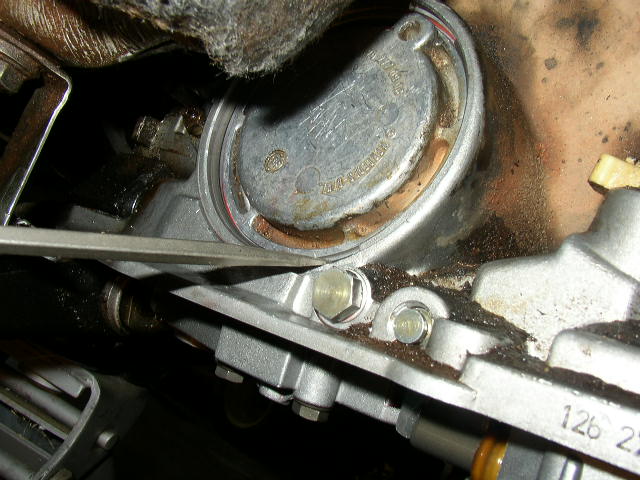
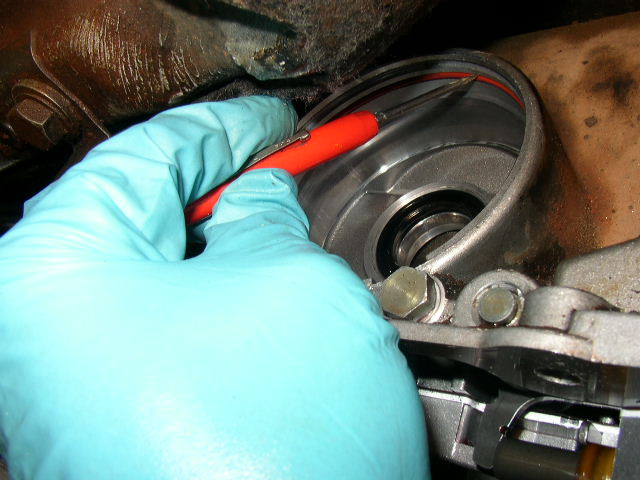
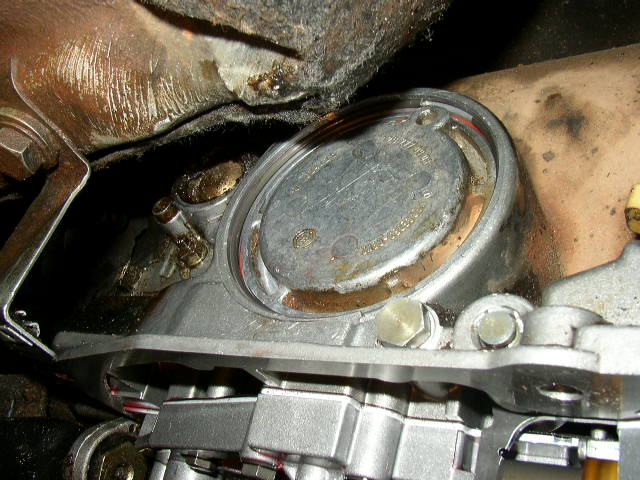
The B2 piston cover plate the rear most cover of the 2 on the passengers side of the car. As you can see I chose to remove the transmission pan before I removed the piston. Take a small flat screwdriver and insert it into the cutout area and lift up on the circlip, while pushing on the cover with your free hand . It will launch itself if your not careful.
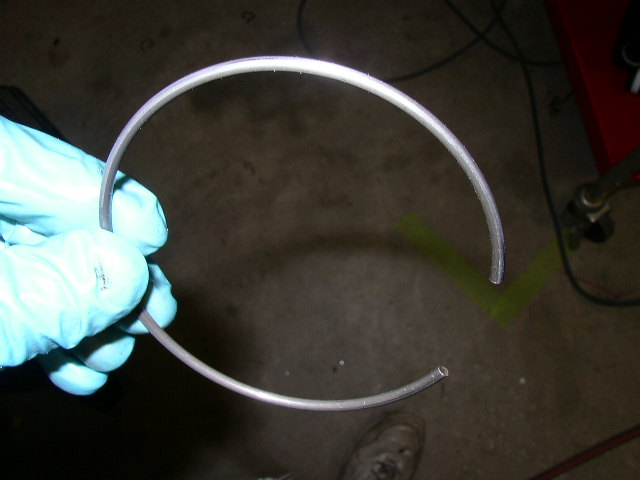
Large circlip removed.
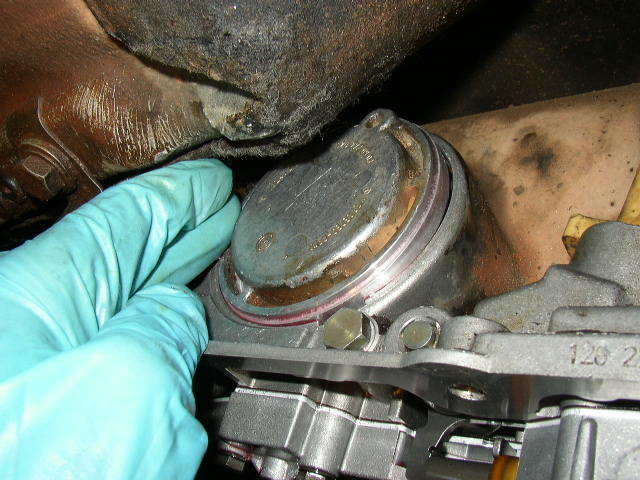
Gently work the cover out of the bore.
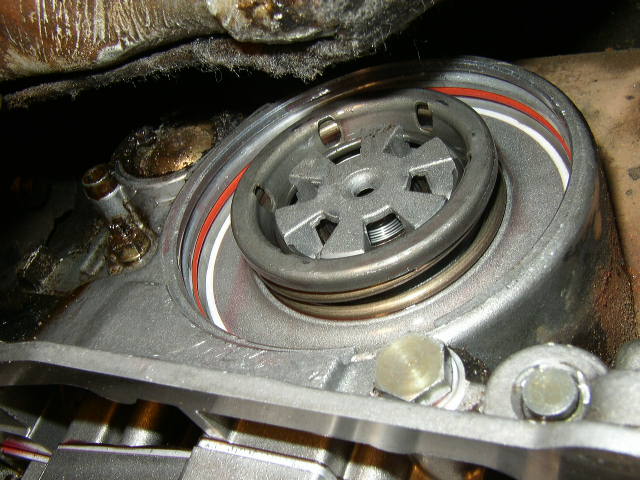
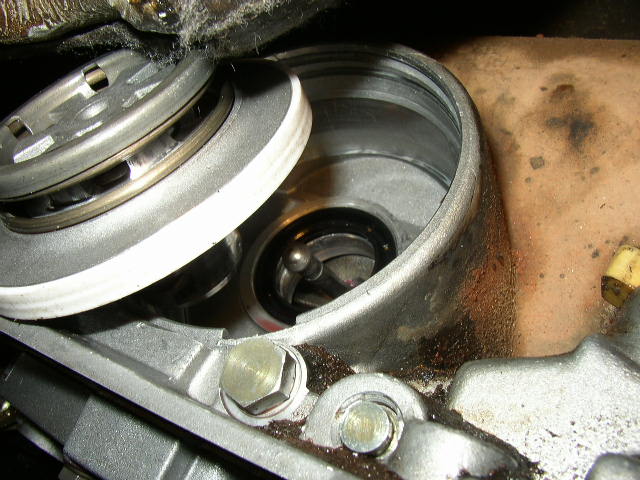
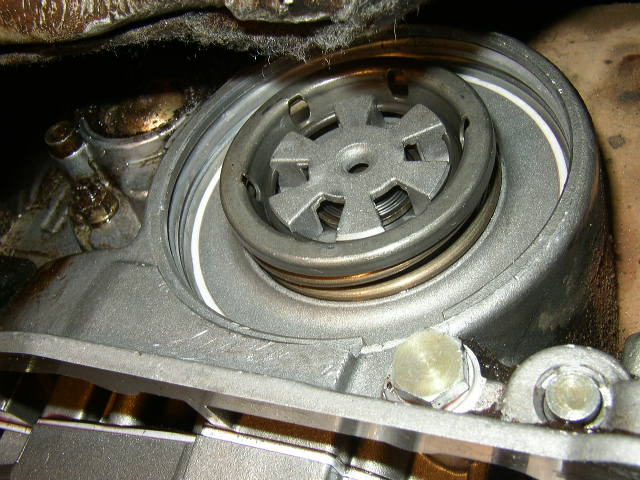
There is the B2 piston and orange O ring bore seal. On my particular car the bore seal was the problem, my B2 piston was just fine. Just very gently pull the piston out of the bore along with the push rod.
You can see the pushrod touching the band brake. Pull the rod out also.
I used a small screwdriver to remove the bore O ring.
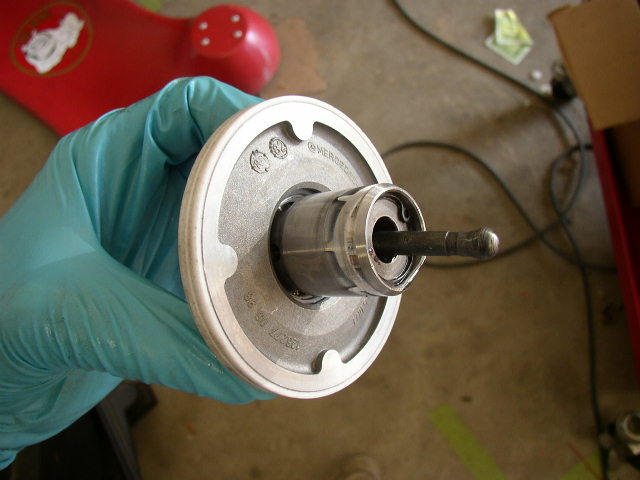
I actually had the upgraded B2 piston in this transmission. You can see how the push rod fits into the end of the piston. If your B2 piston is broken like many of them will do then the other side of the piston is what actually breaks.
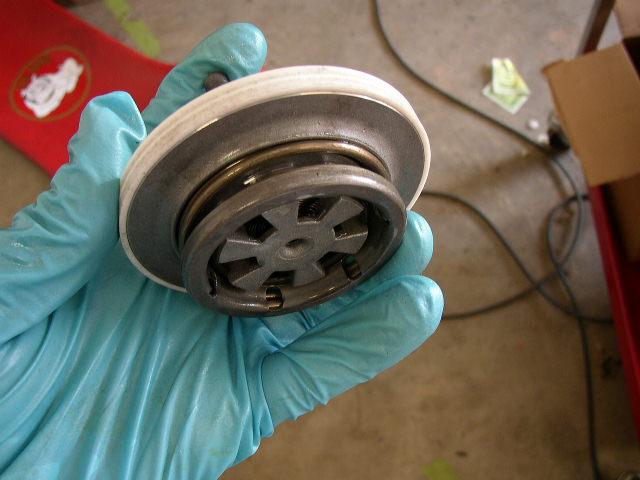
This is the side that will break (where the spring is). If your piston came out into 2 pieces then you will have to install a new B2 piston and seal. My piston still had the older type metal sleeve to fit into. The new type of sleeve is plastic. The sleeve is in the transmission, in the center of the rubber seal. Since this transmission was shifting perfectly and had no signs of sticking, I left the metal sleeve in.
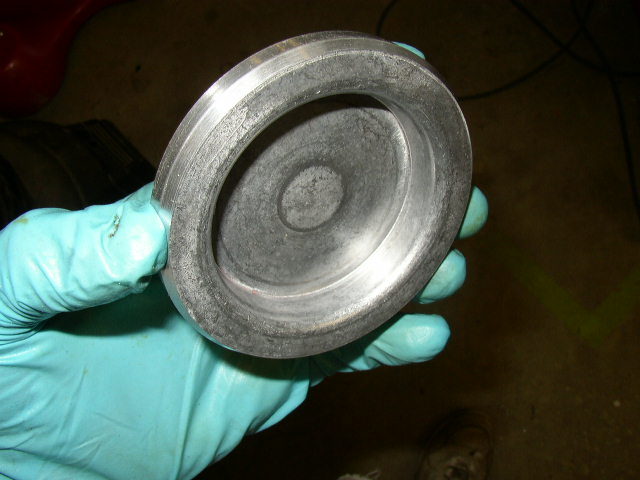
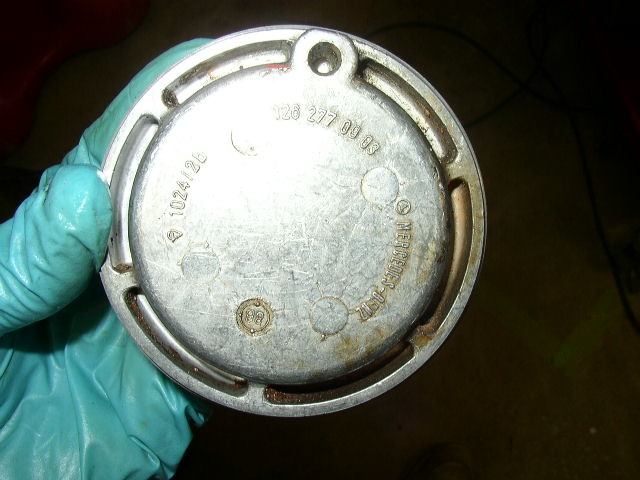
This is what the back side of the B2 piston cover looks like.
Front side of the cover.....
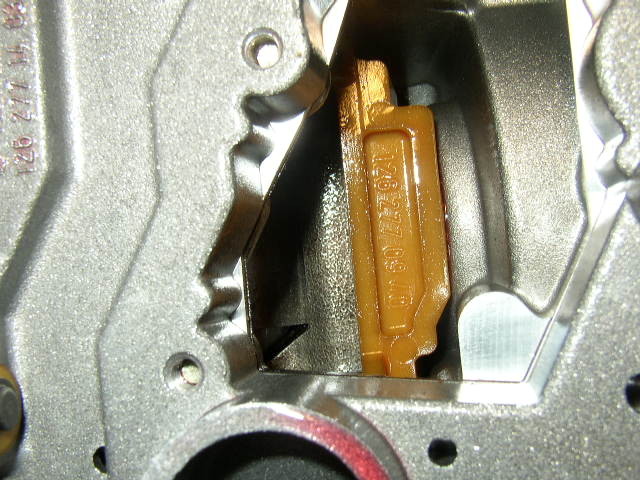
Looking up into the transmission you can barely see the brake band to the left of the brown plastic piece. You will need to look at this after you install the piston and push rod to ensure the push rod engages the brake band. I did not do this simple step the first time and caused me to do the whole job over.
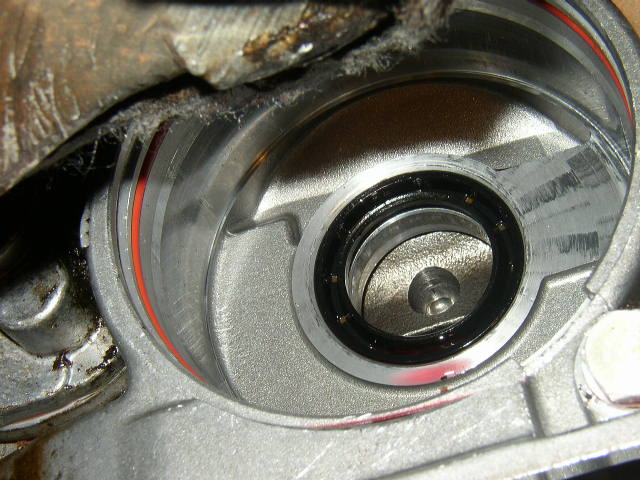
You can see the metal sleeve inside the rubber seal in the very center of the bore. The indention in the dead center is the foot of the brake bank where the pushrod will rest when installed properly. If your piston was broken then install the plastic sleeve in place of the metal one with your new piston.
Now take some Vaseline and put on the end of the pushrod and insert that end into the brake band hole. (The push rod is in the dead center). You will see the indention in the brake band where the rod goes. It only fits in one place on the band. The Vaseline will keep it from falling out and will not cause a problem in the transmission. Then lube up the bore with some transmission fluid and insert the B2 piston. Remember the push rod end has to go into the center of the B2 piston.
B2 piston fully installed in the bore. The bore seal will be installed last. If you push on the B2 piston you can look inside the transmission form the bottom and see if the push rod is moving the brake band. If it is then you are in good shape.
Next I installed the O ring into the bore. I pushed the B2 piston in so it would give me more room to work. Lubricate the O ring with transmission fluid and make sure that it is seated in the inter most groove all the way around.
Lubricate the edge of the cover with transmission fluid and slowly push it into the bore. DON'T get the cover cockeyed or you will destroy the O ring. Just push with equal pressure on both sides of the cover and will go in fine. Since I only have 2 hands I could not take a pic while I was doing it. You will need to push the cover in further to insert the circlip in its groove. You will not need any tools for installing the clip as it does not have a lot of tension on it.

I am using the transmission filter kit from dieselgiant.com for the next steps.

I installed a new transmission pan filter....
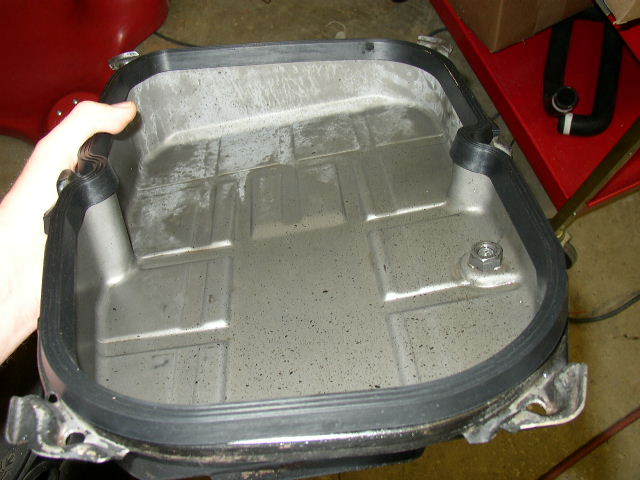
....and the new pan gasket. I had previously cleaned up the pan and inspected it for any debris or problems. As usual I found no problem in the pan.
Install the pan, lift the transmission back up and secure the mounts to the body. Reinstall the heat shield and exhaust pipe.......
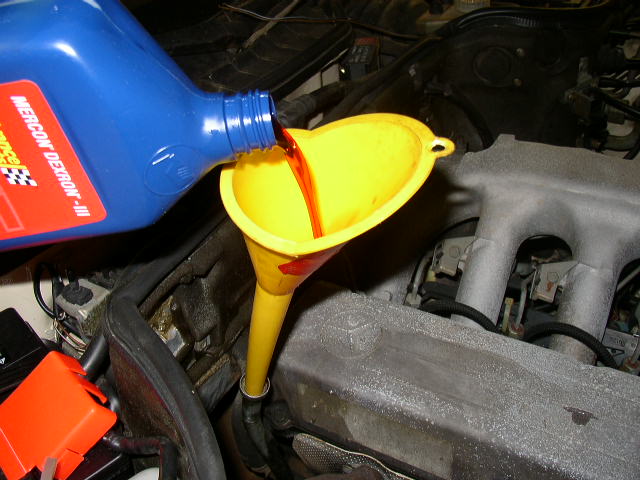
...Refill with nice clean new transmission fluid. It took about 5 quarts to get the transmission back to full. Now start the car and check for leaks. Move the gear selector thought the gears to be sure everything engages. Now road test the car and enjoy the ride!