|
|
|
|
|
Mercedes diesel maintenance tips (page 2) |
| Home |
| Bio diesel and WVO page |

All parts used in these pictorials are available at the diesel parts for sale page
How to repair your Ignition lock if your key is stuck or broken
So you have got a key that is stuck, or won't turn your ignition lock? This can be one of the most frustrating things to deal with on your old Mercedes car. I recently had an 85 300 D in the shop for some other maintenance. Now I knew the key had been a little tough to turn from time to time, but I ignorantly ignored it. Well like all things in life, "Mr. Murphy's law" was working overtime that day. I had just turned off the car and taken the key out of the ignition, when I just knew something was not right. On instinct, I put the key back in to tried and start the car, but it was not to happen. Over the next few days totaling several hours, I wore a blister on my finger, used graphite, silicone spray, banged the lock, vibrated the lock with a sander, etc. You name it I tried it! Every trick I could find on the internet to get that darn lock to turn, I tried it. At that point my only real option was to call a lock smith and pay him about $400 to have him remove the hardened steel theft resistant tumbler. Or was it........
Well I don't know if it was the thought of spending $400 on some lock jockey drilling up the car, or me not wanting to be "beaten" by a 20 year old car, but I decided I was going to remove the lock or else. So follow along on my quest to save the $400 and do it myself......
On this pictorial, I am assuming several things: 1) You are fairly handy with tools 2) You already know how to remove the dash cluster 3) you are not scared to get intimate with the car 4) You are not afraid to do a little "grinding"
I would say this job rates a solid 4-5 on the difficulty scale. Most DIY'ers can do this, just be patient.
Ok first go ahead and remove the dash instrument panel cluster and set it aside.
Next we want to "drop" the steering column down a bit. There are 2 large studs that hold the column to the dash support. Remove the large nuts and washers. Don't pull the column down yet.
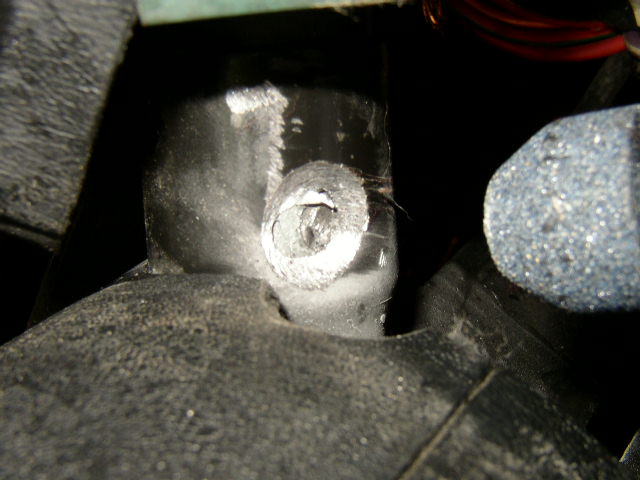
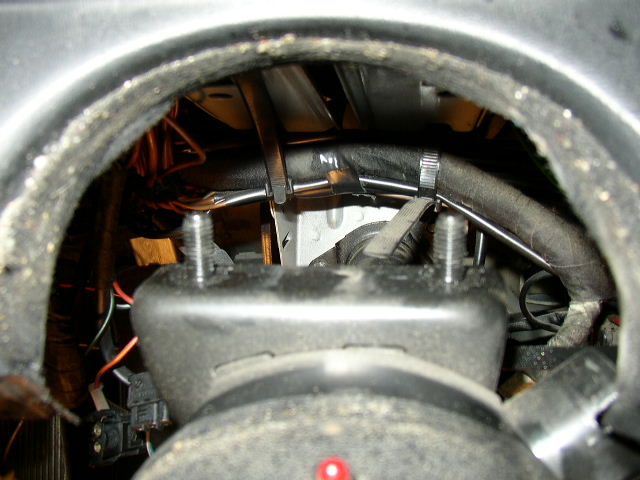
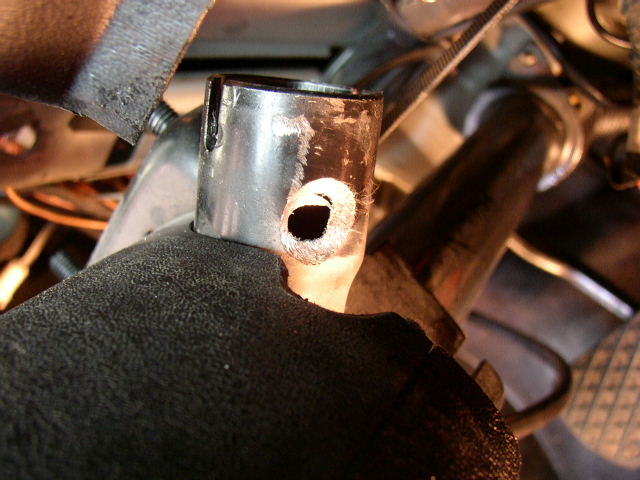
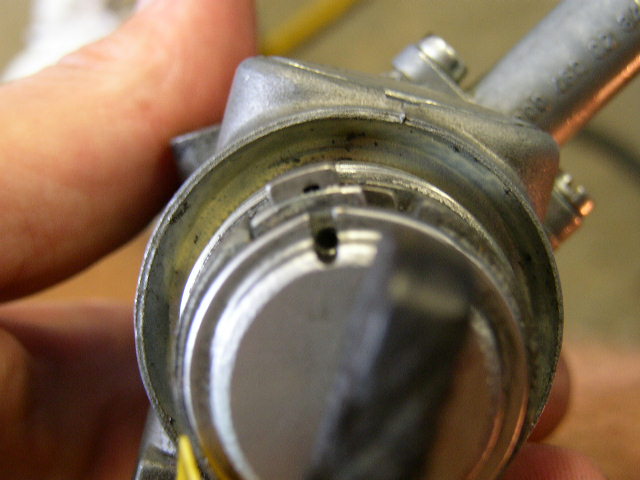
Now if you could just pull the entire lock assembly off the column, then it would not be "theft" proof now would it? Looking under the dash at the lock assembly, you will see a U clamp with a large bolt running though it securing the lock assembly to the column. Remove the clamp. Now locate the pin that holds the lock to the column. Normally this pin can be pushed in when the key is turned, but you cant turn your key, so the pin is in the locked position. What you must do is grind the pin below the surface of the steering column. ***Now understand by doing this, you may render the steering lock portion of the assembly null and void. In other words, if you choose to re-use the lock assembly, and just install a new tumbler and key, the steering wheel may not lock when the key is removed. If this is NOT acceptable, then you will need to go get a new or used, lock assembly that has the pin intact.
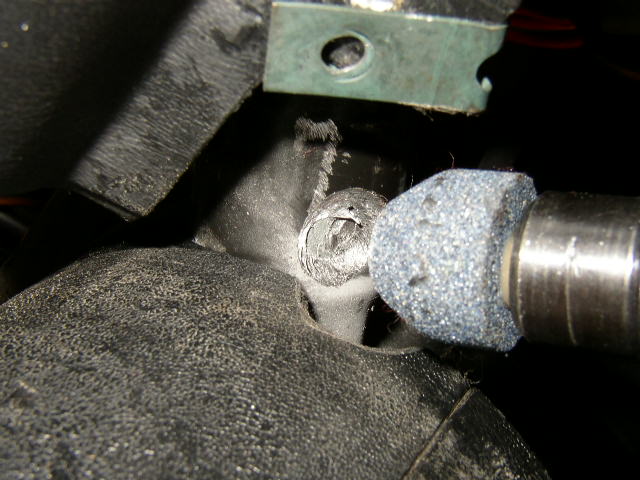
So using your small grinder or dremel tool, grind the pin just below the surface of the steering column. This was the smallest grinding bit I had, so it made a bigger grind area than I wanted, but it worked. Next time I would have used a dremel with a smaller bit, and left the column material untouched. Never the less, my steering wheel locks like it was new after the repair was done because I got another used lock assembly..
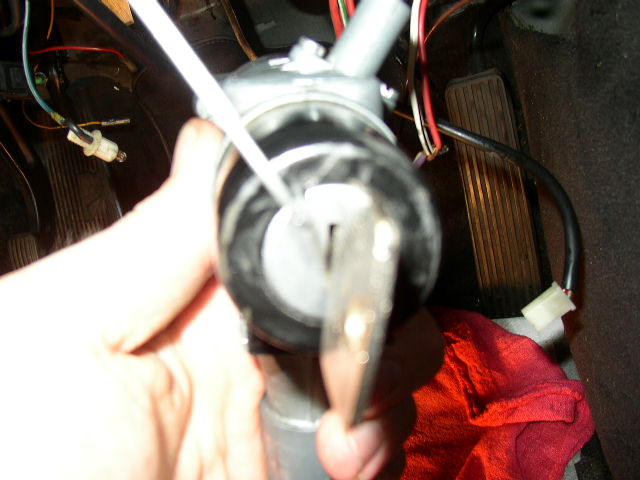
When the pin is ground down, you will be able to feel the lock assembly get real loose in the column. At this point it is time to drop the column down a few inches. I removed the bolt securing the dash on the left side, right below the parking brake release. Just look under the dash and you will see it. This will give you just enough "slop" to pull the column down. Now very carefully, pull on the dash right under where the ignition switch is, and simultaneously start pulling the steering column down. As the column starts to move down you will have to manipulate the key assembly to clear the opening in the dash. You will get the hang of it as you are doing it. It is really not that complicated, but kind of hard to explain it in words.
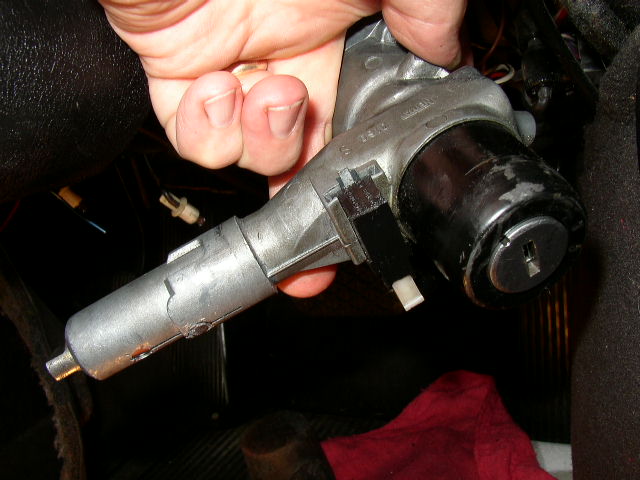
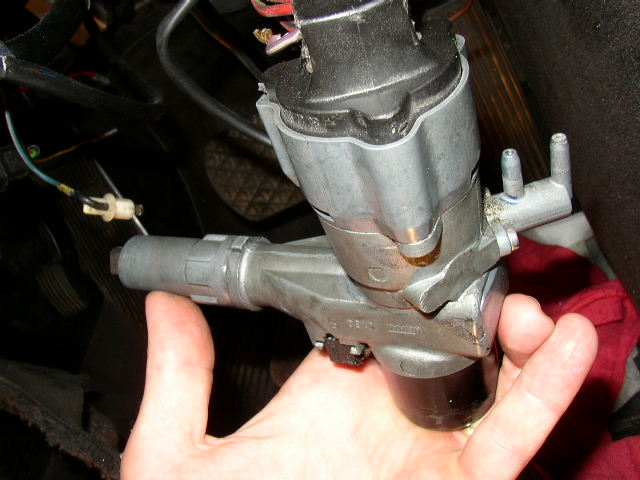
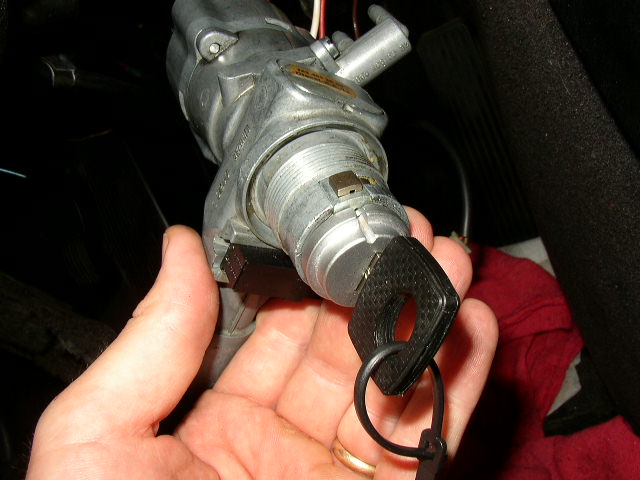
When the column is down enough to allow the lock assembly freedom from the dash, then you can just pull the lock assembly out of the column. Then remove the single wire to the key buzzer. Also mark the placement of the 2 vacuum lines on their respective ports. Do not get them mixed up, you car wont shut off! Don't try to remove the mess of wires connected to the back of the lock assembly just yet. The 2nd pic is what the column looked like after the lock assembly was removed.
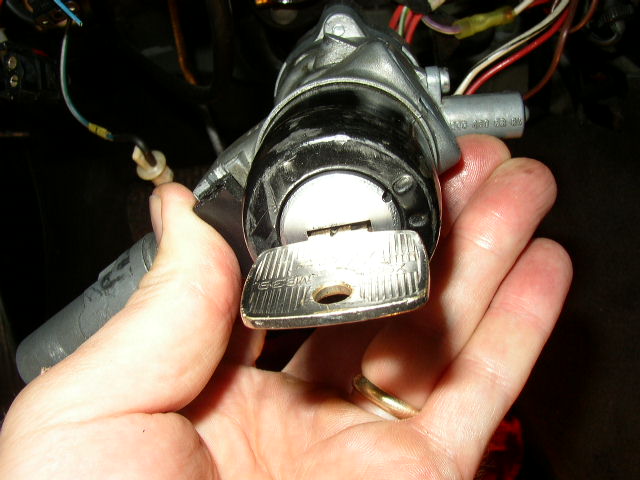
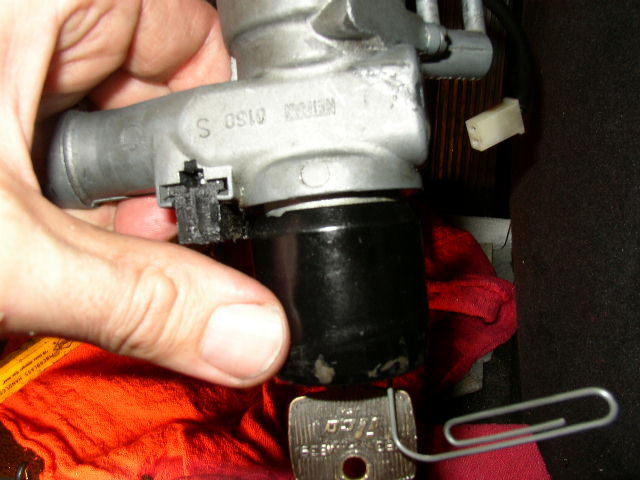
Lock assembly removed and showing the pin ground down on the lock assembly. The main function the pin has, is to keep the lock assembly from being pulled out of the steering column by a thief.
Now the problem with my lock was sticking tumbler pins, that would not allow the steering column lock to disengage. By turning the lock up side down and shaking it, then pressing the column lock pawl with my thumb, the key turned very easily. Viola! Now I have a turning lock cylinder. I did this several times and the key would only turn with the lock assembly upside down. Hmmmm we may have 2 problems with this unit as we will find out later. If you key is broken inside the cylinder then shaking it upside down will more than likely allow it to drop out. You may have to use a small pick and a shaking motion to get it to free up.
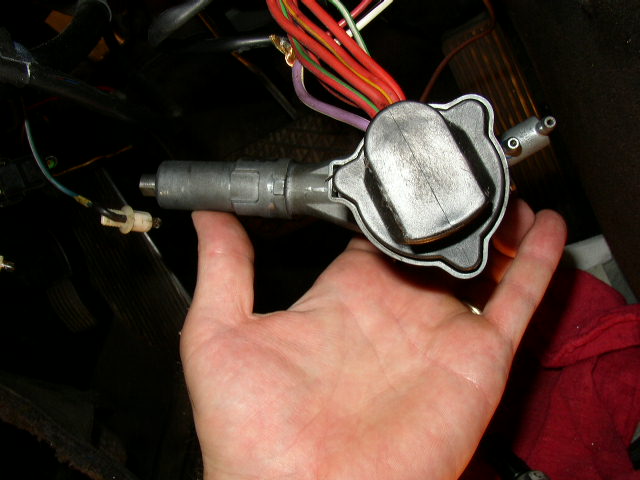
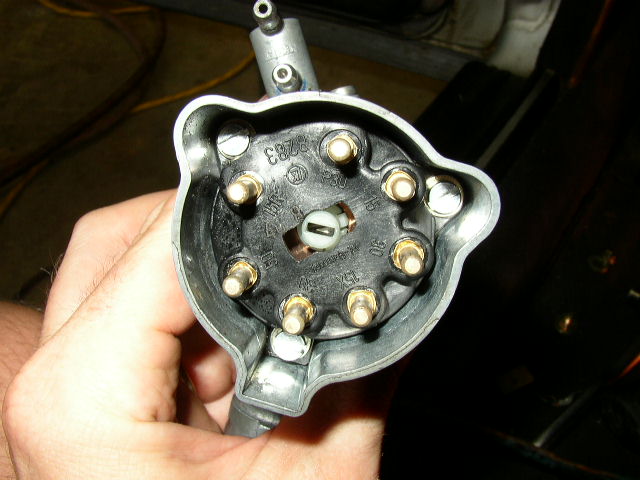
Now after you have had your victory dance, and turned the key enough to satisfy your sense of domination, then its back to work. Turn the key to the second notch on the black ring and leave it there for the rest of this project. Now you may disconnect the harness assembly at the back of the lock assembly.
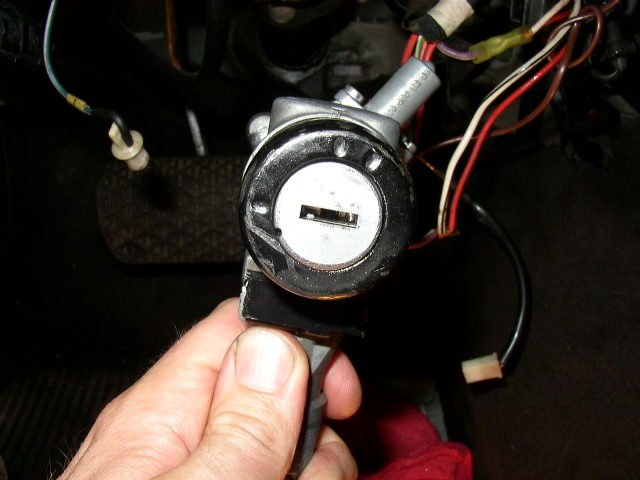
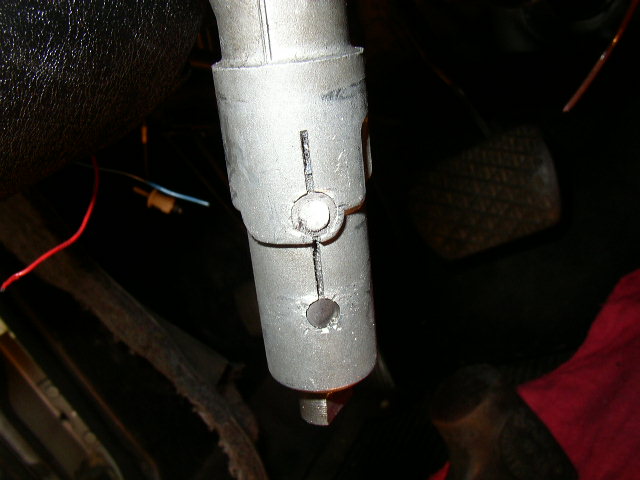
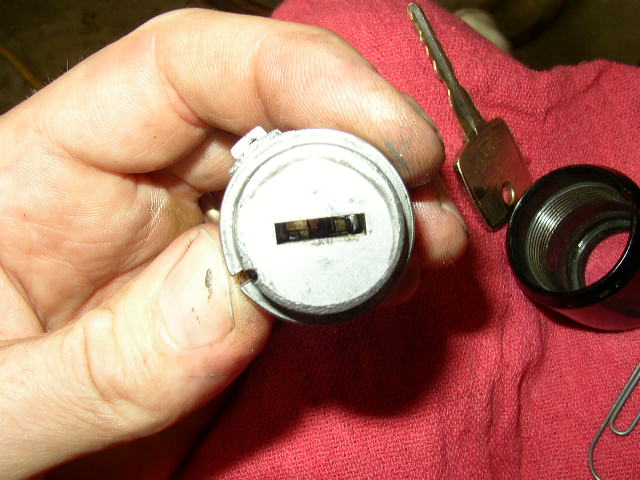
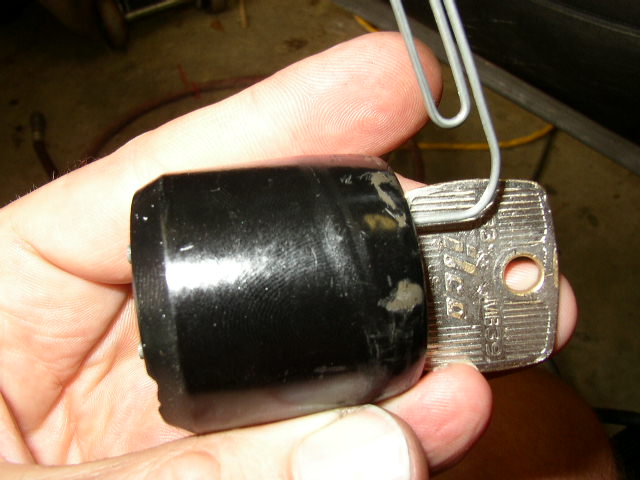
Now its time to take out the lock cylinder. Turn the cylinder with the key to the 2nd mark on the black ring. Then take a small paperclip and insert it gently between the lock cylinder indentation and the black ring. Your goal is the get the paperclip into the small hole inside the tumbler. By doing this, it will hold down the locking mechanism so the black ring will unscrew. Keep the key and paperclip in their same positions while unscrewing the black cylinder.
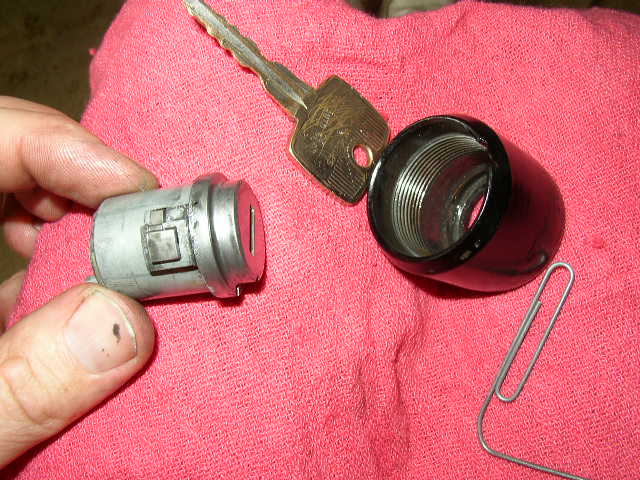
With the cylinder unscrewed, you can pull the tumbler straight out of the lock assembly
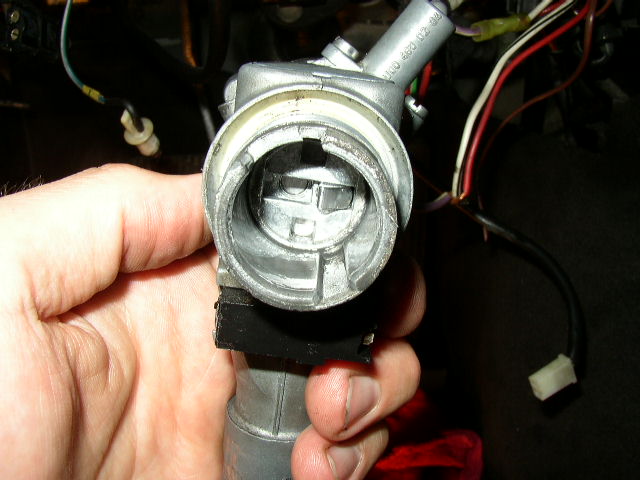
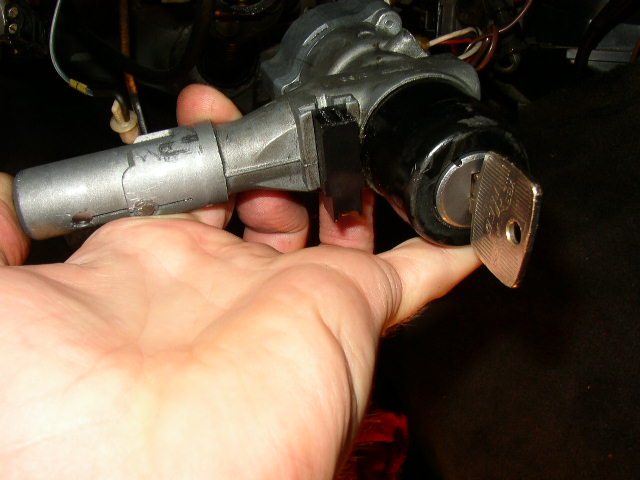
This is what the assembly looks like with the lock cylinder removed. Next pic is with the cylinder in the assembly, minus the black ring. My lock assembly was also defective, so I went the junk yard and got another one that was smooth. Now we are ready for installation................
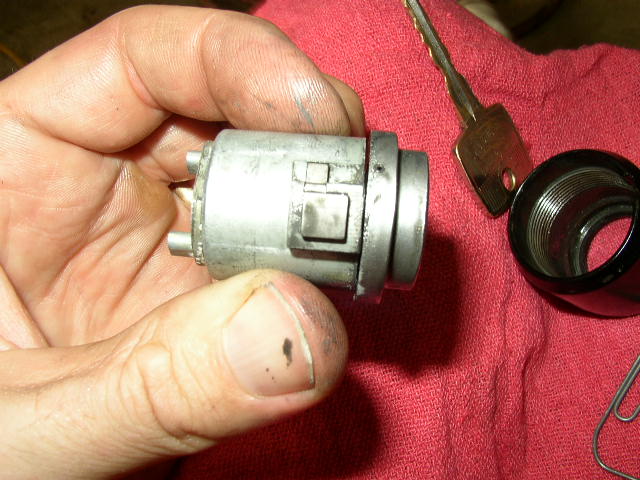
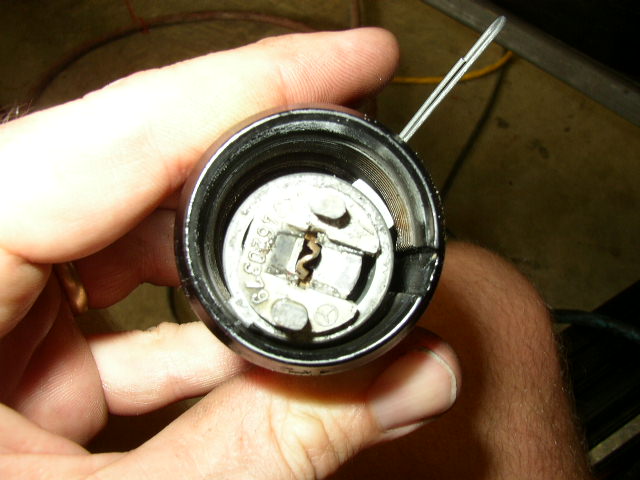
Front, side and rear view of the lock cylinder. Not the small hole that the paperclip fit into on the front. Note the large square locking pawl on the side that engages the black ring, to prevent the black ring from turning with the paperclip removed.
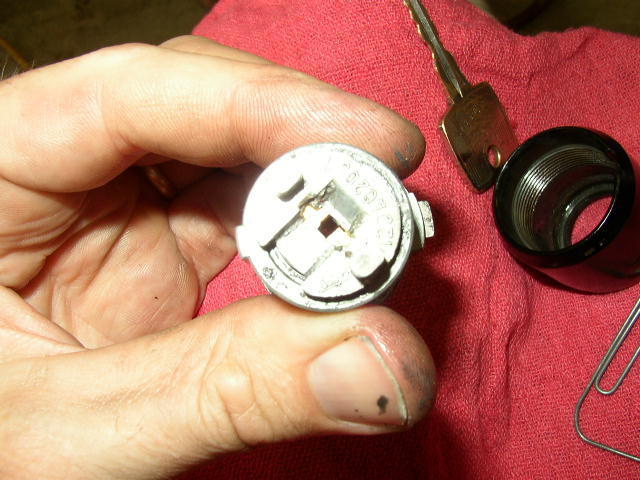
This is a close-up of where the paperclip is going, and the hole it goes in. Note the behind the hole is the lock cylinder pawl. Normally with NO paperclip in the hole, the pawl is in the up position like it is now. This keeps the black lock ring from being unscrewed. Seeing the lock cylinder can help you when removing the lock, because you can see why you need the paperclip.
Take the new ignition tumbler and insert it into the black ring. Make sure the cylinder locking pawl that will be depressed by the paperclip, is in its proper position in the black ring. Look into the back and you will see what I mean. Then turn the lock cylinder to the 2nd position and insert the paperclip to depress the locking pawl. Making sure the lock cylinder is in the proper orientation to the locking pawl groove.

Reinstall the assembly you just set up, on to the lock assembly. It may take a few tries to get everything lined up. Once the cylinder and black ring start to line up, tighten the black ring back down on the lock assembly. Keep the key and paperclip still, while screwing the black ring on. Once you get the ring nice and tight, try to make the 2nd hash mark on the black ring, line up with the indentation in the lock cylinder. It will probably NOT line up perfect, but as long as its close, its ok.
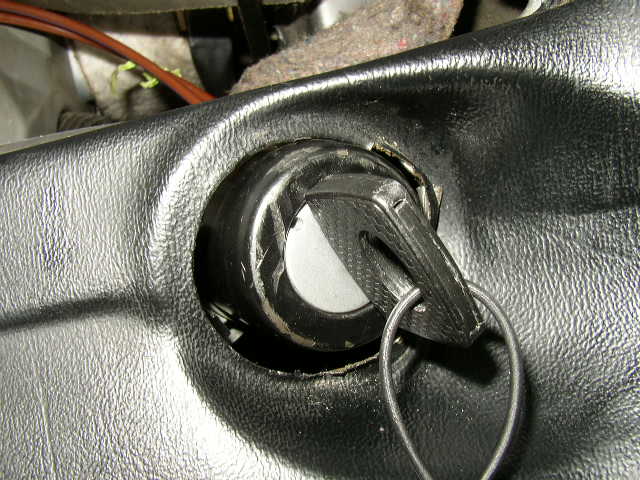
Next is just the reverse of disassembly. Install the rear harness on the lock assembly. Slide the lock assembly back on the steering column, making sure the locking pin lines up in the hole you ground down on the old assembly. If you are reusing the original lock assembly just get it close, but now the steering wheel may or may not lock. Hook up the "key in buzzer" wire. Put the clamp back on the steering column but don't tighten yet. Move steering column back to it upright position and secure. Install the 2 vacuum lines back on the lock assembly. Reinstall the lower panel. Reinstall the dash cluster.
Now test the key and make sure the car will start and shut off. If it does not shut off you probably got the 2 vacuum lines reversed on the lock assembly. Put graphite in the lock to keep it working smoothly.
Now that was not so bad was it?
How to replace your timing chain on the 617 engine
One of the most disastrous things that can happen to your engine, is a timing chain failure while running. At best you are looking at a few bent valves and a whole lot of labor. At worst you can crack your head and camshaft assembly and other assorted goodies. The best advise I can give, is treat this as a PREVENTIVE maintenance item. It is not a hard job to do before the engine is destroyed. So with that being said, lets actually see how the procedure is done. This procedure was done by Mat Cama at Old World Automotive www.oldworldauto.com in Lilburn Ga. So follow along as we install a new timing chain.......
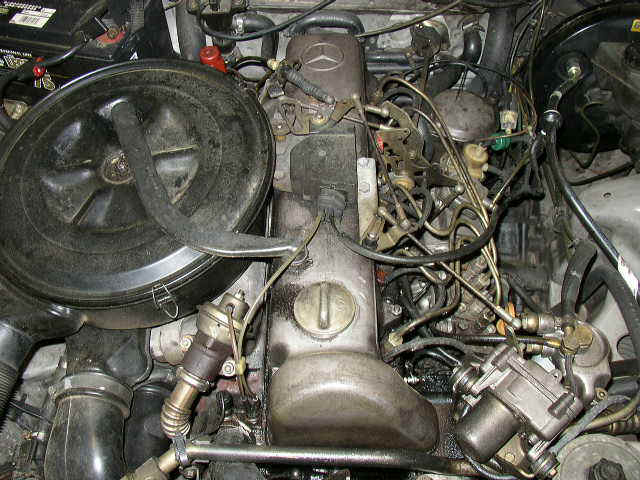
Normal garden variety 617 turbo diesel engine with 270k and the ORIGINAL timing chain. Don't let you car go this long!

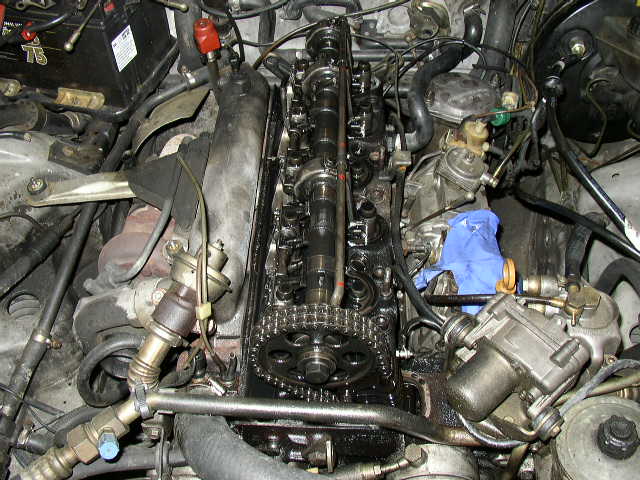
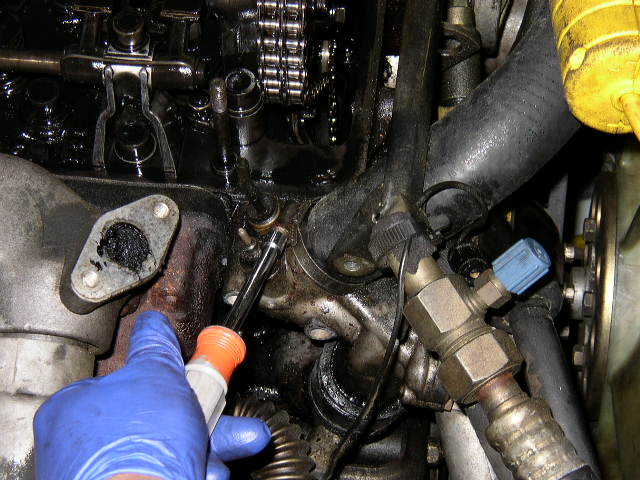
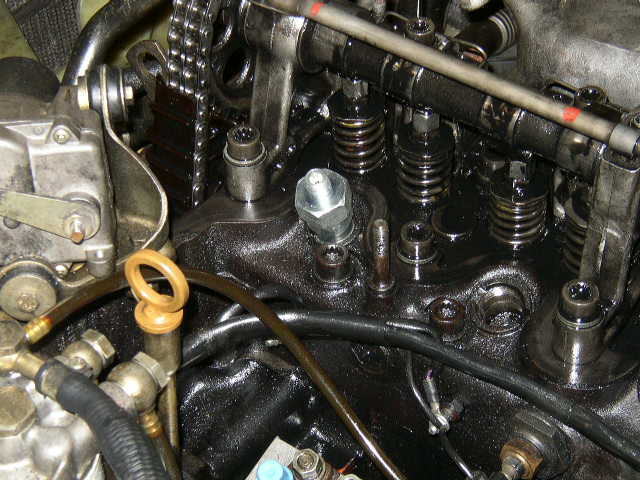
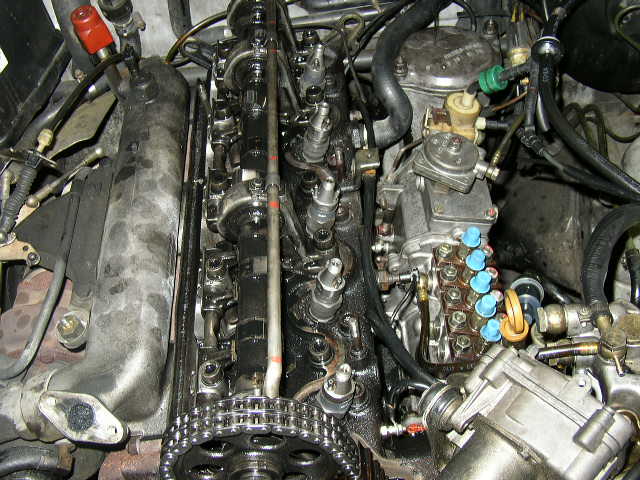
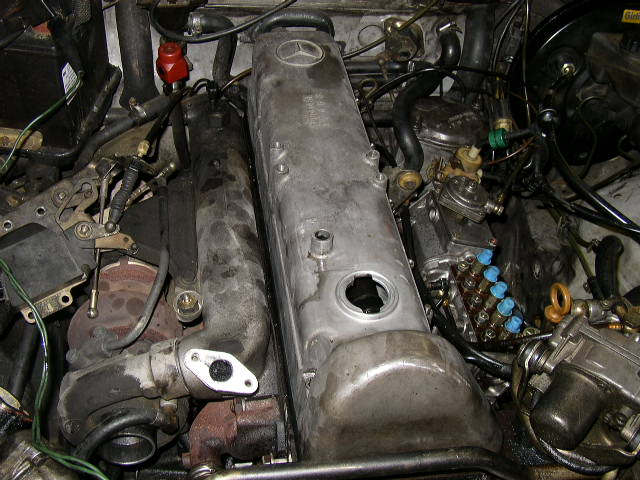
Remove the valve cover, linkage, air cleaner assembly, injectors, and fuel lines.
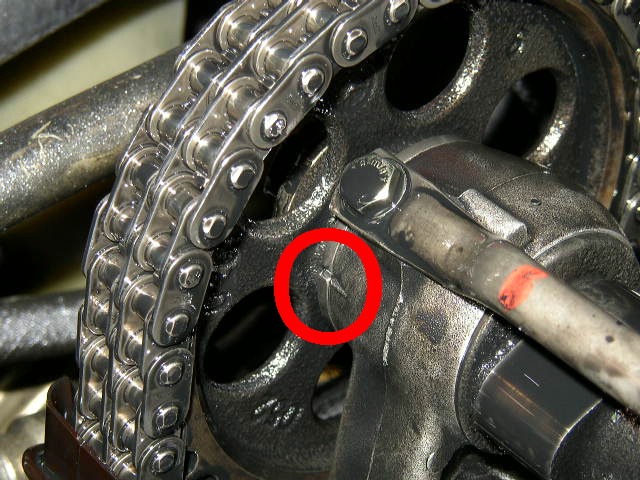
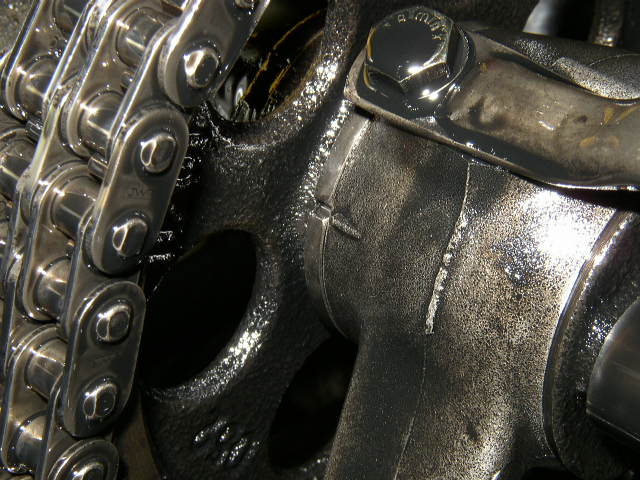
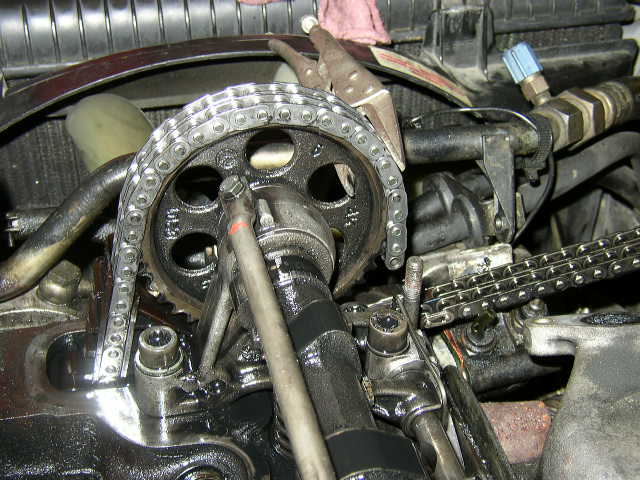
Line up the timing marks on the camshaft gear and the cam tower. An easy way to rotate the engine without using the crank bolt, is to use the power steering pulley bolt. If the belt is tight enough, it easily turns the engine over. ** Only rotate in the running direction which is clockwise.
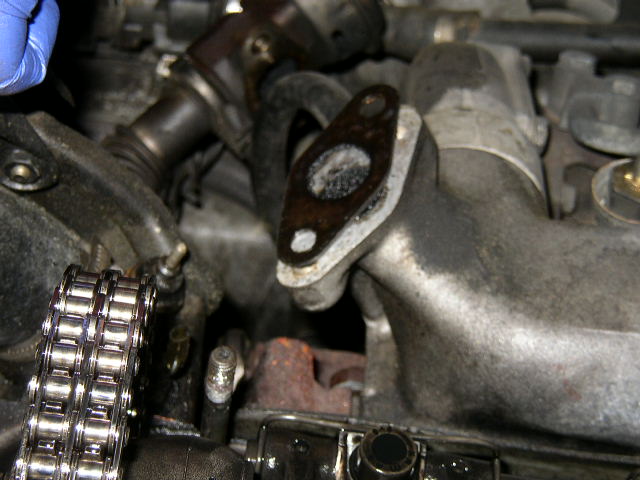
Remove the EGR assembly.....
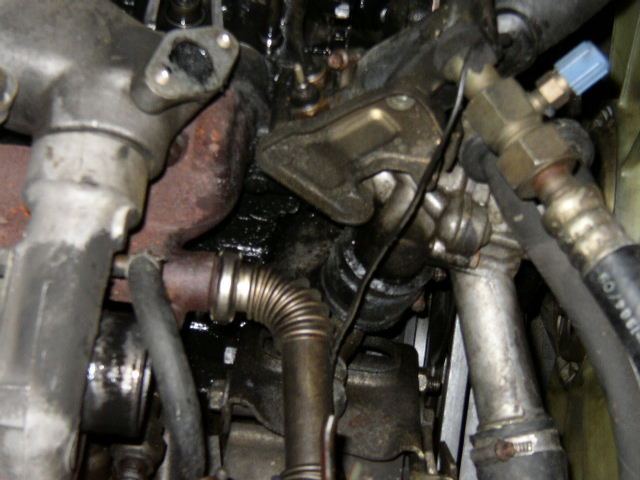
Remove the thermostat housing. This is a great time to install that new thermostat you have been putting off, along with the proper Mercedes coolant. Go ahead and do a citrus flush while you are at it.
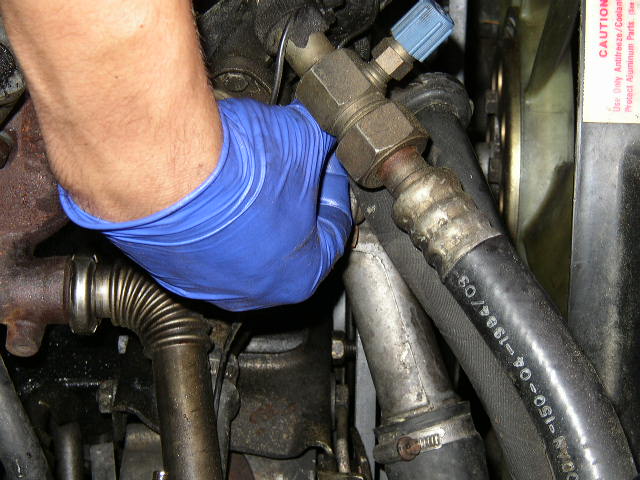
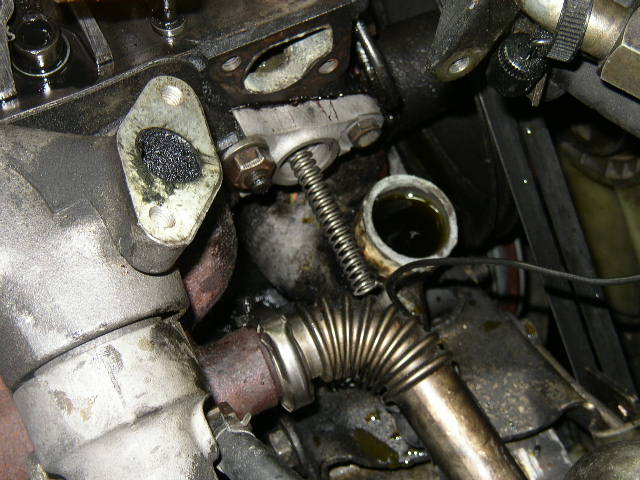
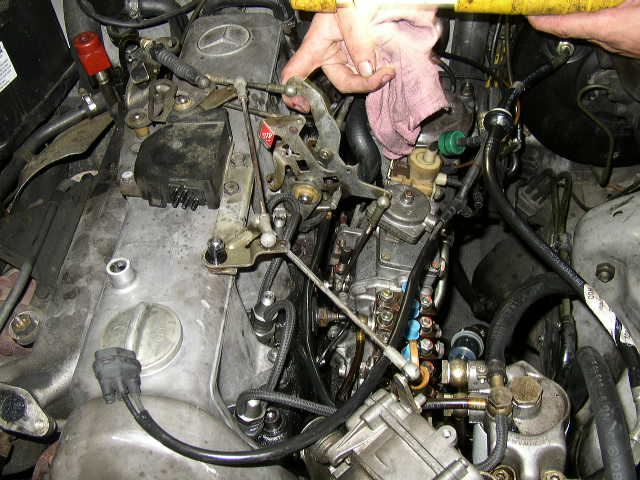
Remove the bracket that hold the upper A/C line. Do not discharge the A/C!
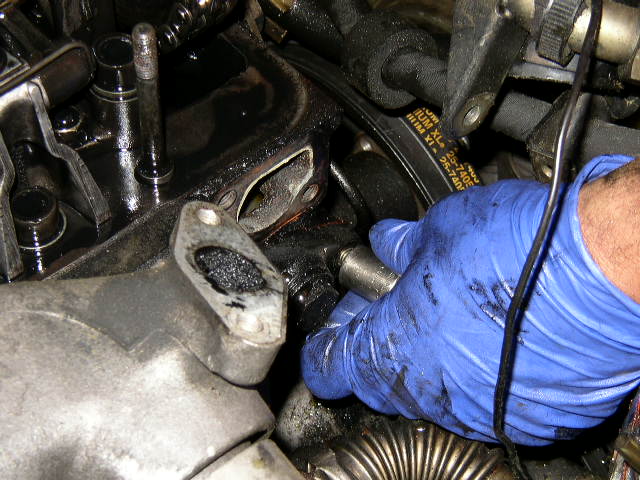
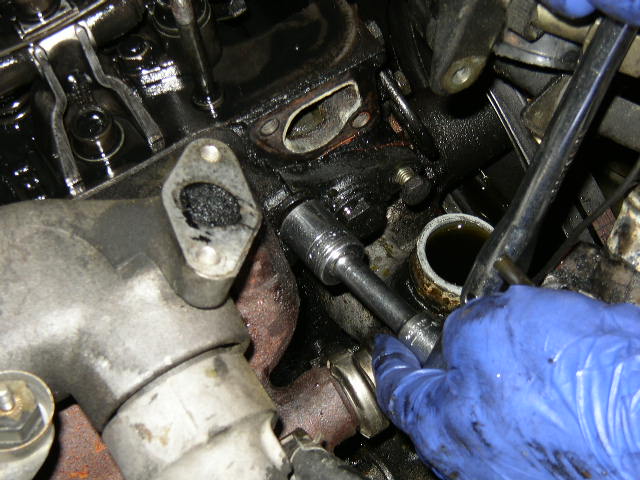
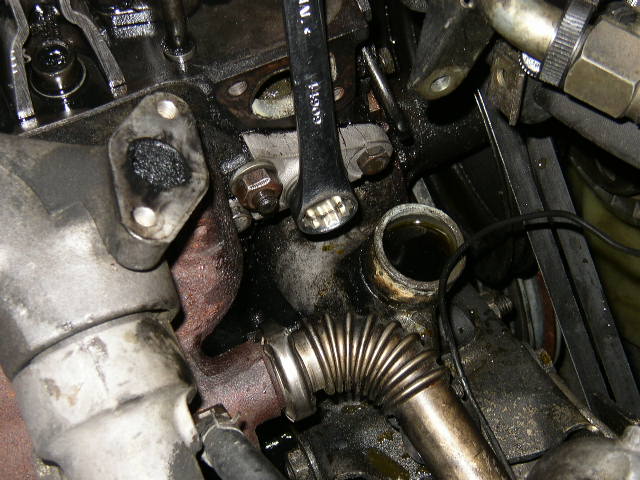
Remove the timing chain tensioner. A few bolts and its out. Make sure to use a NEW chain tensioner and spring. Never re-use the old unit.
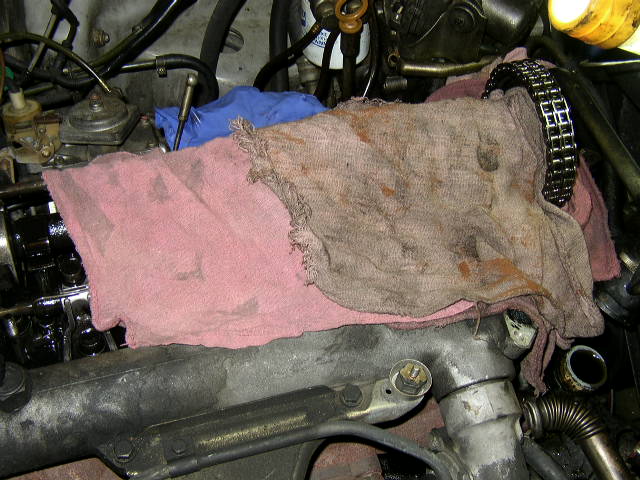
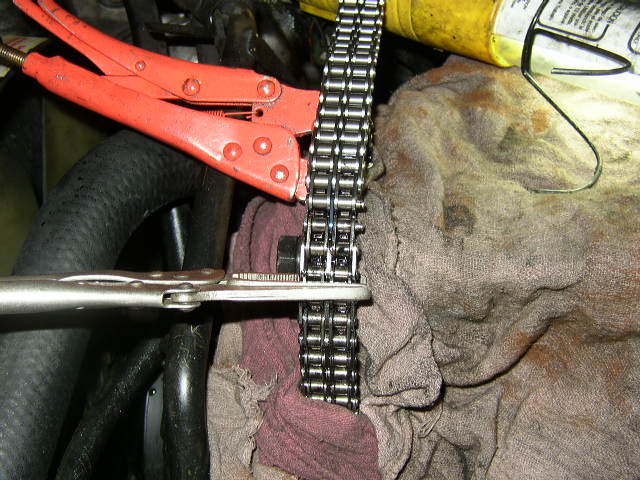
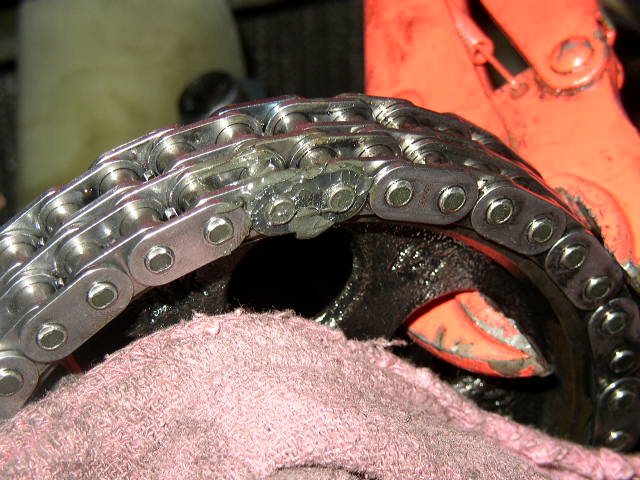
Now take some clean shop rags and cover the valve train and all the crevices near the chain. Basically any where the removed link could and will fall. If you drop it into the engine, you have a BIG problem, and yes you will CRY! I know they don't look it, but the rags are clean and have been washed.
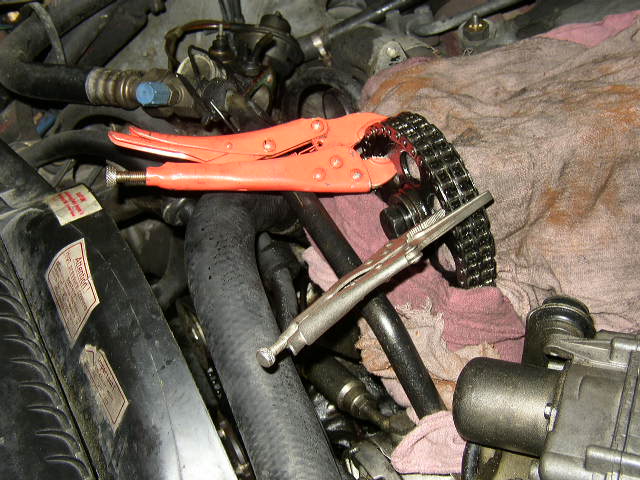
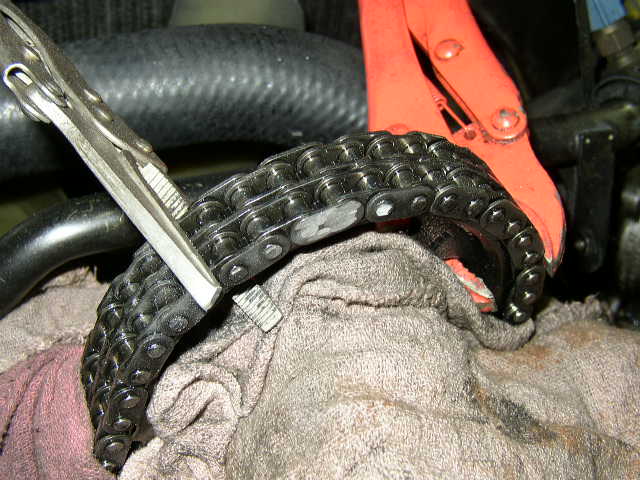
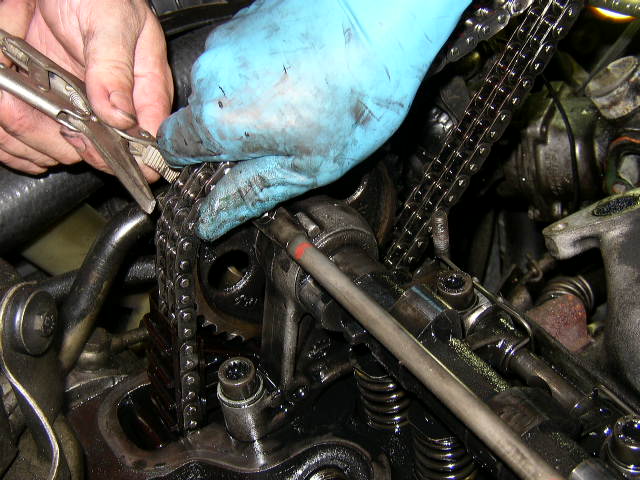
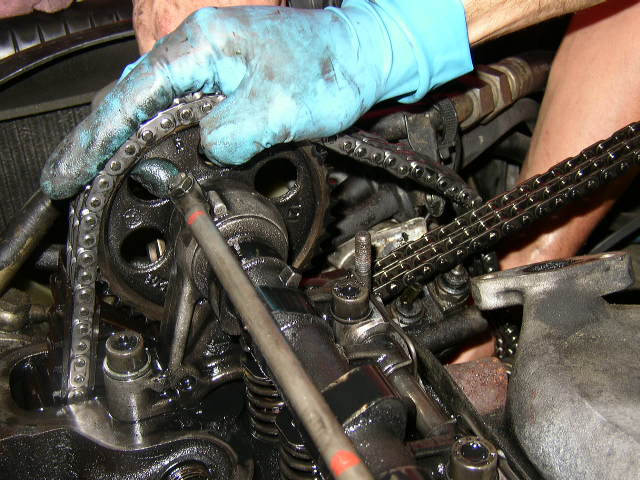
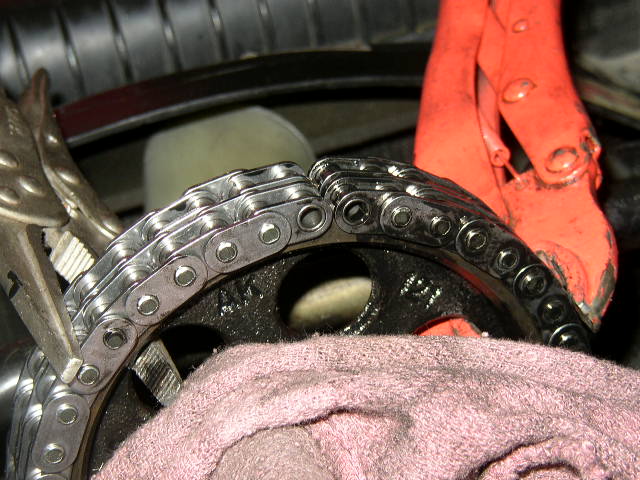
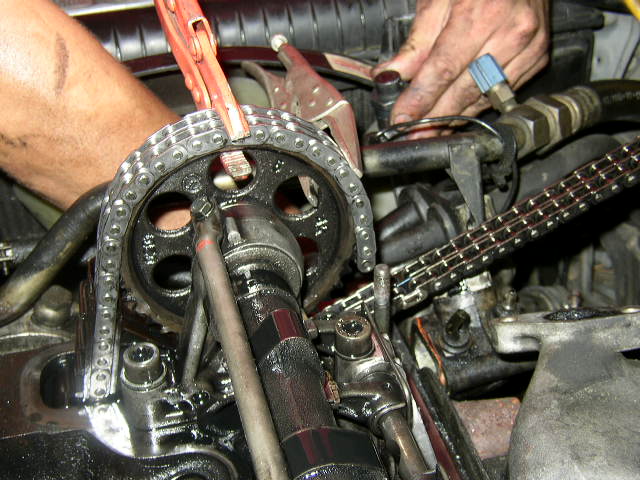
Now take a minimum of 2 vise gripe pliers and clamp the chain to the gear in the position shown.
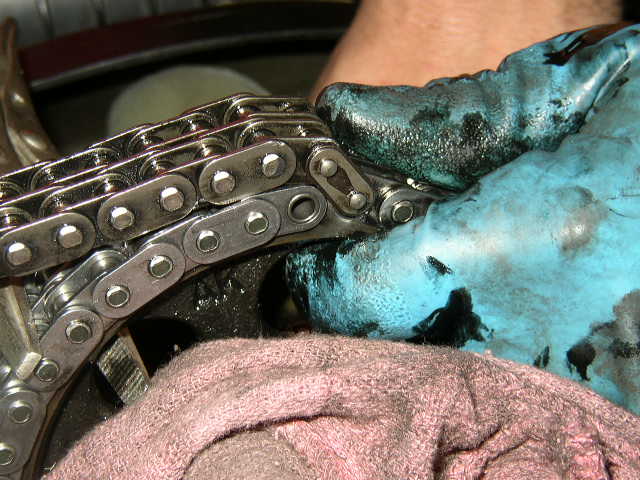
You will now need to grind the heads off the pins of one of the links. Use a dremel or air grinder. Your goal is to grind the heads down, so the link will pop off. It does not matter which link, just choose one. Then VERY carefully and slowly, use a screwdriver to gently pry it off the chain. Don't let that little sucker fall into the engine. Using too many rags is better than having it fall into the engine.
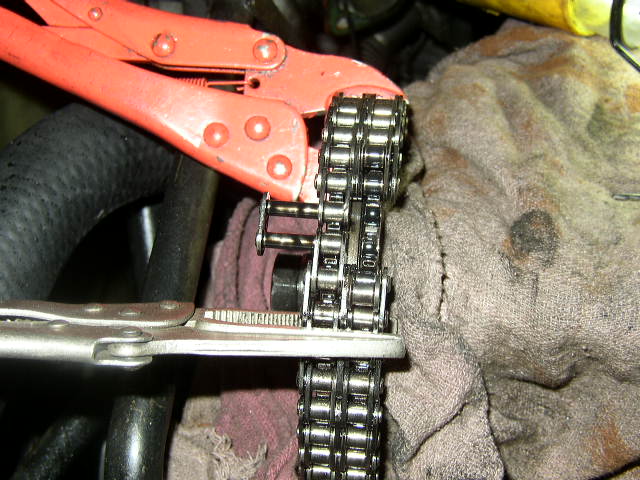
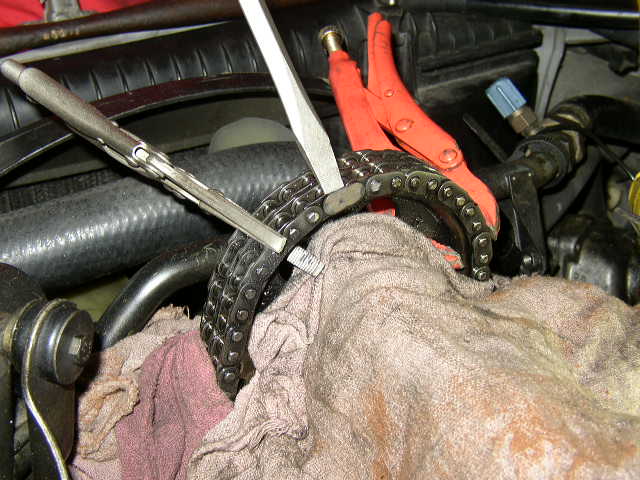
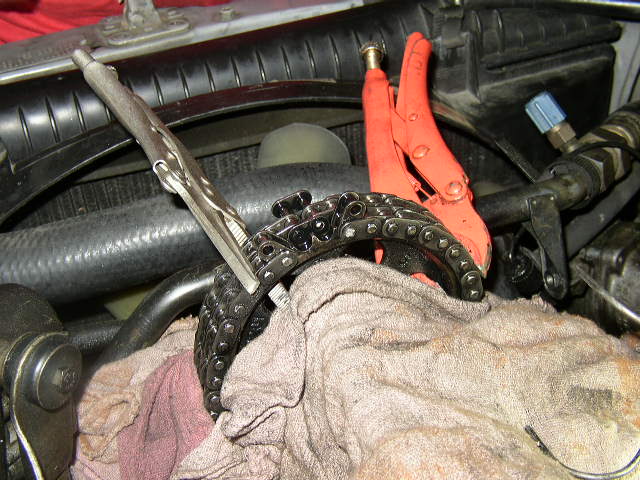
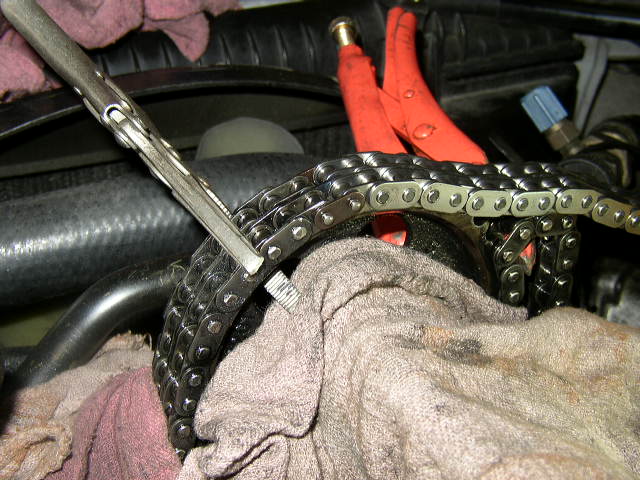
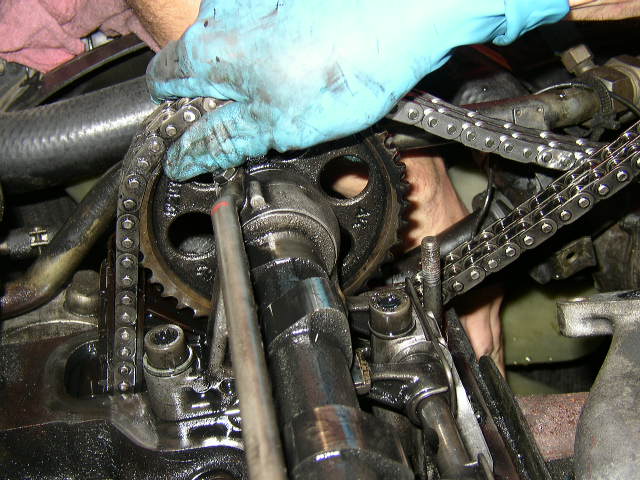
As you can see the link is being removed from the chain. Do not do this unless the 2 vice grips are securely in place. Remember since this is a double chain, you will have 2 bars. One on the outside of the chain, and one on the inside of the chain.
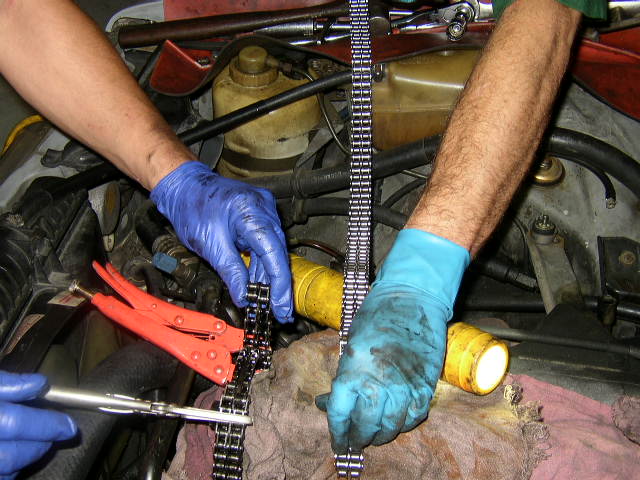
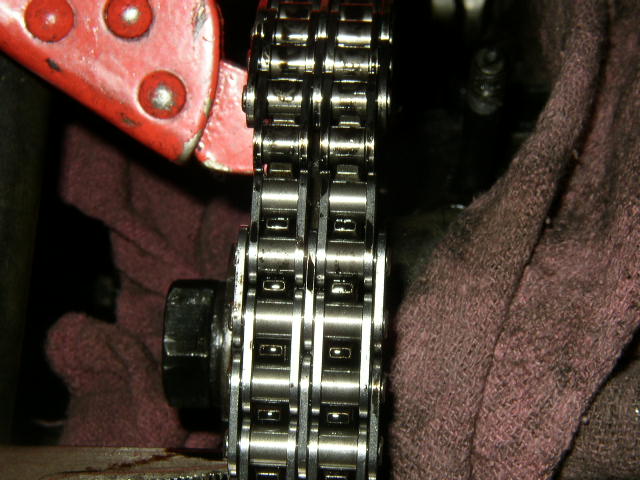
The new length of chain is stretched out and ready to be installed. The new chain is attached to the old chain on the drivers side and will be "rolled in". The other end of the old chain on the passenger side must be held taught and guided out. This job is best done with a helper.
Secure the chain with a master link and clip. The clip for the master link is only for a temporary hold. Do not install the clip as permanent on your new chain. It will not hold up in the diesel engine. The new link must be pressed on the new chain, as you will see later. Since the engine will be rotated clockwise, the old chain will pull the new chain in the engine and out the other side...hopefully.

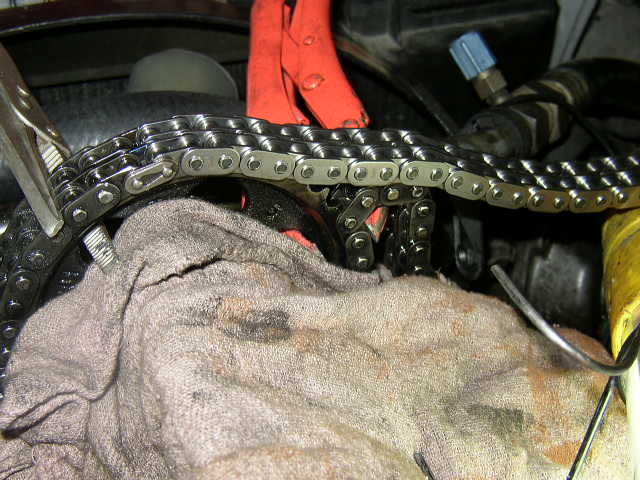
Everything is secure and ready to be rolled in. Your helper will guide the old chain out and hold the new chain on the sprocket. Don't forget to remove the rags for the rotation portion of this exercise.
When releasing the vice grip, make sure the helper has his hand on the sprocket just like the photos. One of the helpers hands is on the sprocket, his other hand has the old chain pulled tight. NO SLACK IS ALLOWED! If slack gets in the old chain it can come off the crankshaft sprocket, then time to remove the engine. Make sure you get your game plan with your helper before you release the vice grip.
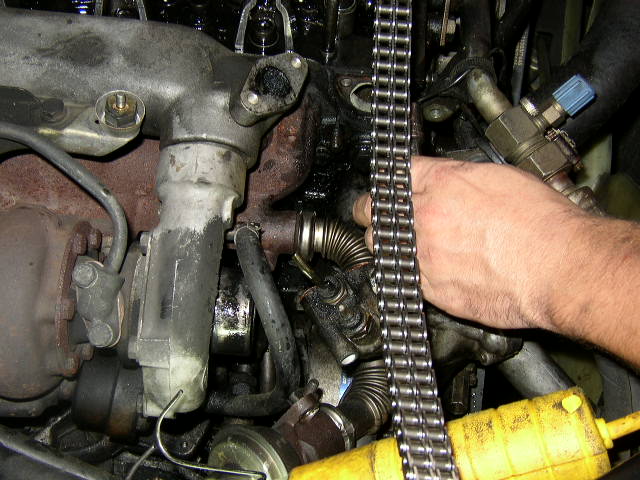
One person is rotating the engine very slowly, the other is holding the chains......
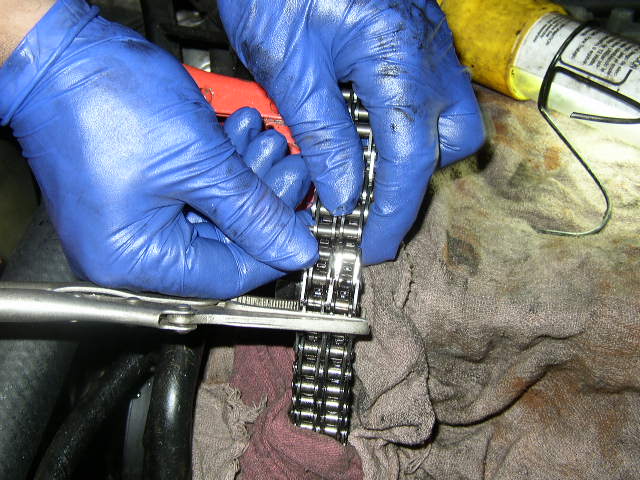
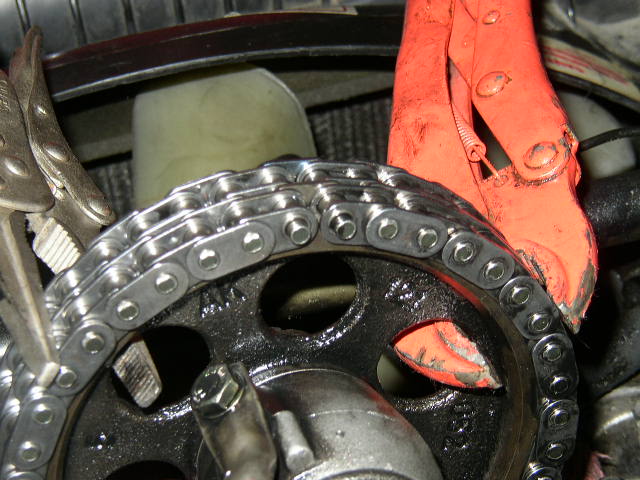
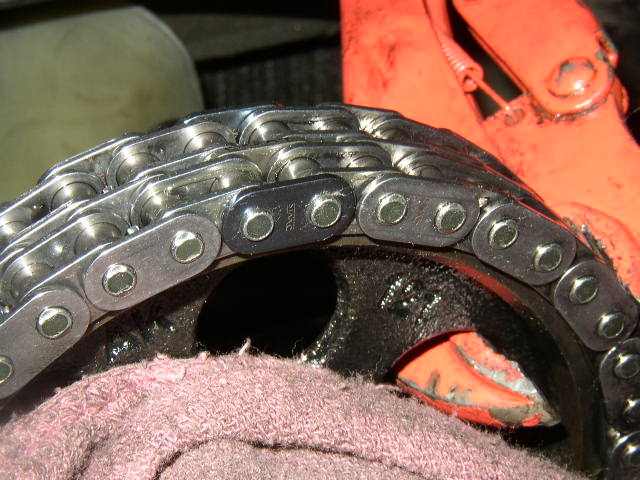
All the way around and back to the beginning, with the old chain meeting the other end of the new chain. Secure the 2 vice grips at this point so the helper can let go of the chains. Then put all the rags back on the engine to prevent the pins or bar from falling in. Then take off the master link and throw the old chain at the cat. This is how the chain will end up if you did it right and did not get any slack or skip a tooth. If you did what I said earlier you should have no problem.
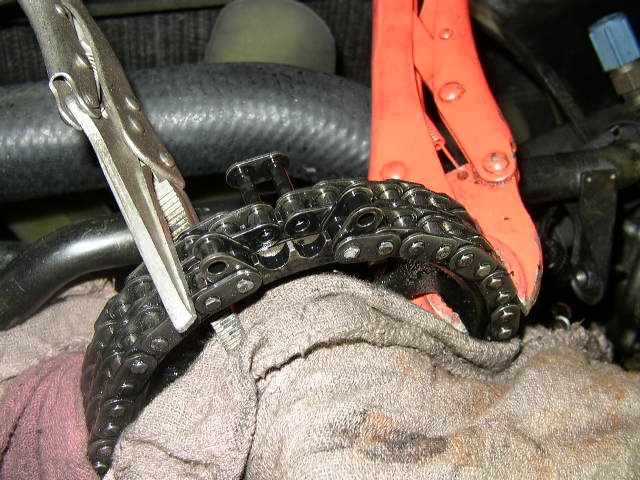
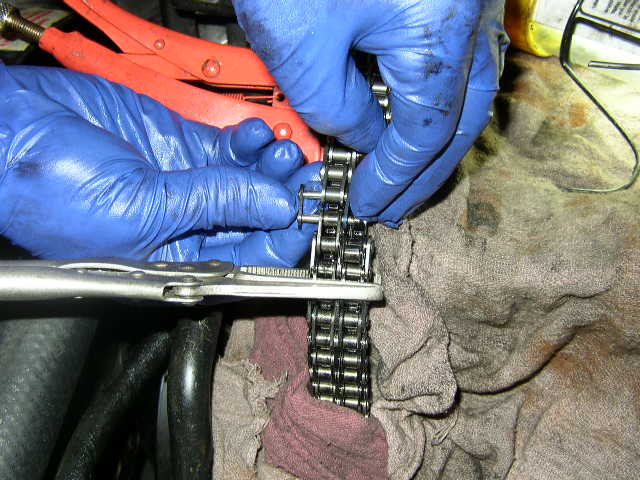
Install the new link to hold both ends together, just like the photo.
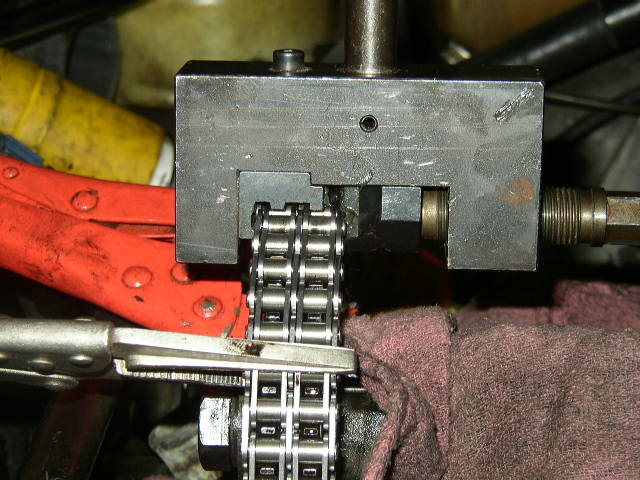
Then get your handy chain press and secure the chain. Using this tool ensures the link you just installed, will NOT come off for another 200k. The pins should be mushroomed just like all the other pins in the chain. Don't use 2 ball peen hammers to press the pins. It is just not worth having the chain come apart and ruining your engine.
Now get your new tensioner and install it into the block. I don't recommend you use the old one at all.
Install the tensioner in the block after cleaning the gasket surface.

Install the new spring and bolt assembly.
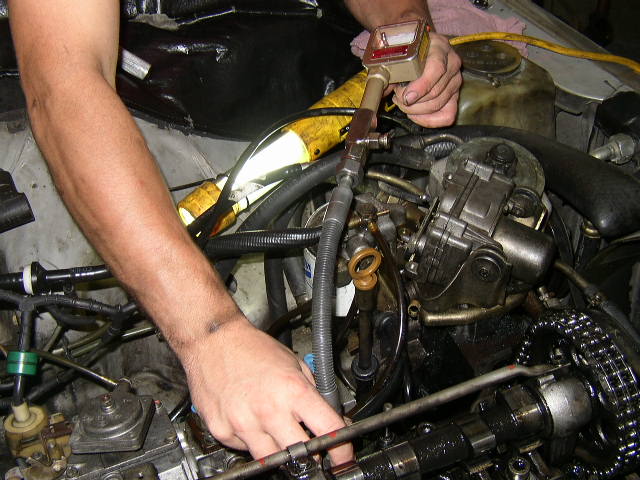
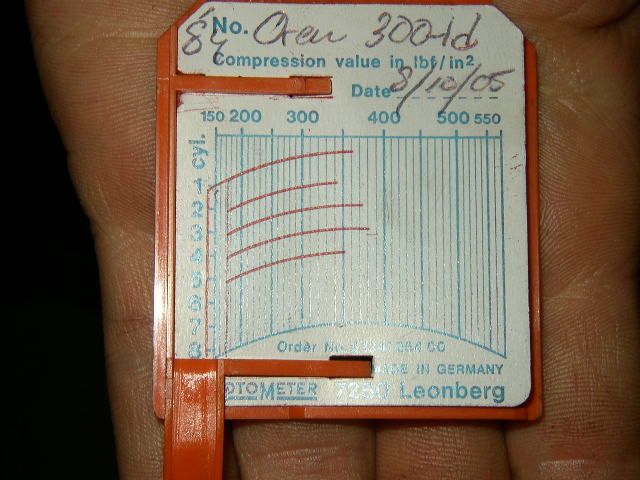
After the valves were adjusted, a compression test was done to check the health of the engine. Mat has a super cool compression tester that prints out for each cylinder. This gives you a very accurate and permanent record of the results. The test was done on a cold engine, with results not too awful for 270k miles. The engine is getting a little tired, but with good maintenance and care will go another 200k. Mat really has some cool factory Mercedes tools. I guess that is why he is the "Masta".
Reinstalled new injectors and washers, fuel lines, reinstall the valve cover and all the associated "stuff" that was removed. Standard procedure for bleeding fuel system. Crank for oil pressure before starting. Gives the chain some good lube before it is called on to serve.
I hope that this pictorial has encouraged you to jump in and get this job done. It is not really hard, you just have to be careful and have a helper with you.
If you enjoyed this pictorial drop me an email and let me know.
All parts used in these pictorials are available at the diesel parts for sale page
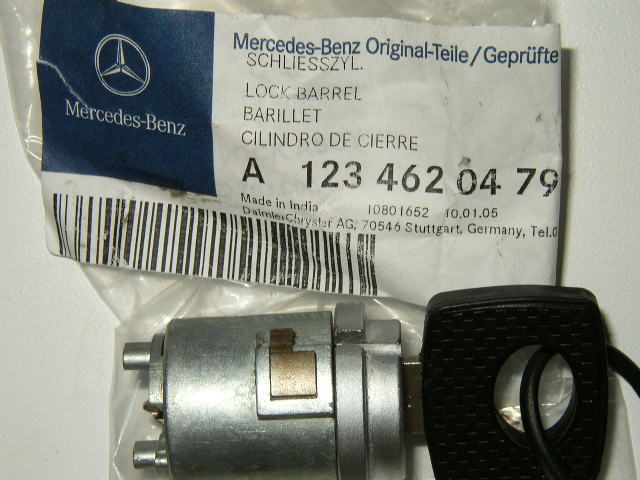
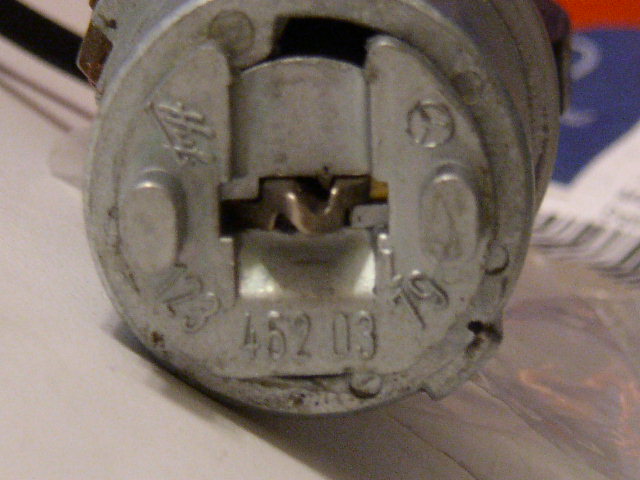
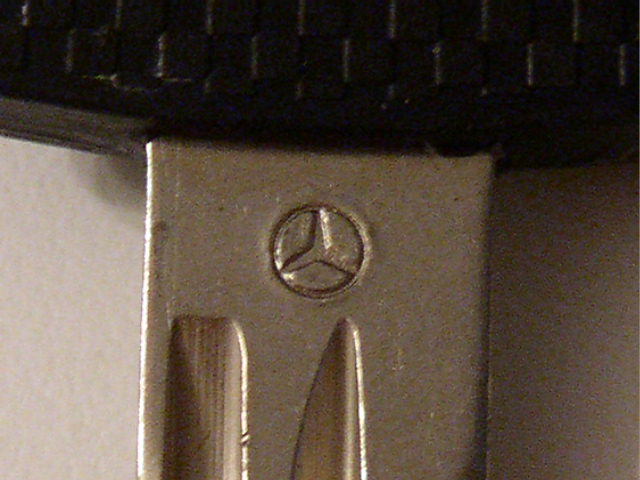
If you are looking for real Mercedes lock and key cylinders, I have some in stock for the W123 body style. These are not the cheap ones you see on ebay for $24. The time it takes to do the job, do it right and it will last for years. The lock tumbler and key go for $59 plus $4 shipping. Just send me an email if you need one. The key will not match the doors, but hey it sure beats the MB dealer at $100.